
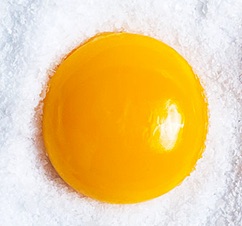
Bottarga – An Italian ingredient that I love but cannot really afford it as much as I want to.
I was thinking about what Bottarga is; well it is smoked cakes of dried fish roe that you grate over some fresh Pasta or may be silky potato puree. But in a functional description, it adds a rich flavour because of its Protein content, fishy (not everybody likes the fishiness), salty, a little smoky and it tends to have a touch of acidity (mild and not over powering).
So, I thought I could try and recreate it without the fish roe. Here comes another of Natures greatest Protein sources, the humble egg. Here is what I did and I will post the results once I taste it.
- Four Organic Cage free Eggs local farm store. If this works right, I may have to go find a local farmer who can give me a bunch of it since I have plans for this.
- Got a Tupperware 6 inch square and layered about 2/3 cup of Kosher salt. I used Diamond Crystal since I had it at home. I don’t think it matters what brand but you don’t want it too coarse; that leads to reduction of contact with the egg. Too fine and it may get too salty from too much contact.
- Made four divots in the salt with my fingers.
- Separated th
 e Yolks from the whites with my hands, taking care to get as much of the stringy extra membranous bits without breaking the membrane and releasing the yolk to run.
 - Laid each of the yolks in the divots. Used another 2/3 cup of salt to cover the yolks completely. Loosely put the lid on top and shoved it into the back corner of the fridge. The salt has to pull out the moisture from the yolk.
Three days later…
- The yolks look gelatinous. They are still a little soft at this point since a lot of moisture has been pulled out but they are not quite dry. A good time to get the a
 cidity on to them
 - Took some white balsamic vinegar and diluted it by half. Used this vinegar to wash off the salt while gently scrubbing with fingers taking care not to break or scratch the surface of these yolks.
- Layered them on top of a fine mesh cooling grate that fitted in side a Tupperware and put that in the fridge again. Loosely covered the top with a Paper towel; nothing was touching the yolks. This was to dry the yolks further and get them ready for smoking.
- I flipped the yolks after two days to expose the surface in contact with the grate to dry better and left them alone for two more days.
Four days pass… Just forget that they are in your fridge.
- I need to smoke these dried egg yolks. They are dry but not hard crackly dry due to their protein content.
- Set a metal dish on top of the stove, added some Alder wood chips (that is what I had in the garage). Turned the burner to medium under them. When they started smoking, turned the heat down to maintain the smoke but take away the excess heat so you don’t cook the yolks. Inverted a clear Tupperware so I could see the smoke and let them sit in the smoke for about 10 minutes.
- Took them off and lay them not touching each other on top of a coffee filter lining a little plastic Tupperware. Layered a couple of more coffee filters to loosely cover them and they are sitting on my counter. Today is saturday and they have been going two days. I will wait one more day and them I am going to grate them with a microplane and taste them.
They look like Bottarga cakes except they are ovoid rather than the pressed squared off Bottarga cakes you can get at an enormous price at the fancy italian grocery store.
I will tell you what the taste test comes out like tomorrow…
Update: They were absolutely brilliant grated over fresh pasta
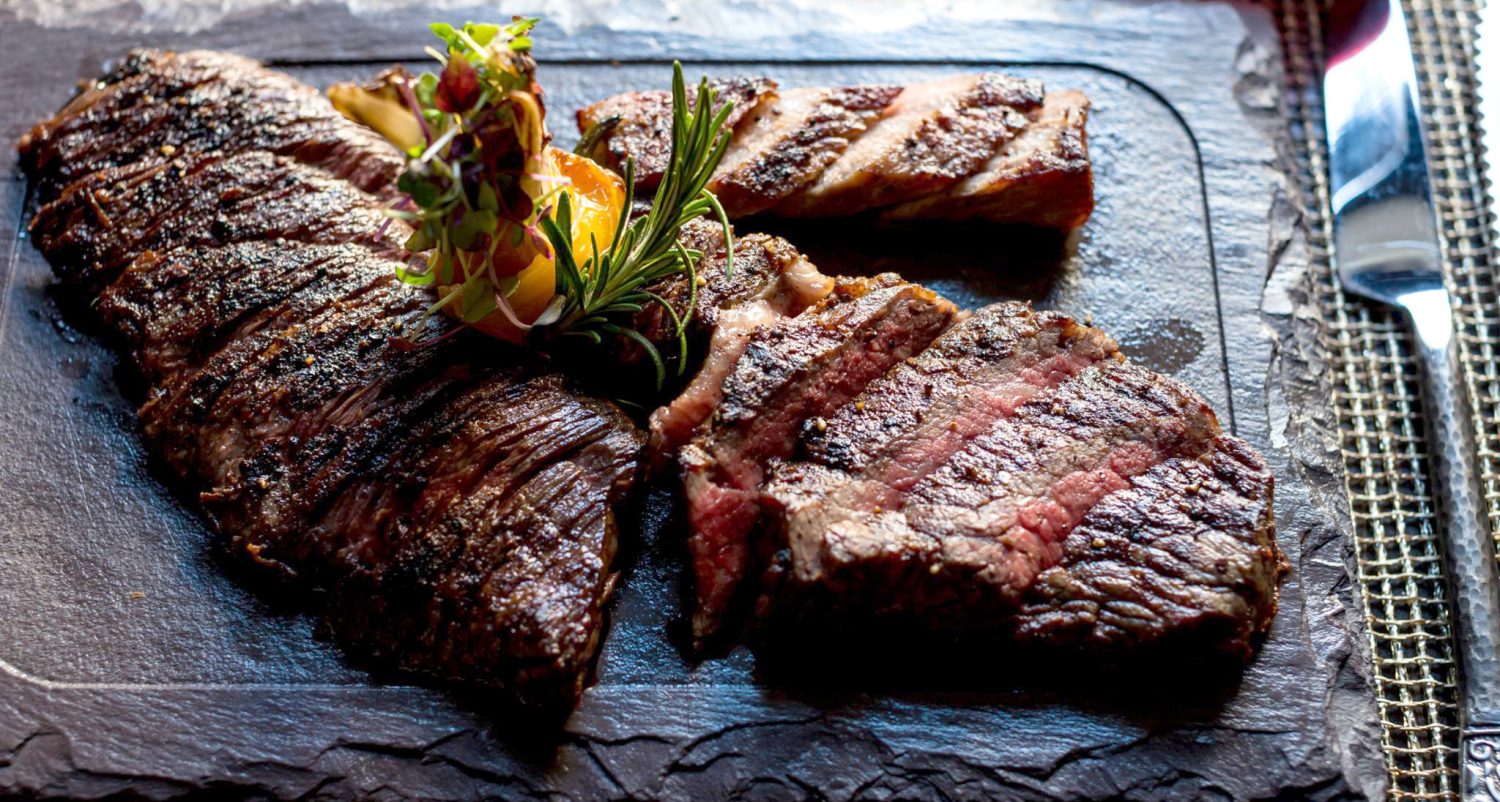
Roots – A restaurant in Rutland, Vermont
 We went for dinner during our vacation in July to a restaurant named “Roots – The Restaurant” in Rutland, VT. The food was not bad… But I had some issues with the place overall. We ordered a Cheese platter for appetizer. The cheese was not warmed up to Room Temperature. A cold Brie at Fridge temp just does not go far in my mind. The cheese itself was good but when it is fridge cold it does not work. Neither did the blue cheese or the aged goat
cheese. An hour on the sideboard would have done these cheeses a world of good. Well, I ordered a Verdejo to go with my seared scallops main course, The seared scallops dish itself was very well done. The roasted beets were wasted on the plate. The mixed wild mushroom duxelles with shitake, maitake, oyster and woodear was very nice except for a couple of pieces of grit that managed to sneak through. Well I also had a problem with a 3Oz pour of the Verdejo at 9$ a glass. All in all it was an average experience with the value for money being on the low side.
DISCLAIMER: This is a resurrected Post and the review was from mid 2015. Let us not forget that it may be a completely different restaurant now and might just be spectacular.
Mise en Place and why is it so important?
“Mise en Place” is fancy French for Cooking Prep work. Literally it means “Put in Place”. This covers all of the putting in place of ingredients ready to cook. The following steps cover “Mise en Place”.
- Collect all of the ingredients needed for the dish
- Measure out the appropriate quantities needed
- Cut, chop, dice, julienne, brunoise appropriate ingredients.
Sometimes a Mise en Place might actually entail cooking something. For example a Green bean salad with almonds may call for blanched green beans and roasted slivered almonds; this means there is the cooking process of blanching the green beans and shocking them to stop the cooking before your Mise en Place for the salad is complete.
So Mise en Place for one dish might spawn other Mise en Places recursively. C’est La Vie… I cannot overstate the importance of this process. Getting everything ready just makes the cooking go faster, smoother and you don’t forget that last ingredient that needed to be added and in your hurry as the stove is going and you want to avoid overcooking something you miss adding it. Ergo, it is worth the extra minutes to put everything in its place…
An Example Mise en Place for a Paella from the website Passport dinners below to demonstrate

A Wine Rating System for a Pleb like me..
 This is a simplistic wine rating system for me. A Robert Parker 98 means really nothing to most mortals who like to drink good wine.
This is my way of categorizing my wines based on my drinking…
-
- WTIB – This is “Wow Take it Back”, meaning take it back to the kitchen. This lot of riff raff don’t deserve this and let us drink it just by ourselves without sharing.
- ONGM – “Oooohh, nice; Get some more”
- GW – Easy rating… Stands for “Good Wine”. A lot of every days wines fall under this category. There are exceptions of course
- YWE – “Yeah Whatever”. Nothing exceptional but will do at a pinch…..
- EwwP – “Ewwww, Plonk”. Have not drunk something like this since college. Would not put it out even after everybody at the party is drunk enough to kill their taste buds.

Crispy Roasted Brussels Sprouts with an Asian twist
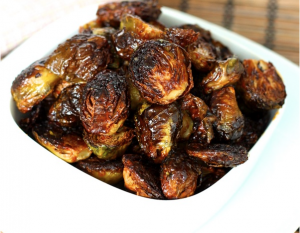 Brussels sprouts are one of my favourite items for a side dish. They are very versatile even though the family complains about the after effects of cruciferous vegetables… 🙂 . I have blanched them, followed by sauteeing them in butter with chopped Walnuts, shredded them into ribbons and steamed sauteed them with grated coconut a la Souther Indian, aka Tambram style and many more. This one is a roasted variety.
Ingredients:
- 1 lb Brussels Sprout2
- 3 Tbsp of high smoke point oil (Vegetable/Peanut, I tend to use Grape seed oil since all of it is non GMO)
- 2 or 3 Tbsp Fish sauce; you can use Soy sauce if the Fish sauce is too Umami laden for you
- 2 Tbsp (or so) Something sweet like Agave nectar or Maple syrup. I find that Maple syrup tends to take over the dish. I have even used Demerera sugar ( 2 and a half teaspoons)
- 2 Tbsp Lemon Juice
- 1 Tbsp Red Wine Vinegar
- 2 tsp finely grated Ginger
- Kosher Salt
- Black Pepper
Mise en Place and Directions:
- Preheat the oven to 400°F
- Prep the Brussels sprouts
- Trim the stems and remove the tough outer leaves
- Cut them in half (Quarters is OK too if they are really large)
- Soak them in cold water for five minutes to get rid of any dirt
- Drain them and spread them out on Paper towels in a single layer to dry. Give it the 15 -20 minutes needed to really dry them out. You can speed it up with mopping up the water with paper towels
- Toss the Brussels sprouts in the Oil with Kosher salt and spread them out single layer on a non stick baking tray or a foil lined regular tray
- Bake on the top rack of the hot oven for 25 minutes
- Stir and turn them over for even cooking and continue cooking for another 20 – 25 minutes
- They should be Golden brown at the center but nicely charred with some crispiness to the outer leaves.
- During the last 15 – 20 minutes of the baking combine the rest of the ingredients and reduce on top of the stove on medium to high heat until reduced, thickened and syrupy.
- Toss the Brussels sprouts in a bowl with enough of the sauce to coat it. You don’t want excess sauce to make them soggy.
- Serve immediately.
I have sometimes enjoyed this dipping sauce tossed with sauteed cabbages. It is also quite good on roasted Cauliflower.
Hello World Again!!
It has been awhile. A screwed up OS upgrade trashed phatbugger.com and it has taken a while for me to get of my tush and actually fix this site again.
I still have to get my old posts from a back up and pull them back into this site but I figured I would at least start by posting things again.
So I will start adding some new articles. I am also experimenting with some new themes and modifying existing themes etc.
So bear with me while this site resurrects itself and starts being active again.