
 There are a few odd balls ingredients I use with Indian cuisine, which would probably surprise the hell out of my tam-bram (ask me for an explanation of this term) relatives. No I am not talking about meat. These are non-meat ingredients.
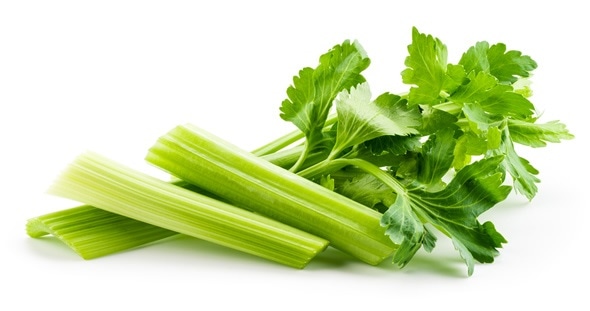
The first of them is celery, which does not grow in India, at least has not been grown and utilized there. However, it has enough fibre and is a vegetable that stands up to longer cooking that most Indian food demands courtesy of the fibre mesh skeleton of the celery stalk. I love cutting them up into 3/4 inch long and use them in Indian food. A great addition to the Biriyani dishes of the south. Even if you make Biriyani with meat in them, celery works well with them.
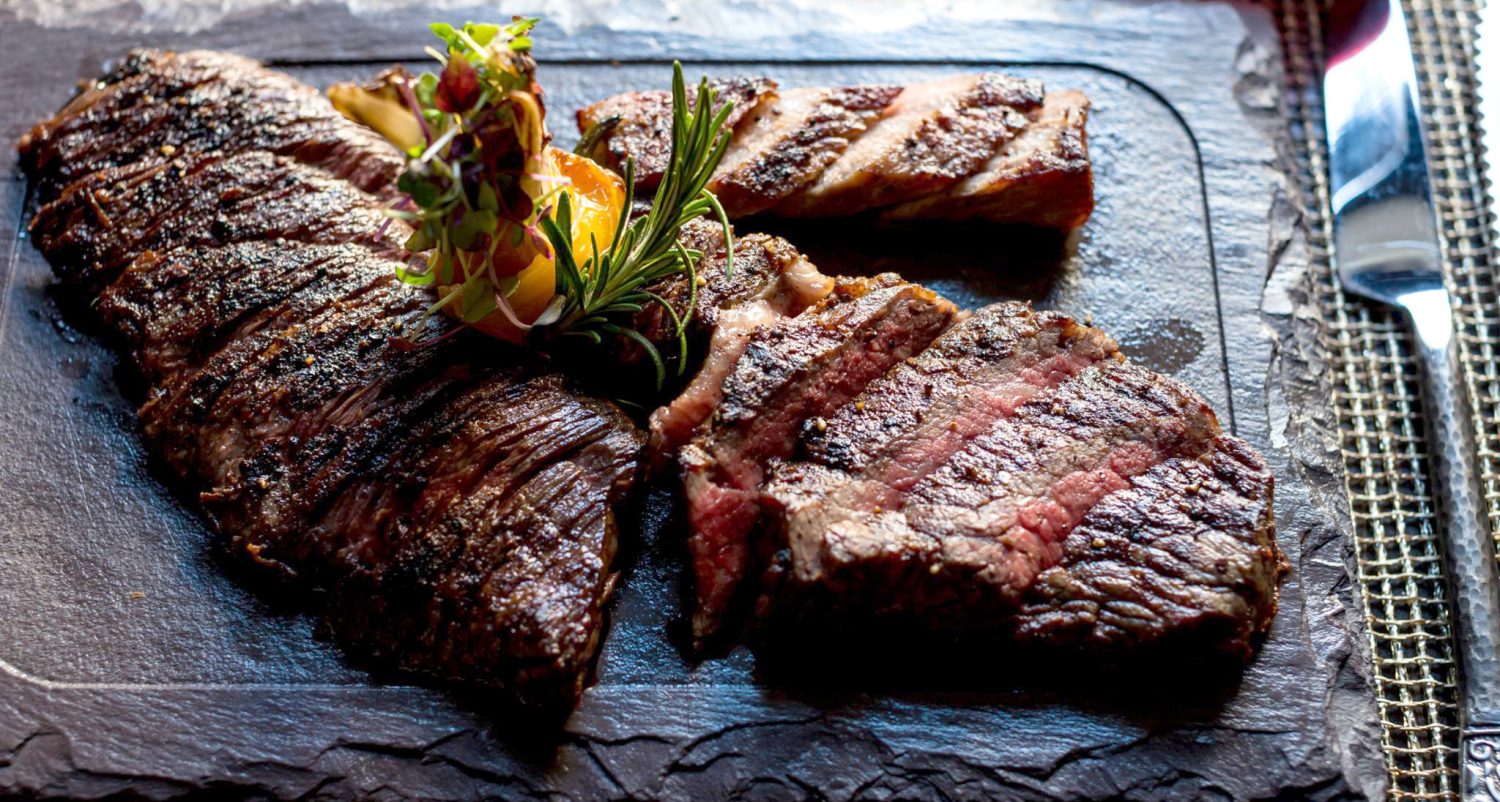
The second ingredient that I like throwing into curries surprisingly are Mushrooms. Most mushrooms work fine. I like to saute them first in a bit of oil which is real hot until the mushrooms give up a whole lot of liquid and then the liquid evaporates of the hot pan. I then keep them aside and add them to the pot for the last 10 minutes of th e simmering. They pick up the sauce into the mushrooms and end up being really juicy with the curry sauce soaking up in them. South Indian dishes are even most vegetarian Indian dishes do not have a whole lot of Umami in them. Well it takes red meat to produce the Glutamate cross links under heat that make up Umami and there isn’t much of it in Vegetables. While white mushrooms work fine, Shitakes give you a bit more leeway since they are stiffer and stronger and more meatier. The same is true of Portabella Mushrooms. Porcini’s add a richness that is amazing and they also soak up the sauce in them and are heavenly. Given the Morel mushrooms propensity for soaking up things like cream, I cant wait to try but Morels are hard to come by and are expensive; I have not had the occasion to throw them in a curry yet, but rest assured one of these days I will.
The Chinese h ave long used Tofu as protein in their food. They fry the extra firm tofu to take out even more of the m
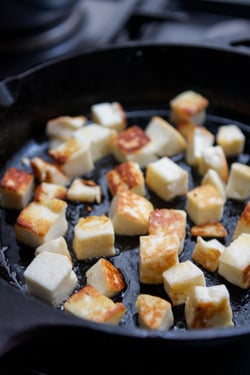 oisture and use it as protein in their food. The Indians have used the analog of Tofu, “Paneer”, in their cuisine. Tofu is from Soy and Paneer is from cows’ milk. However, Paneer tends to melt and vanish into the sauce if you add it for too long during the cooking process. For me, enter Halloumi cheese. Halloumi is a cheese originating from Cyprus. It is a very hard cheese, extremely compressed. It has a second attribute that is absolutely phenomenal. It is so high in its melting point that you can actually grill it or pan sear/fry it. I like to fry it as cubes in a pan and add it to the curries. Even if cooked for 10 minutes or so during the last phase of cooking the curry these Halloumi cubes will hold their shape and add this sauce flavoured salty nuggets to the curry.
Good Bye Paul Bocuse


Paul Bocuse passed away today the 20th Jan 2018. He was a Culinary Giant of France. He introduced the world to French “Nouvelle Cuisine”, which at the time was quite radical. It went from”Le Grande Cuisine Française” (The great french cuisine, which was RICH, butter cream truffles etc.) to using healthier and less fatty and rich alternatives without sacrificing the taste or the flavour.
His restaurant in Lyon, L’Auberge_du_Pont_de_Collonges, has held three Michelin stars for its quality, inventiveless and consistency since 1965…
In Gastronomic and Culinary circles, he was the chef of the 20th century and in more grandiose terms has been described by some writers as “The chef of epoch”
What ever he was he introduced a healthier form of French cooking and changed the conversation on Food. In some ways “Nouvelle Cuisine” as introduced by Paul Bocuse was the progenitor of the Farm to Table and the Fresh ingredient movement.
RIP…..
My attitudes to wine are changing
While I have always loved the good wines and have lashed out occasionally to buy 50-80-100-120 $ bottles of wine and really savoured them, my attitudes towards them are changing recently.
When I tasted a 100$ bottle of wine and it tasted great, my reactions and comments on the wine were just about the wine and not so much what I paid for it; it is easy because most 100$ wines taste darn good. It also resulted in me praising the wine maker for his great skills in producing the great wine.
Recently I am looking at things a little differently. The maker of the great wine is starting from a great place; he can afford and starts with the primo, crème de la crème juice from the best vineyards with the best climate for the year etc. So in effect, he starts on mile 14 of a marathon rather than mile zero.
The guy that produces a wonderful wine at 10-20$ a bottle is not starting from the primo juice and yet, he/she produces a great wine given their starting material. My respect for the makers of very good to great wines for 10-20$ is way more now than for the Mondavi winemaker who produces Opus 1 from the best juice of the year for the region and can sell his wine at about a 100$.
May be in my old age my palate has become not so refined anymore, but I don’t think so. It is just that I am looking at the skill levels of the wine makers with a different set of glasses on.
Our Everyday wine – Apothic Red

This has been our everyday wine in the house for the last three years or so. This is a luscious easy drinking wine. Fruit forward and does not need any work to quaff on a daily basis. Lots of Cheery Berry flavours in addition to soft but very noticeable vanilla from the oak.
In addition to its nice and easy drinking attributes, this wine lives on my counter top for two days without any deleterious effects; still very drinkable on day two. Only once in two years it has made the third day since we drink it. It has also been very consistent over three vintages…
All in all a great every day wine, especially given that it is a sub $10 wine…
This was our everyday wine for 3 years or so in 2015 when the original post appeared. It still isour evryday wine and it still is a sub $10 wine. It is awesome.
Injera, the Ethiopian answer to Bread – A quick version

Injera, it is more than just a flatbread to eat with Ethiopian stews.
It doubles as the eating utensil/vehicle. You tear off chunks of this fluffy, pillowy flatbread/pancake and use it to scoop up the stew instead of a knife and a fork or a spoon.
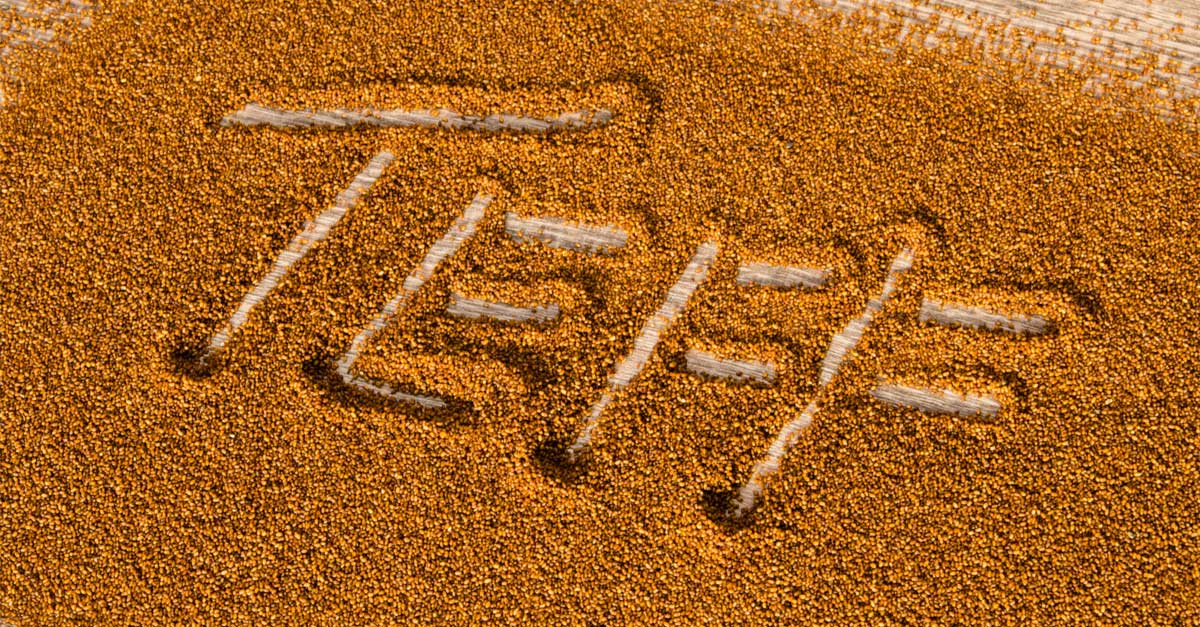 It is made from what some call one of the super grains, Teff. Following is a quote from a nutritionist on Teff.
It has more calcium than any other grain, is a complete protein, is the size of a poppy seed, is the only ancient grain (or seed) to contain Vitamin C, is completely gluten and grain-free, and is rich in iron, magnesium, Vitamin B6, fiber, and protein. Meet tef.
On top of it, for a diabetic like me it also has a low glycemic index because what starch it has, which is pretty low to begin with, a third of it is resistant starches; further, it also has plenty of fibre in it to counteract the starches.
Enough pontification, let us talk about Injera.
Injera making is normally a pretty involved process. While it is mostly waiting for it to ferment, it still takes a couple of days, sometimes three in winter. You make a batter of Teff and water with a little bit of salt and wait for it to ferment and get bubbly. I dont tend to have the patience for it or the planning. I tend to say Ethiopian tonight and I need Injera. So I came up with the following quickfire recipe for quick Injera. Tef when it has not had the time to ferment tends to have a grainy texture and so I make a few modifications to making the batter. Also since I am not letting the thing ferment to produce the gases for the fluffy texture, I cheat with Baking powder and Club Soda.
- Cut the Teff flour with a third of Quinoa flour
- Add a little bit of regular AP flour to provide the Gluten to hold the Injera together
- Use Baking Powder and Club Soda
- Fermentation produces a slight sourness that is part of the essence of Injera and Lemon or Lime juices in the batter instead produces a harsh acidity. So I add a pinch or two sumac to the batter that produces a gentler acidity.
Ingredients:
- 2/3 Cup Tef Flour
- 1/3 Cup Quinoa Flour
- 1/4 Cup All Purpose Flour
- 2 Teaspoons Baking powder
- 1-2 Pinches of Sumac
- ~ 1 Cup Club Soda, chilled in the fridge for at least an hour
- 1/2 teaspoon of Kosher salt (adjust for taste)
Directions:
- Sift the Flours, salt, Sumac and the baking powder together to ensure even mixing
- Make a well in the center and pour in the club soda slowly while constantly whisking with a large whisk. Don’t worry, you wont degas it too much
- Add any extra needed club soda to get to the consistency of a thin pancake batter
- Meanwhile heat a non stick skillet (one for which you have a lid, glass lid preferably) over medium low to low heat on the stove
- Pour quarter cup of the batter on to the skillet while holding it tilted slightly away from you and swirl to distribute to a thin layer
- Cover with the lid so the Injera steams. You don’t really want it to brown much like a pancake. You may end up lowering the heat to low to ensure it does not cook too quickly on the bottom
- Injera is done when the top surface appears full of holes and does not look wet
- Take it off the skillet and roll it up to keep it from drying out
- Use up all of the batter
- Wipe dry the inside of the lid to the skillet between uses to remove the condensed moisture so it does not drip back on tot he Injera as it is cooking.
Serve with any of the savoury Ethiopian stews like Doro Wat, Doro Alicha, Key Wat(Beef), Beg Wat(Lamb) or Awaze Tibs (Lamb and Onion).
I actually love Injera with a spicy, sticky Indian curry as well…
Doro Wat – Say what….
 Doro Wat is a wonderfully spicy and I don’t mean “spicy hot”, but flavoursome chicken stew from Ethiopia. It uses the Berbere spice from the last post. Since the spices are robust, it is best to use chicken thighs rather than breast meat.
This is a dish that needs time. The Ethiopian way of slow cooking the onions brings out a sweetness to them that is unparalleled. So much so that I have taken up this as a means of cooking onions even for Indian curries etc.
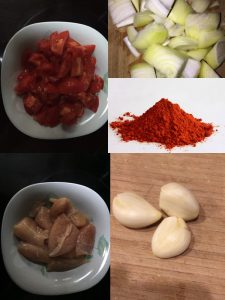
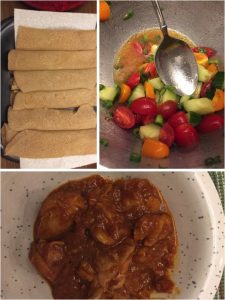
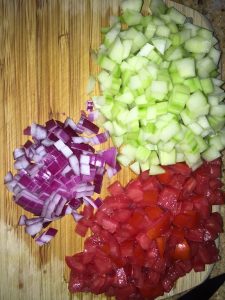
 Above is a collage of the basic ingredients of this recipe. To process these as part of the mise-en-place, I used a Cuisinart stick blender with the mini chop attachment. The onions really need to be chopped very very fine, almost a pureé.
Ingredients:
- 1 medium Onion, chopped very very fine, almost a puree
- 3 large Garlic cloves, chopped fine
- 3 large Tomatoes, coarsely chopped and then pureéd in the mini chop Doing the tomato last provides the liquid to sweep up any left over, onion and garlic bits in the mini chop
- 2 1/2 Tablespoons of Berbere
- 1 lb Chicken thighs, trimmed of excess fat and cut into one and a half inch chunks.
- Olive Oil
- Butter
- Salt
Directions: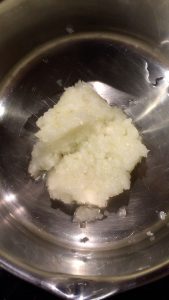
- Set a heavy bottom pan on the stove on (real) low and add a tablespoon of butter and a teaspoon or so of Olive oil to prevent the butter from burning.
- Once the butter ha melted and stopped foaming, add the on
 ions, stir and cover it with the lid. Spread the onions out as evenly as possible on the bottom before covering.
 - Look but don’t touch for the next 20 minutes or so. The onions will semi-steam and semi saute as the juices from them will keep them moist and prevent scorching (hence the real low)
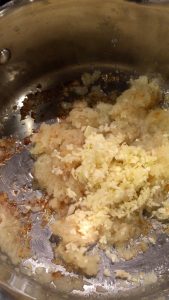
- Add the chopped garlic, stir, add a bit more butter and or olive oil to keep everything lubricated on the bottom of the pan.
- Cover and ignore it for another 15 minutes.
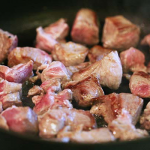
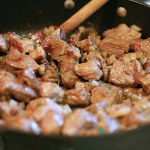
- Add the Berbere, a bit more oil if it needs it, mix thoroughly cover and cook on low for another 15 minutes; follow this with the pureed tomateos and cook on low for another 20 minutes or so. In fact, the oil should separate from the sauce before you add the chicken chunks. Pictures below in sequence to show you what the various stages from above should look like.
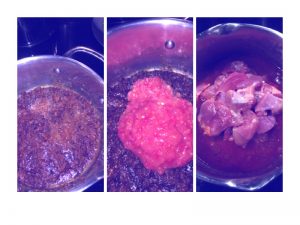
- Stir the chicken in and cover and cook on low for about 30 -45 minutes till the chicken is done. The traditional way is to also add some hard boiled eggs to the pot for the last 15 minutes or so. To make sure the flavours get into the eggs, you cut slits through the whites so the sauce can penetrate to the yolk. Cut a few slits on each egg.
- While, non traditional, I tend to sprinkle a little bit of garam masala on the top before serving.
- Serve with Injera (traditional Ethiopian flat bread made from Tef; I will post the recipe in a separate post). I served it with Injera and a quick salad of cherry tomatoes, cucumber, seasoned with some grated ginger, red wine vinegar, olive oil and parsley to provide the acidic counter point tot he unctuous chicken.
Berbere – Ethiopian Spice Mix
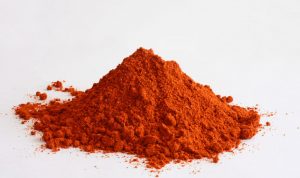
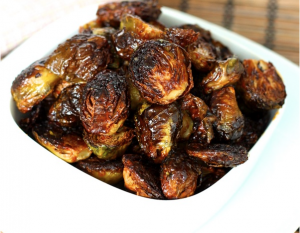
There is nothing quite that says Ethiopian food than Berbere, the ubiquitous spice mix of this land. Of course, there isn’t one recipe for Berbere. Every household will have its own variation. This one started with a recipe I got from a colleague of a couple of jobs ago, Abe Woldeselassie. This was his Grand mothers version. As is the norm with handed down spice mixes, even in Ethiopia, I added a couple of minor changes and this is what I have been using to make Doro Wat(Chicken) or Key Wat(Beef). I also love this on roasted Root vegetables (Just toss big chunks in Olive oil with the Berbere and roast them at 375-400 till done and you see some char on them).
Here is my recipe for Berbere.
Ingredients:
- 2 teaspoons coriander seeds
- 1 teaspoon cumin seeds
- ½ teaspoon fenugreek seeds
- 1 teaspoon black peppercorns
- 2 whole allspice berries
- Seeds of 4 green cardamom pods
- 4 cloves
- 5 dried red chilies, seeded, broken into small pieces‡
- 3 tablespoons sweet paprika
- 1 teaspoon salt
- ¼ teaspoon nutmeg
- ½ teaspoon ginger
- ¼ teaspoon cinnamon
- 1 teaspoon turmeric
‡ – You can find giant bags of them for cheap at your local Indian Market. Use them based on your palate. I like mine a little spicy. Use less if you are a “Blandie” 🙂
Directions:
- Using a heavy pan, I like my cast iron pan for this, toast the whole spices, including the chillies, on high heat, shaking the pan regularly to prevent scorching until they are fragrant. This usually takes 2 to 3 minutes.
- Put them in a bowl and let them cool completely.
- Grind the toasted spices fine in a coffee grinder. While the Grandmas and Mothers of Ethiopia used mortars and pestles and elbow grease, a dedicated coffee grinder is perfect and I have moved with “new technology”.
- After grinding the toasted spices fine, add the other spices already in powder form to the grinder and grind everything together for a couple of minutes.
- Store in an airtight container in a dark cabinet or pantry.
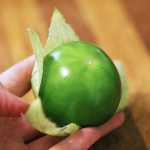
Pork Chile Verde
![]()
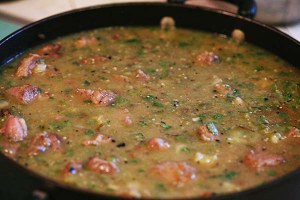
This is a classic Mexican dish with Pork and the bright acidity of the Tomatillos. This certainly calls for a good Beer to go with it and my personal favourite is, as always, Negra Modelo.
Ingredients:
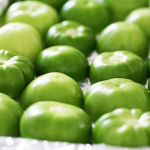
- 3/4 lbs Tomatillos
- 3-4 cloves of Garlic (unpeeled) for Roasting
- 2 Jalapenos (Seeded and de-veined for the blandophiles, and leave them in if you want the heat… but of course)
- 2 Poblano chiles
- 1/2 bunch of Cilantro, rinsed and chopped
- 1 3/4 to 2 lbs Pork Shoulder cubed
- Salt and Fresh Ground Black Pepper
- 3 Cloves of Garlic finely chopped
- Olive Oil
- 1 1/2 Medium Yellow Onions chopped
- 1 1/2 Tbsp Mexican Oregano
- 1 1/2 cups Chicken Stock
- 1 Pinch of Ground Cloves
Directions:
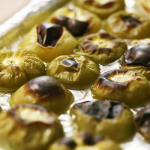
- De-husk and chop the Tomatillos in Half
- Broil them cut side down for 5 to 10 minutes in the oven.
- Broil the unpeeled garlic cloves and the Poblano peppers separately and squeeze out the garlic from the husk and steam and
 remove the skin as well as the seeds and the veins from the Poblano peppers.
 - Blend the broiled tomatillos with the garlic, Poblano and
 the Jalapeno peppers and the Chopped Cilantro.
 - Generously season the cubed pork with salt and pepper and sear them in a heavy bottomed skillet with the Olive oil to brown them on
 all sides. Work in batches if need be to not crown the pan and lead to steaming the pork rather than searin
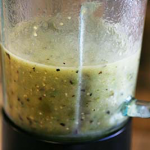 g it. Remove with a slotted spoon and set aside.
 - Pour off most of the residual fat and saute the onions and the garlic till wilted and fragrant.
- Add back the Pork the pureed tomatillo sauce, the
 oregano, and the pinch of cloves. Add a little bit more salt and pepper for seasoning. Be careful here since the sauce is going to concentrate a bit.
 - Add enough stock to cover the meat.
- Bring to a boil and reduce to a real low simmer and cook on the stove between 2 and 3 hours until the pork is fork tender.
Serve with Mexican style dirty rice and fresh corn tortillas….
Keep the Negra Modelo at hand
Middle Eastern Style Salad
This is a little salad I put together to go with a Moroccan style chicken Breast cutlets. I have that separately posted. Here is the link to Chicken – Pseudo Moroccan.
- I started by seeding and chopping tomatoes into about ha
 lf inch dice.
 - Peel, Seed and chop English cucumber, about 1/2 of a large one. Keep the size about the same as the Tomato.
- I also washed and cleaned and chopped reasonably fine one heart of Romaine lettuce.
- Finely dice about 1/5 of a medium size Red Onion.
- Do a Chiffonade of Fresh mint about a quarter of a cup.
- Toss all of these into a bowl.
What I needed at this point was really some Tahini. I did not have any but I had some hummus (good one, made by Ed Hyders a local Mediterranean food source here in Worcester, MA). I used that instead of Tahini
- A mixture of Hummus, Lime juice, Olive Oil, Salt and Pepper to make a dressing.
- What was funny was a secondary positive of the Hummus instead of Tahini; the extra protein from the chick peas made the emulsification of the dressing easy.
- Taste and adjust. It needs the acidity but careful not to overwhelm the mint with the acid.
- As a last and almost light bulb moment, where I wanted a more pronounced lemony flavour without adding too much acid, I sprinkled in some Sumac.
Don’t be a stickler, doesn’t everybody have dried Sumac in their Pantry anyway. 🙂
Chicken – Pseudo Moroccan
 I needed a quick cooking chicken recipe for a summer day when most of it happened on the outside grill. I wanted something from the Middle East, may be Morocco or thereabouts.
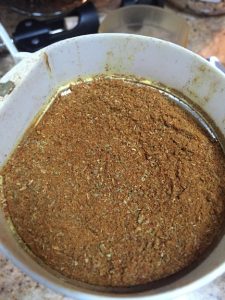
- 1 teaspoon Cumin Seeds
- 1 teaspoon Coriander seeds
- 1 teaspoon Fennel Seeds
Toast all of these over Medium heat till they are fragrant. Cool and grind fine in a coffee grinder that you have dedicated to grind spices… You have one of these don’t you?? You can always resort to a mortar and pestle and elbow grease… Mix in
the following
- 1 teaspoon of Cayenne pepper (adjust down or up based on your preferences)
- 1/2 teaspoon of turmeric powder.
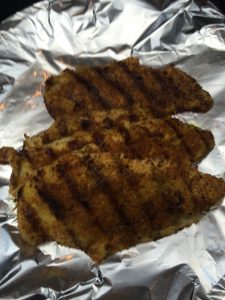
- Lay the chicken breast cutlets out on a Foil lined plate.
- Drizzle Olive oil over the chicken and rub to coat.
- Season the chicken with salt and a few grinds of pepper.
- Sprinkle the spice mixture evenly over the oiled chicken pieces on both sid
 es and let them rest for 15 minutes on the counter top.
 - Turn on the grill and get it heated to medium hot.
- Grill the chicken pieces quickly over the hot grill. It should not take more than a minute per side. I find that cooking is a lot more even if you move the chicken to an unused spot on the grill when flipping so you don’t get a lowered temperature
from the old cooking spot.
Rest the chicken for a few minutes for the juices to re distribute in the meat. Squeeze fresh lemon juice over the chicken and serve with some good Pita Bread and a Middle Eastern Salad. We did not do it last night when we had this dish, but I think a Spanish Albariño would go splendidly with this one.