
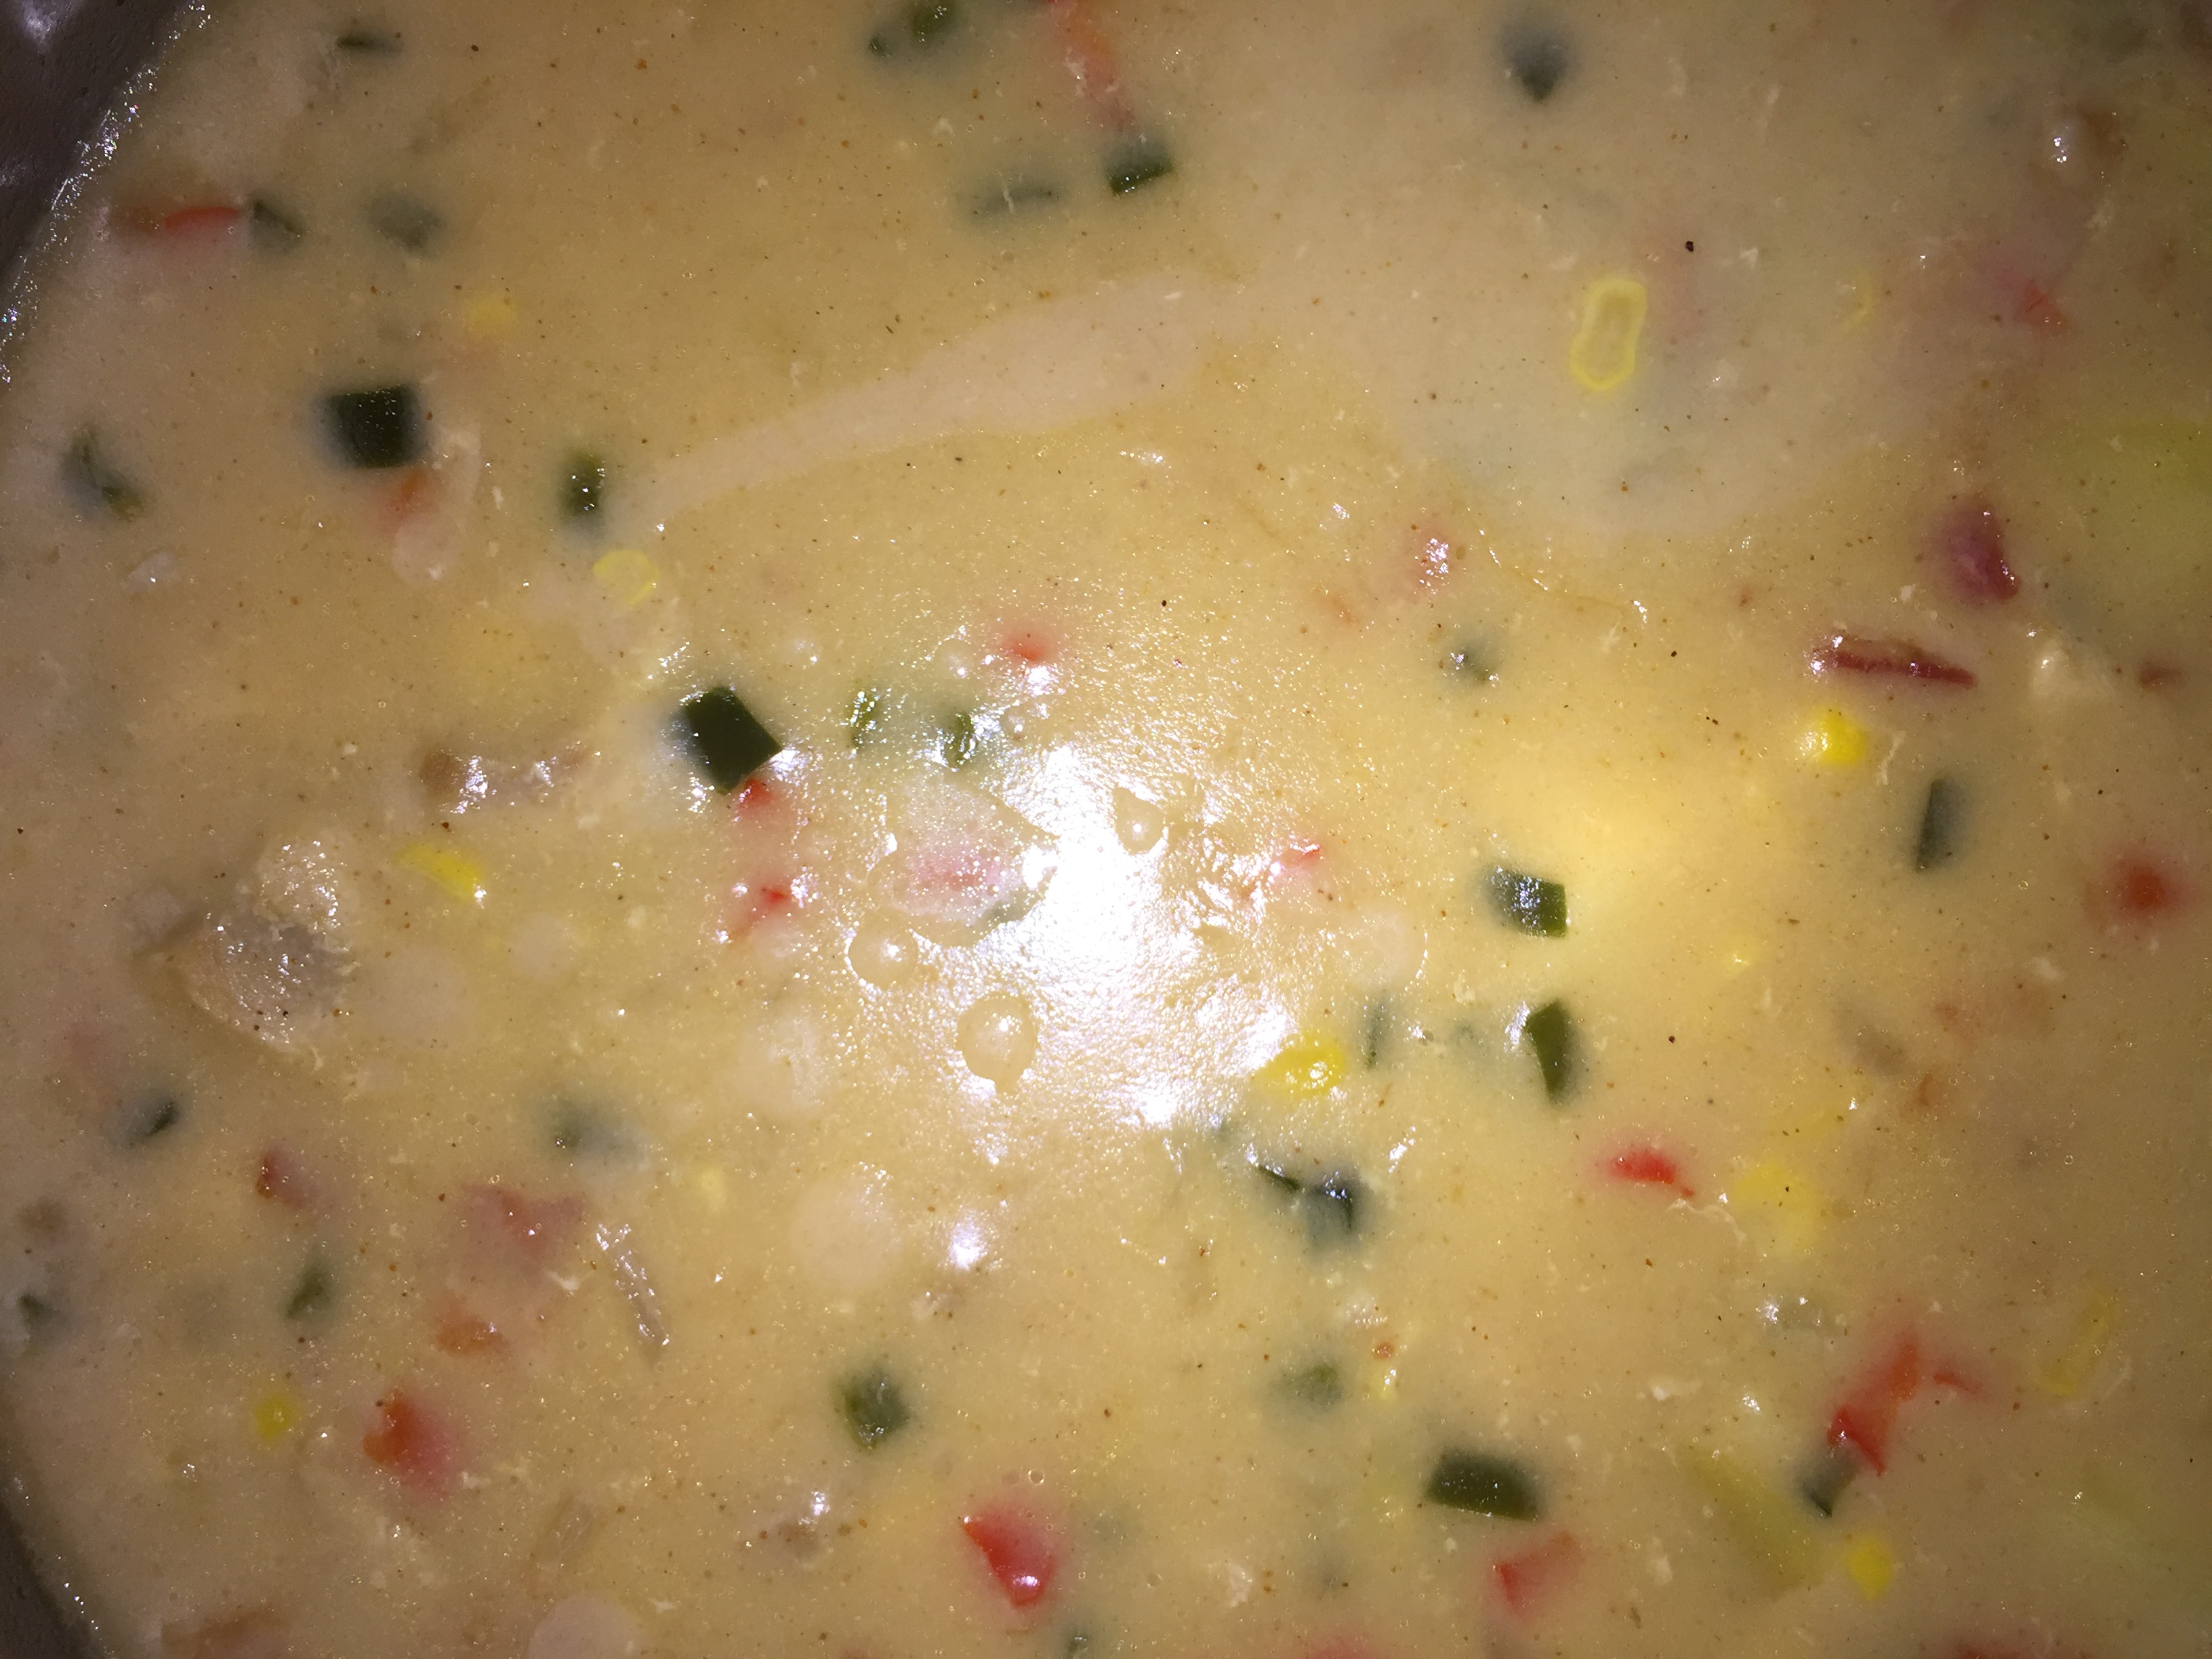
Chowdah, as it is pronounced around these parts, also known as chowder. I had some chicken thighs in the freezer and I needed to put something together quick and one pan. So this was my rendition of a chicken corn chowder.
Ingredients
- Chicken thighs trimmed of fat and chopped half inch chunks
- Boiling potatoes to yield about 1 cup of boiled ½ inch cubes
- 1 fresh Green Chipotle pepper chopped fine
- ½ red bell pepper chopped fine
- 1 Medium onion, chopped fine
- 3 cloves of crushed Garlic
- 2 heaped Tbsp All purpose flour
- 1 cup of Milk
- ¼cup Half and Half
- 2-3 Bay leaves
- 1 tsp ground cumin
- ½ tsp Cayenne
- 1 tsp Chipotle chilli powder
- Salt to season
- 2 Tbsp White wine Vinegar
- Fistful of cooked and crumbled bacon bits.
Directions
- Poach the chopped chicken in water to cover completely with some salt a couple of Bay leaves for about 30 minutes till the chicken is completely done.
- While poaching the chicken skim of the foamy bits that float to clarify the broth that forms.
- While the chicken in poaching, boil the potatoes in salt water till done while still retaining their firmness. Cool in cold water, peel and chop into ½ inch chunks
- Strain out the chicken completely and reserve the resulting chicken stock separately.
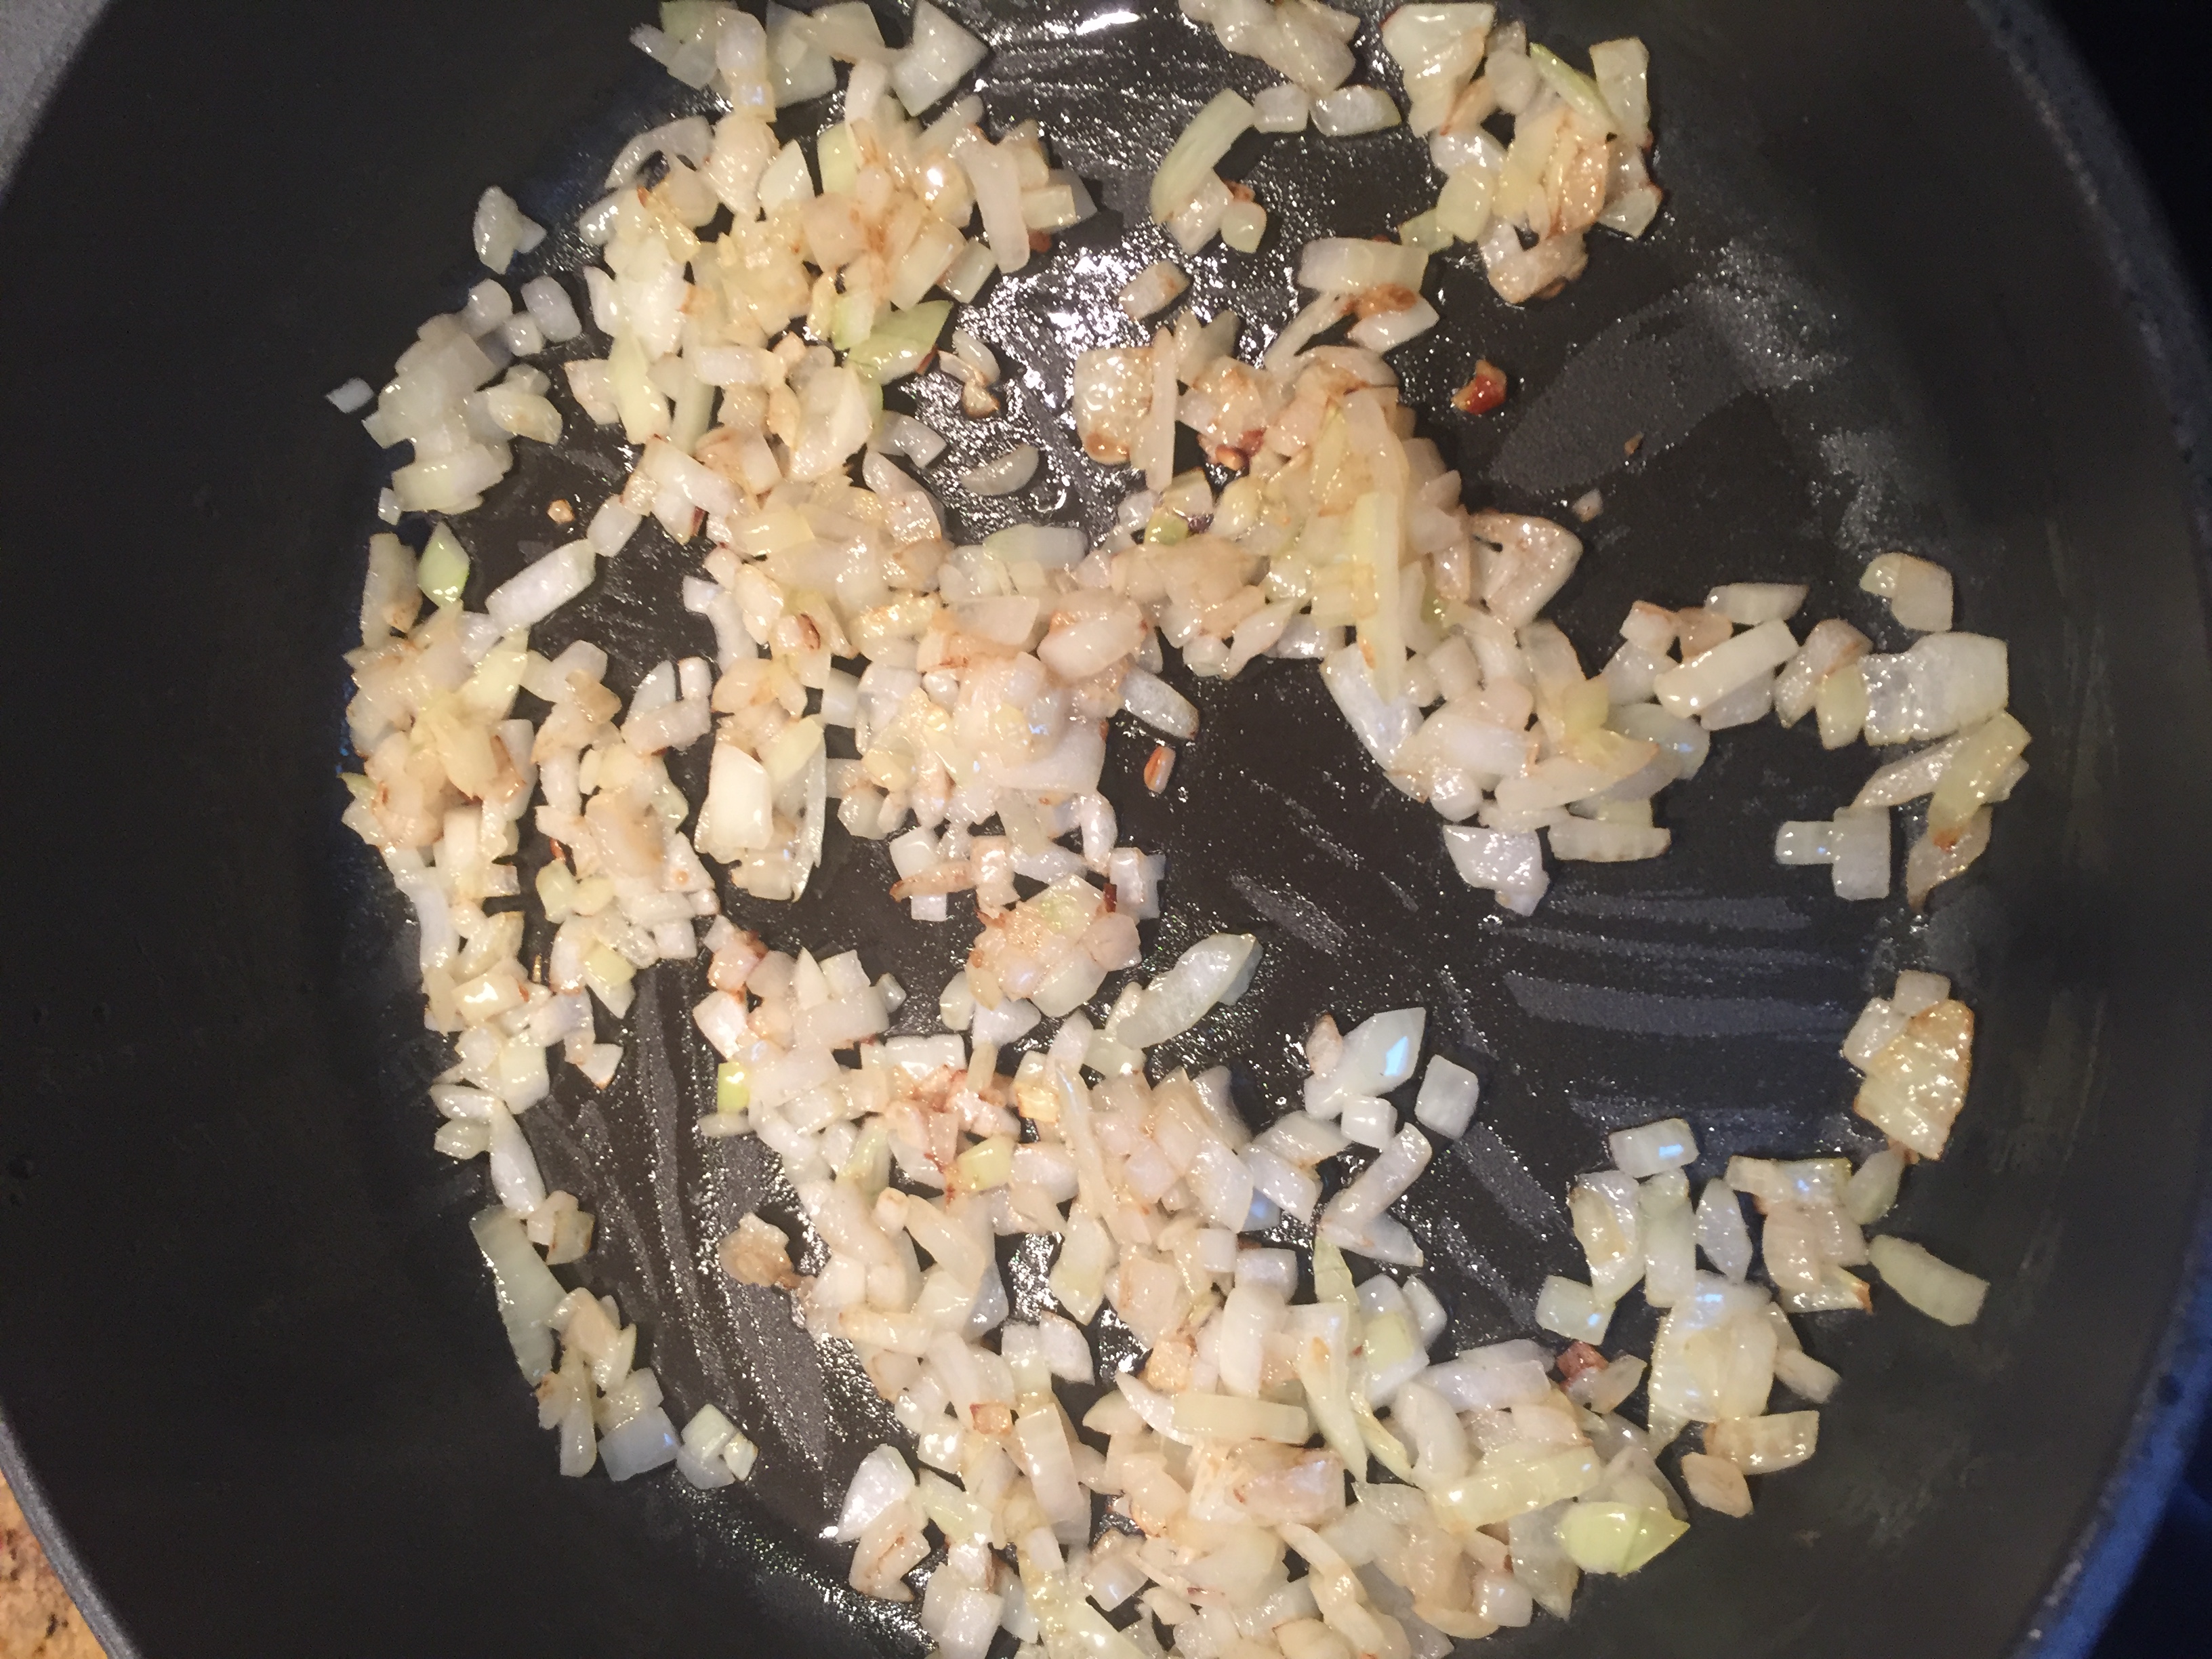
- Sauté onions in a Tbsp of butter and some vegetable oil until translucnet and they start taking on a little bit of colour.
- Add the Garlic and continue to sauté for another minute
- Add both the peppers and continue sautéing till the peppers are soft and start to take on some colour.
- Add the flour and continue mixing to cook out the flour flavour and make an in situ roux.
- When the roux has taken on a golden colour add the reserved chicken stock and bring to a simmer. At this point the liquid should be quite thick.
- Add in the cumin, cayenne and one more bay leaf. Season with salt.
- Add the cumin, chipotle powder and the vinegar and mix well
- Thin it out with the milk and heat to boil and simmer for about 5 minutes to meld the flavours.
- Add in the chicken and potatoes and continue till everything is heated up.
- The soup should have the consistency of a thin pancake batter.
- Adjust seasonings and serve with a garnish of Bacon bits and finely chopped scallions
Chicken, Coorg Style
Coorg is a region of India which now part of the State of Karnataka or Mysore as it was known during the Raj. It has its own distinctive flavour profile and is characterized by the use of Vinegar in its marinades as well as the bright fruity acidity of the finished dish. This particular recipe was an attempt to recreate a Coorg style Chicken curry recipe.
Ingredients
Marinade
- 1 tsp heaped toasted ground cumin
- 1 tsp heaped toasted ground coriander
- ½ tsp ground cardamom
- ¼ and a pinch of ground cloves
- ¼ and a pinch of ground cinnamon
- 1½ Tsp peeled chopped garlic
- 1½ Tsp peeled chopped ginger
- 4 Tsp white vinegar
- ½ tsp or more Cayenne (depends on how hot you want it, stick to a half for New England heat or go up to 1 or more depending on your heat tolerance or desire)
- Salt to taste
- 3 Tsp Lemon juice
Main Ingredients
- 1 – 1 ½ lb of Chicken thighs trimmed of fat and cut into 1 inch pieces
- 2 large tomatoes chopped
- 1 red bell pepper cored seeded and cut into strips
- ½ cup chicken broth
- 1 large onion chopped reasonably fine
- ½ tsp dark tamarind paste
- Cilantro for garnish
Directions
- Add the chicken to the marinade and mix to coat well
- Marinate on the counter top for 30 minutes or even as long as overnight in the fridge
- Heat a deep non stick pan on medium high heat and add a couple of tablespoons of oil to it.
- When the oil is hot and shimmering, add the onions and saute until the onion starts taking on a bit of color without frying them
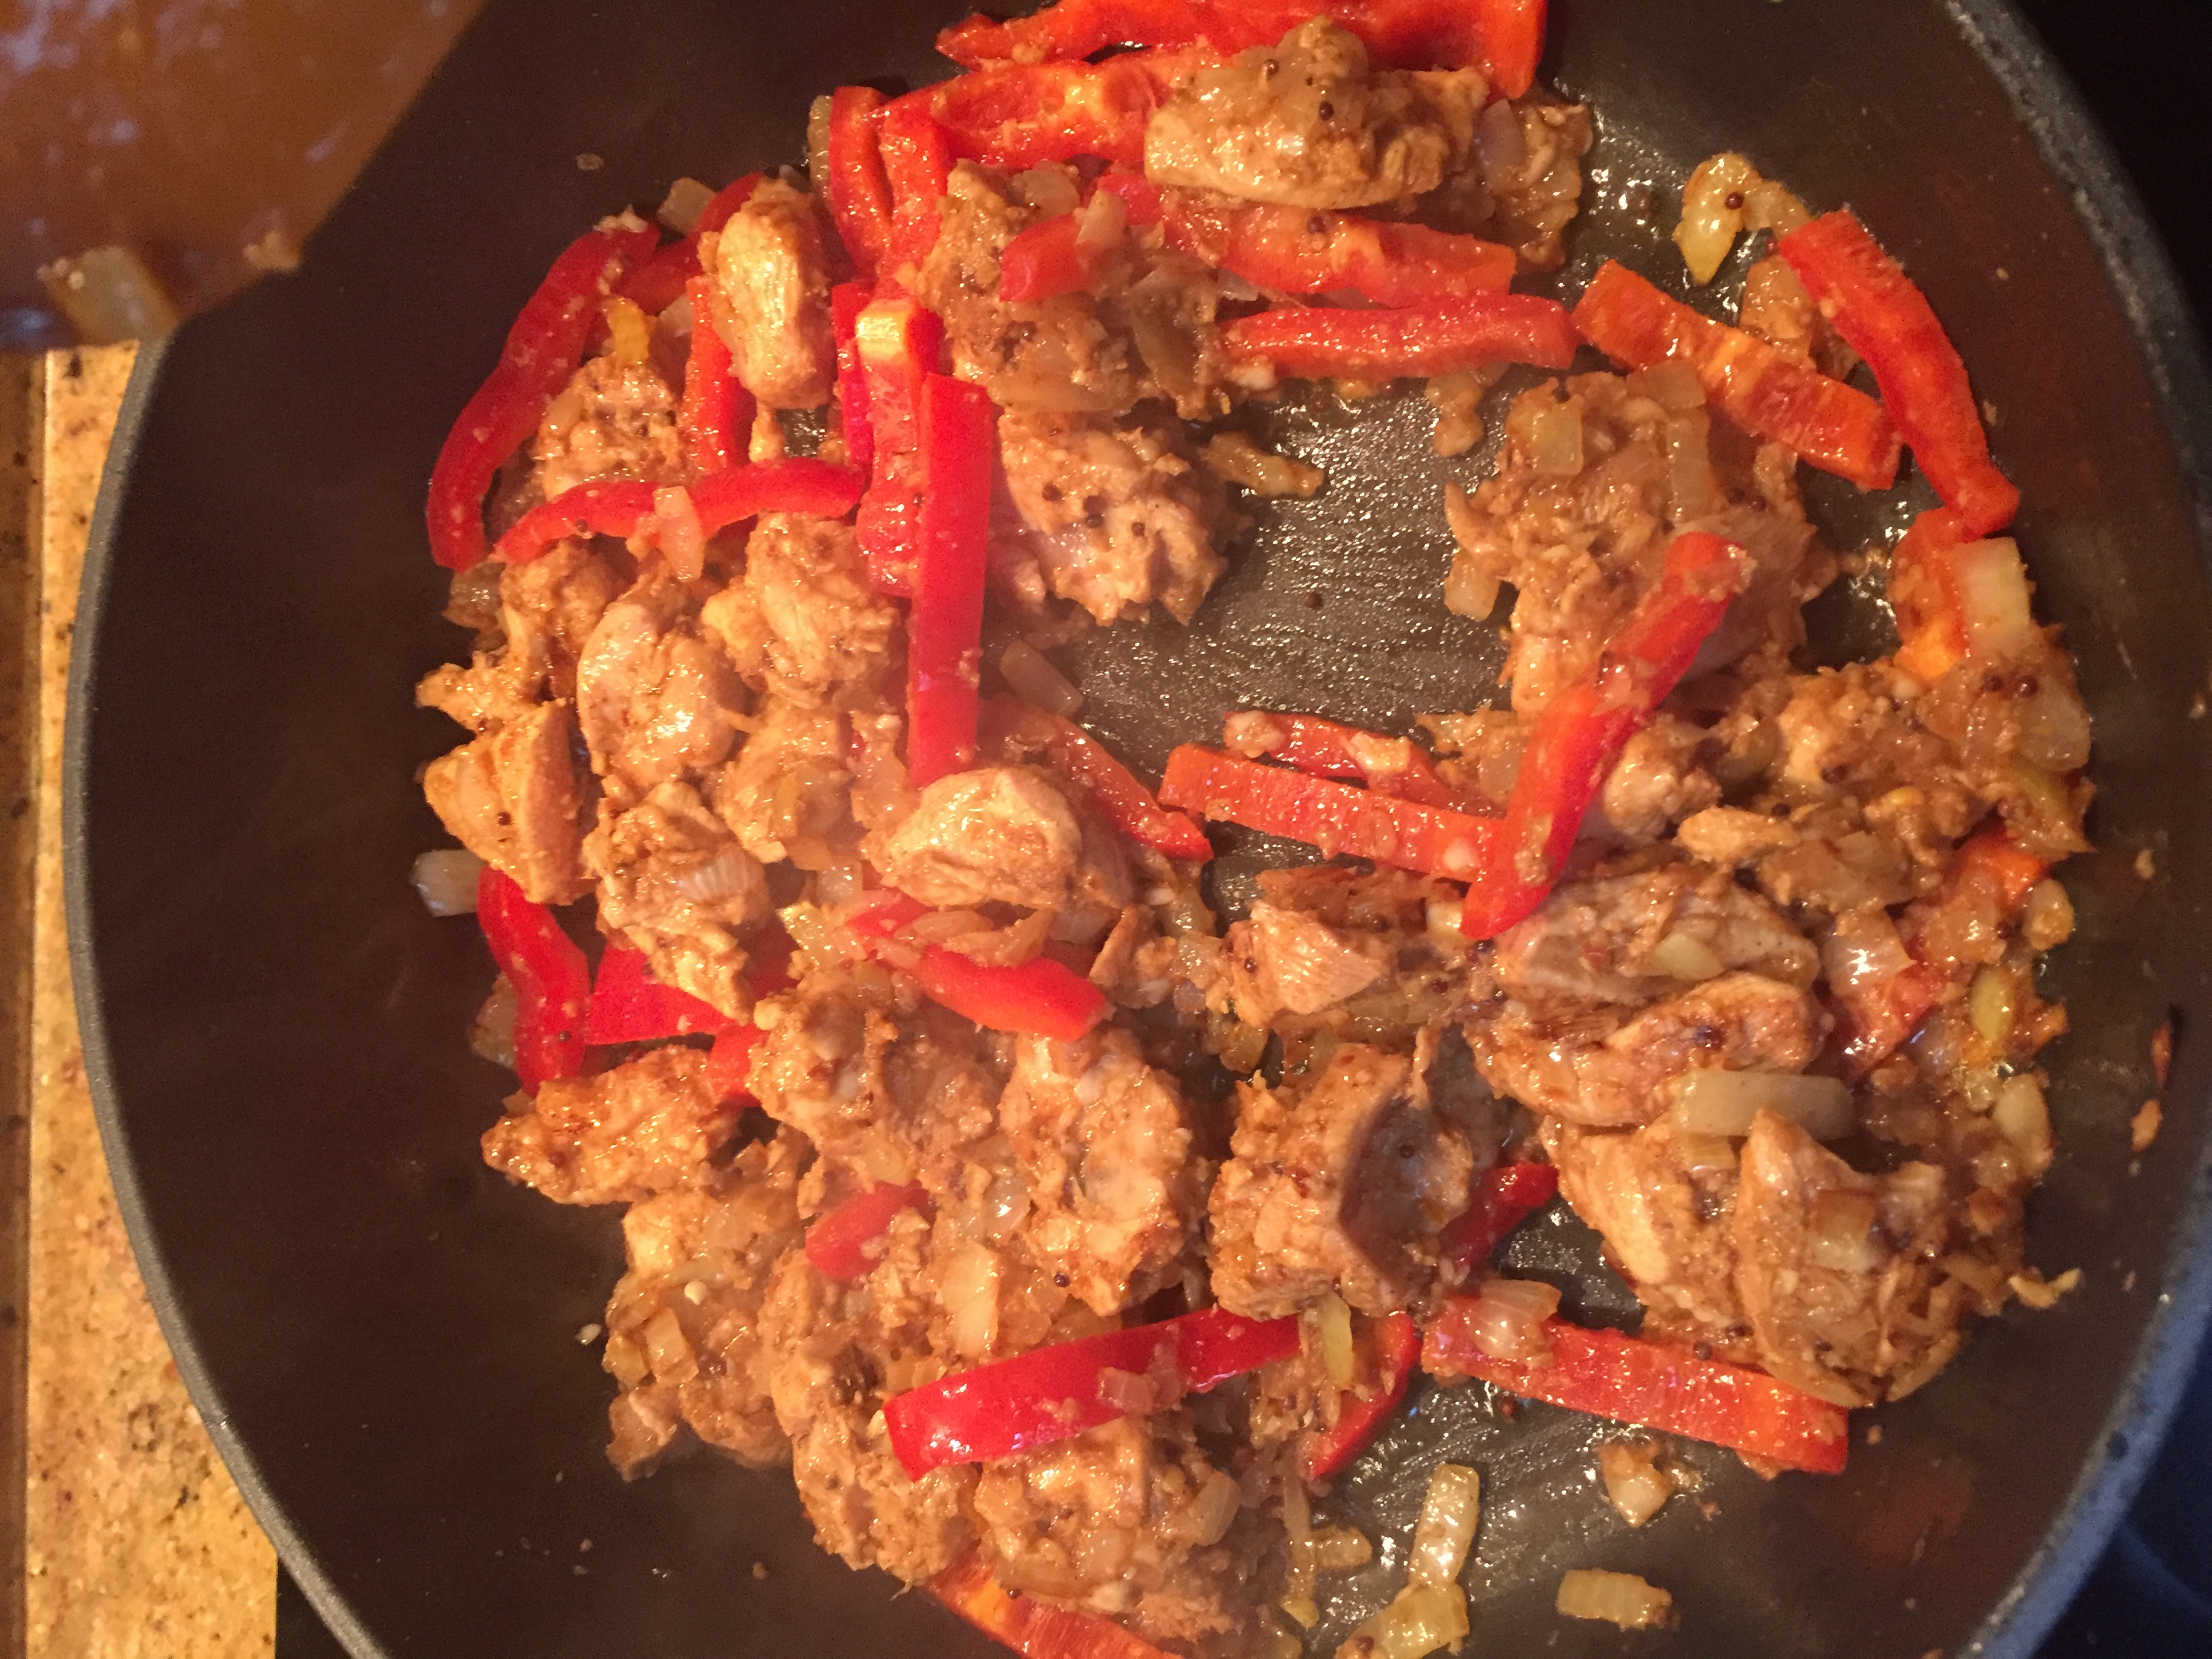
- Add the ckicken with the marinade and the bell pepper and continue suteing until the chicken starts taking on some colour as well
- Add the tomatoes and the broth, bring it up to a good simmer, cover, reduce heat and cook for the next 15 minutes until the chicken is completely cooked and most of the liquid is absorbed
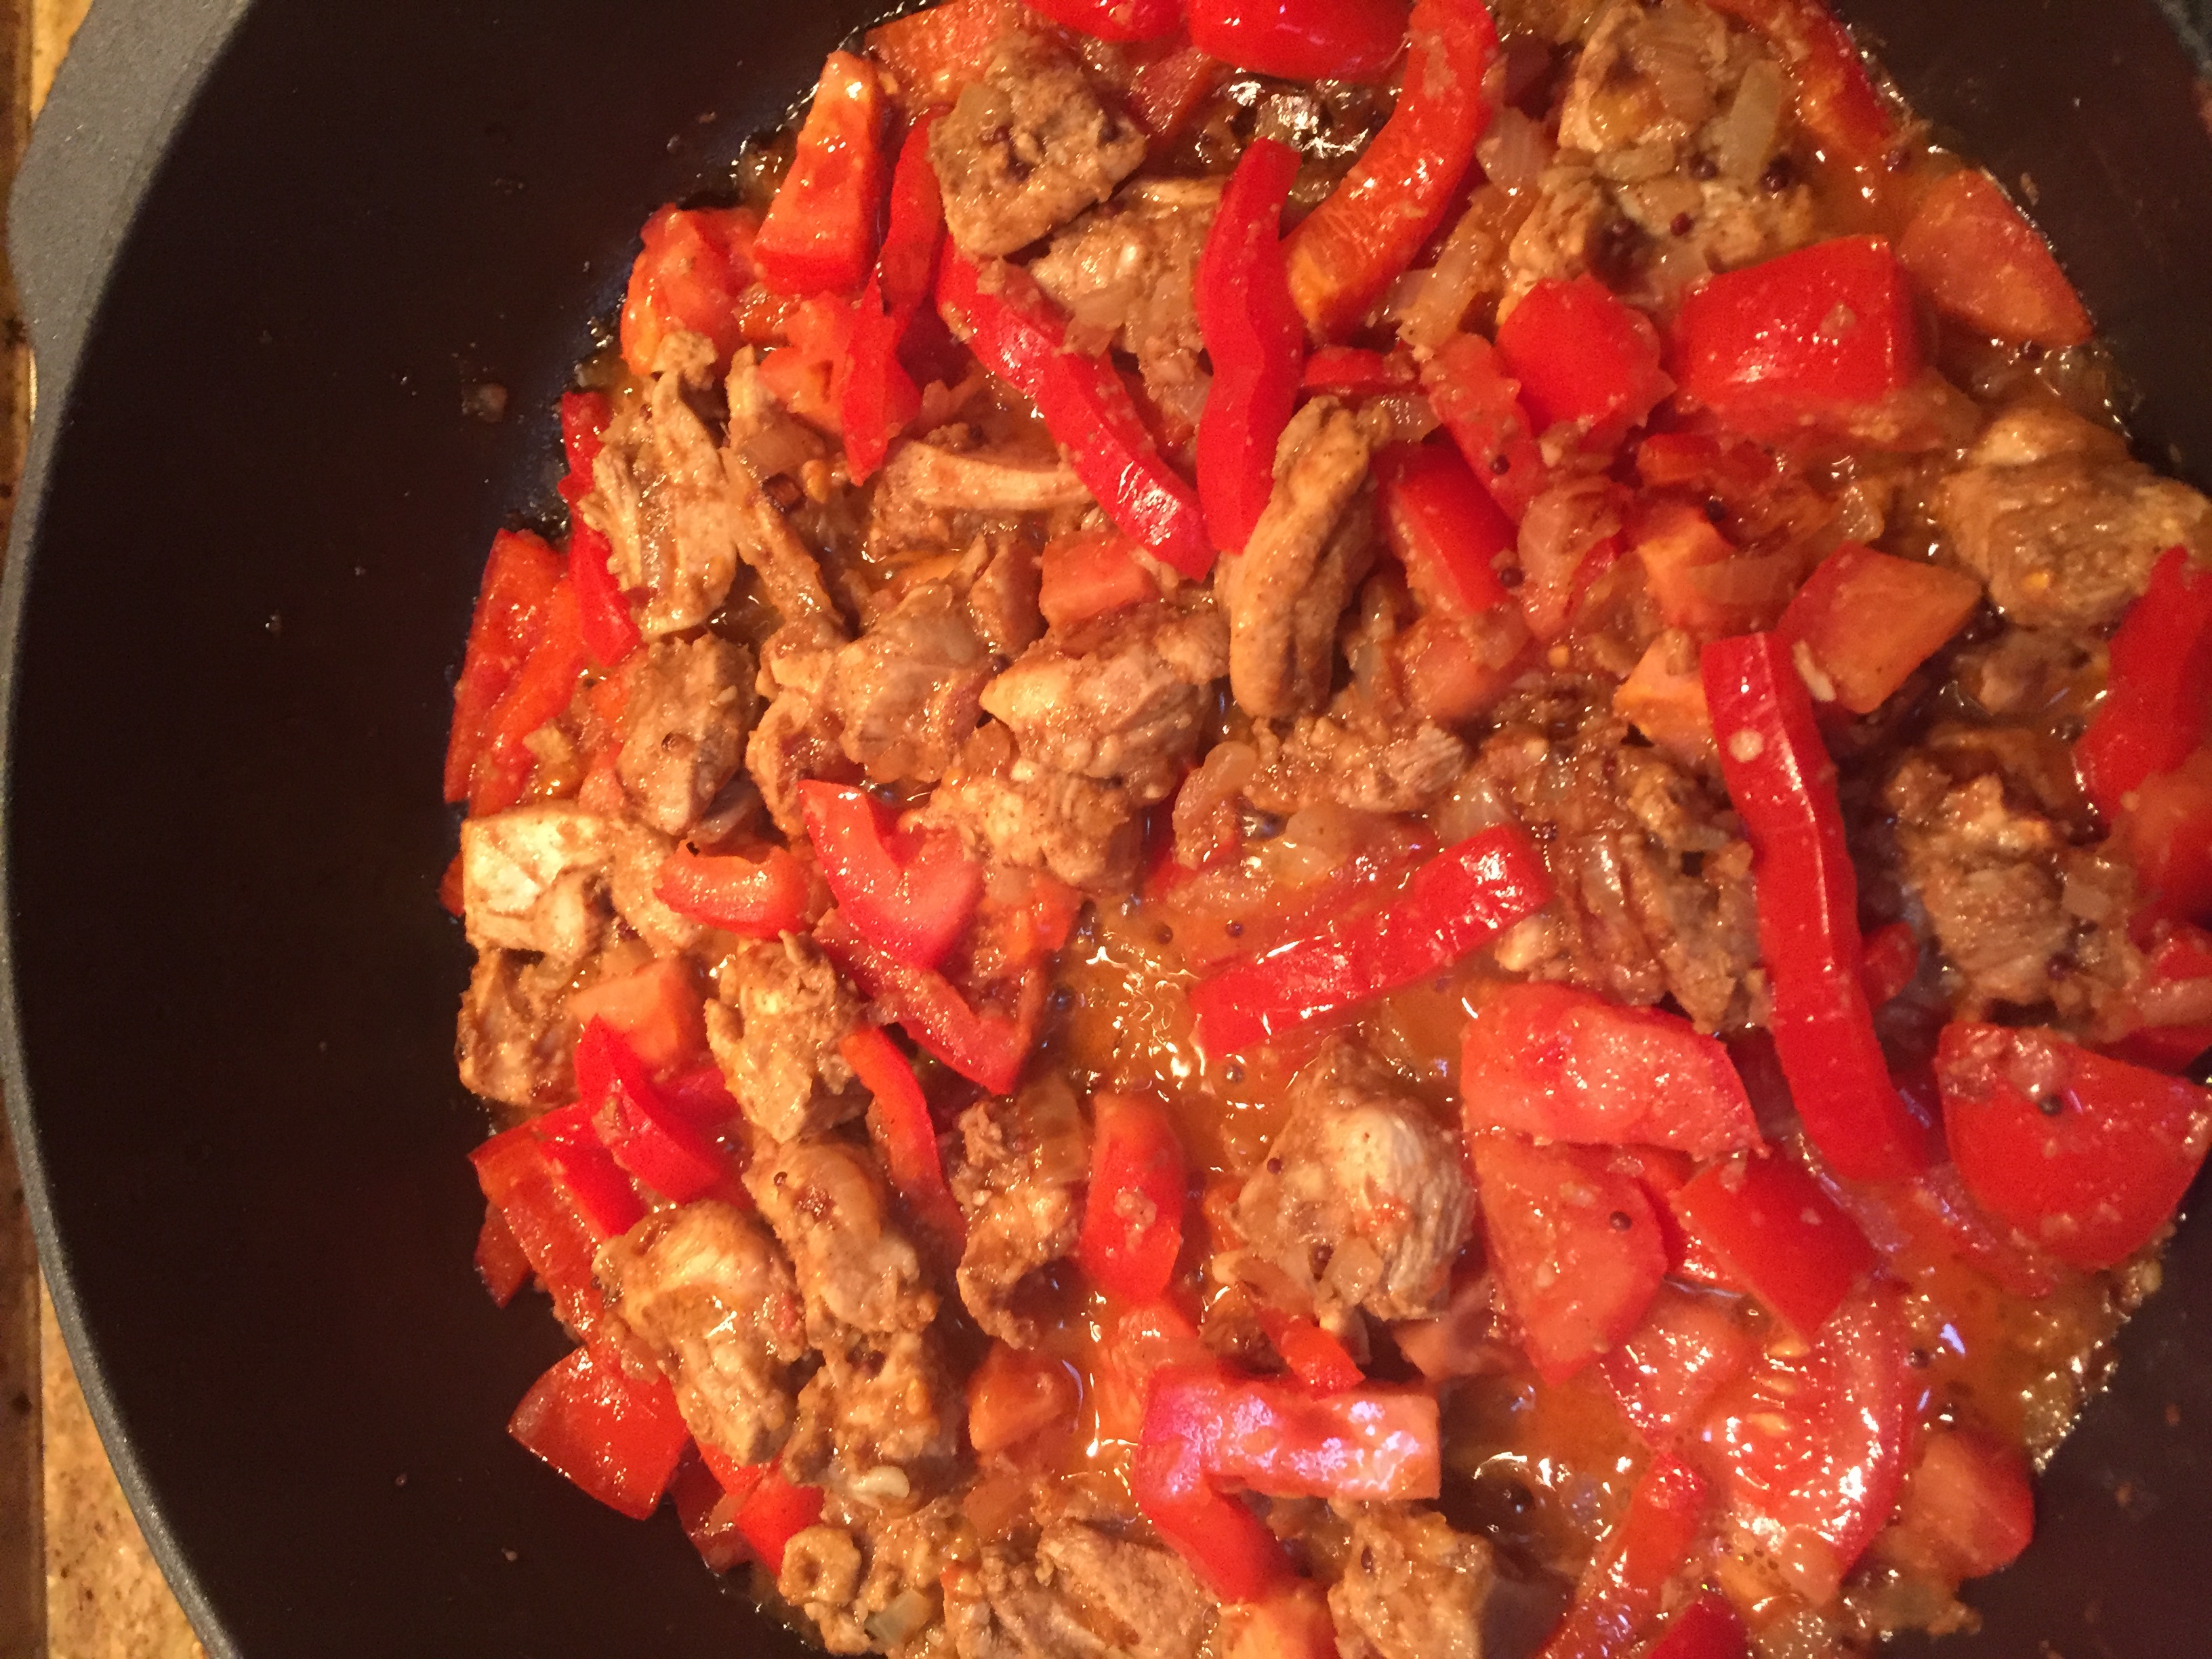
- Mix in the dark tamarind paste and garnish with Cilantro
Serve with rice and Yogurt to to cool your mouth against the heat, if it is warranted.
Vegetable Broth from Scraps
Most of the scraps you throw out when prepping vegetables still have quite a few nutrients and some of them have still have falvour left in them. They are a great starting point for a Vegetable Broth. I use this is broth as a starting point for a soup or sometimes even cook rice in it.
The thi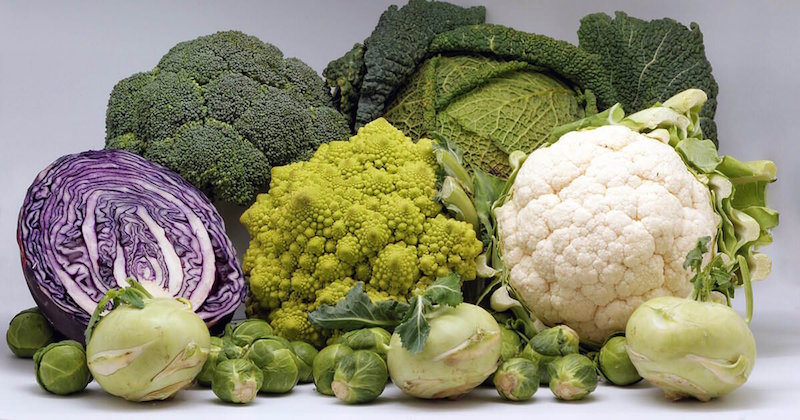 ngs you don’t want to overload the collection of scraps you want to use to make a broth are remnants of cruciferous vegetables; the top of the list mostly found in our kitchens that belong to this group are, broccoli, cauliflower, cabbage of all kinds, regular,red and Napa, brussels sprouts, Collard greens, Kale, Bok Choy and surprisingly, Arugula and watercress fall under this as well.
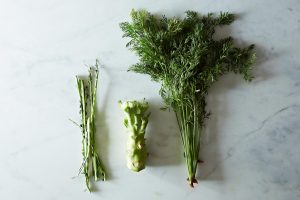
Include these sparingly, or not at all. This particular batch consisted of the following scraps
- Carrot peels
- Onion skins and the slightly dry outer layer if any
- Garlic skins
- Parsley stems
- Celery trimmings including leaves at the top and the root ends
- Zucchini aka Courgette trimmings (the central seeds and pith, which go mushy the moment they hit the saute pan) including the ends
- Cucumber skins
- Mushroom stalks (Great to add the umami flaours)
- Tomato trimmings
I had collected these trimmings for about a week in a tightly sealed ziploc bag in the fridge and I had pretty much filled up a Gallon bag full.
Directions
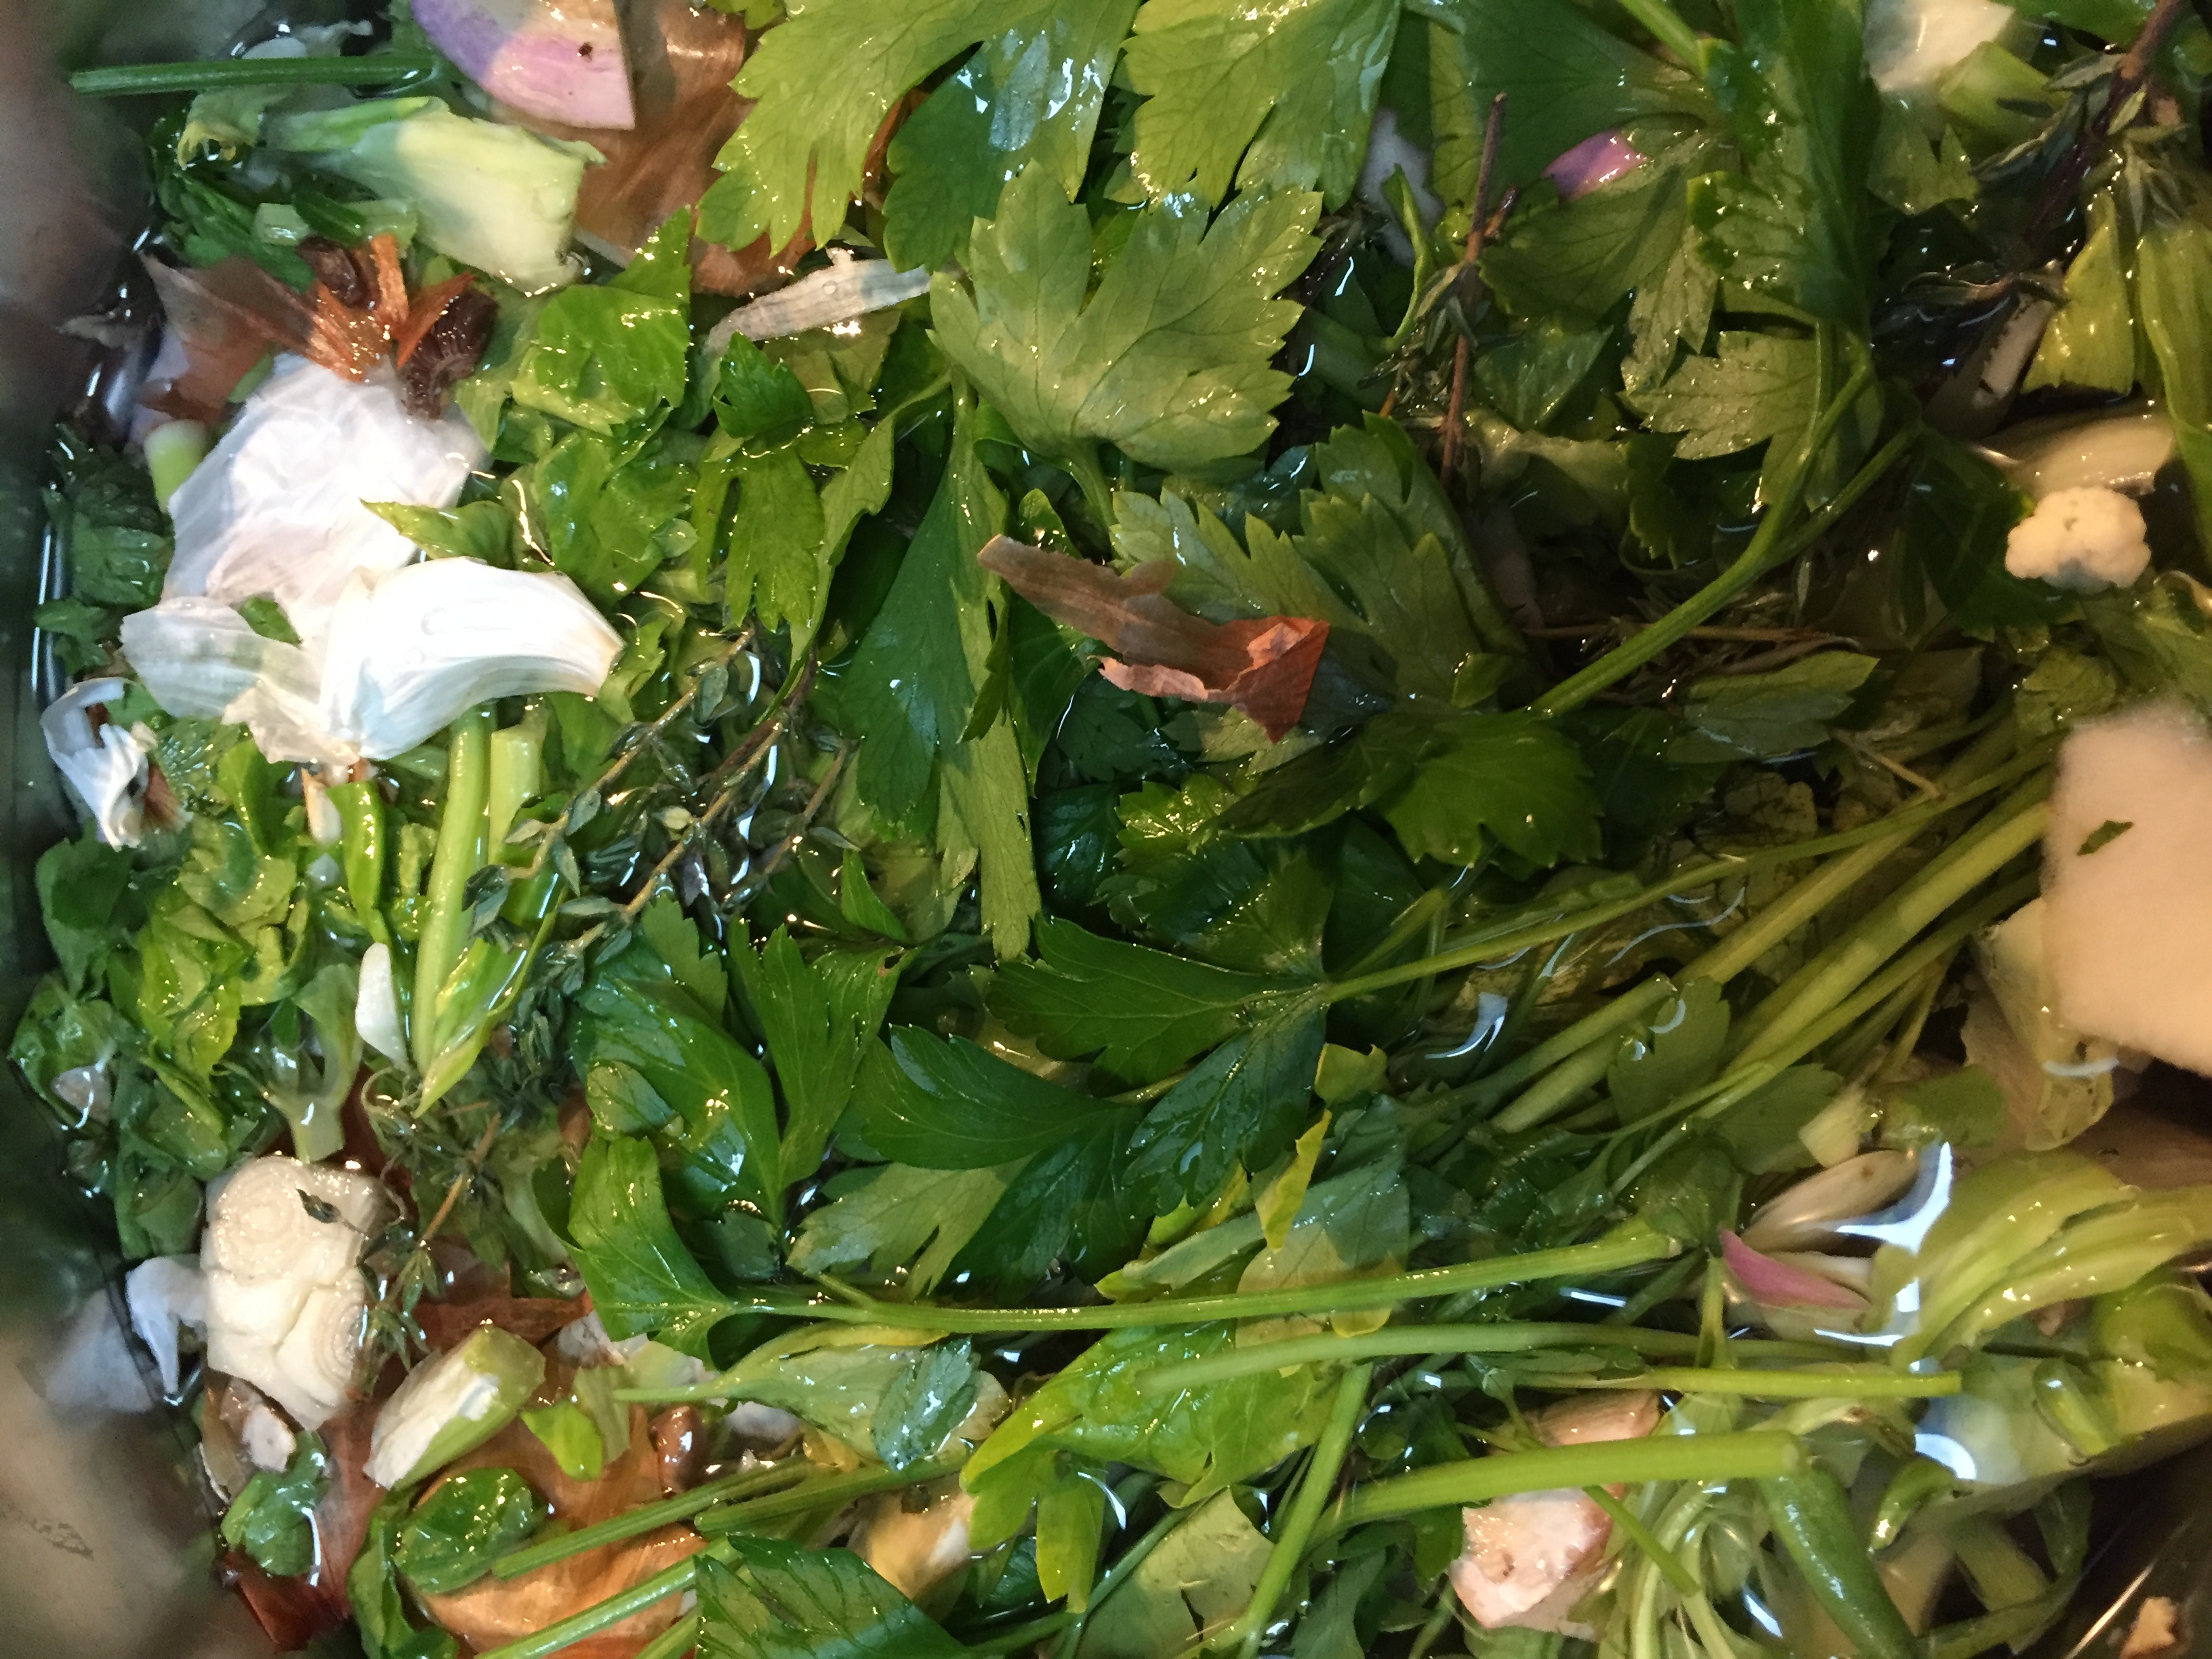
- Add to a stock pot the following
- the trimmings
- 1 whole chopped onion, skins and all
- 3 cloves of garlic including skin
- 10 stalks of fresh thyme
- ~10 staks of parsley (leaves, stems, the lot)
- In a small saute pan dry roast on the stove top the following till they are fragrant
- 8-10 whole black peppercorns
- 2-3 star Anise
- 4 whole cloves
- Add to the stock pot
- Cover with cold water
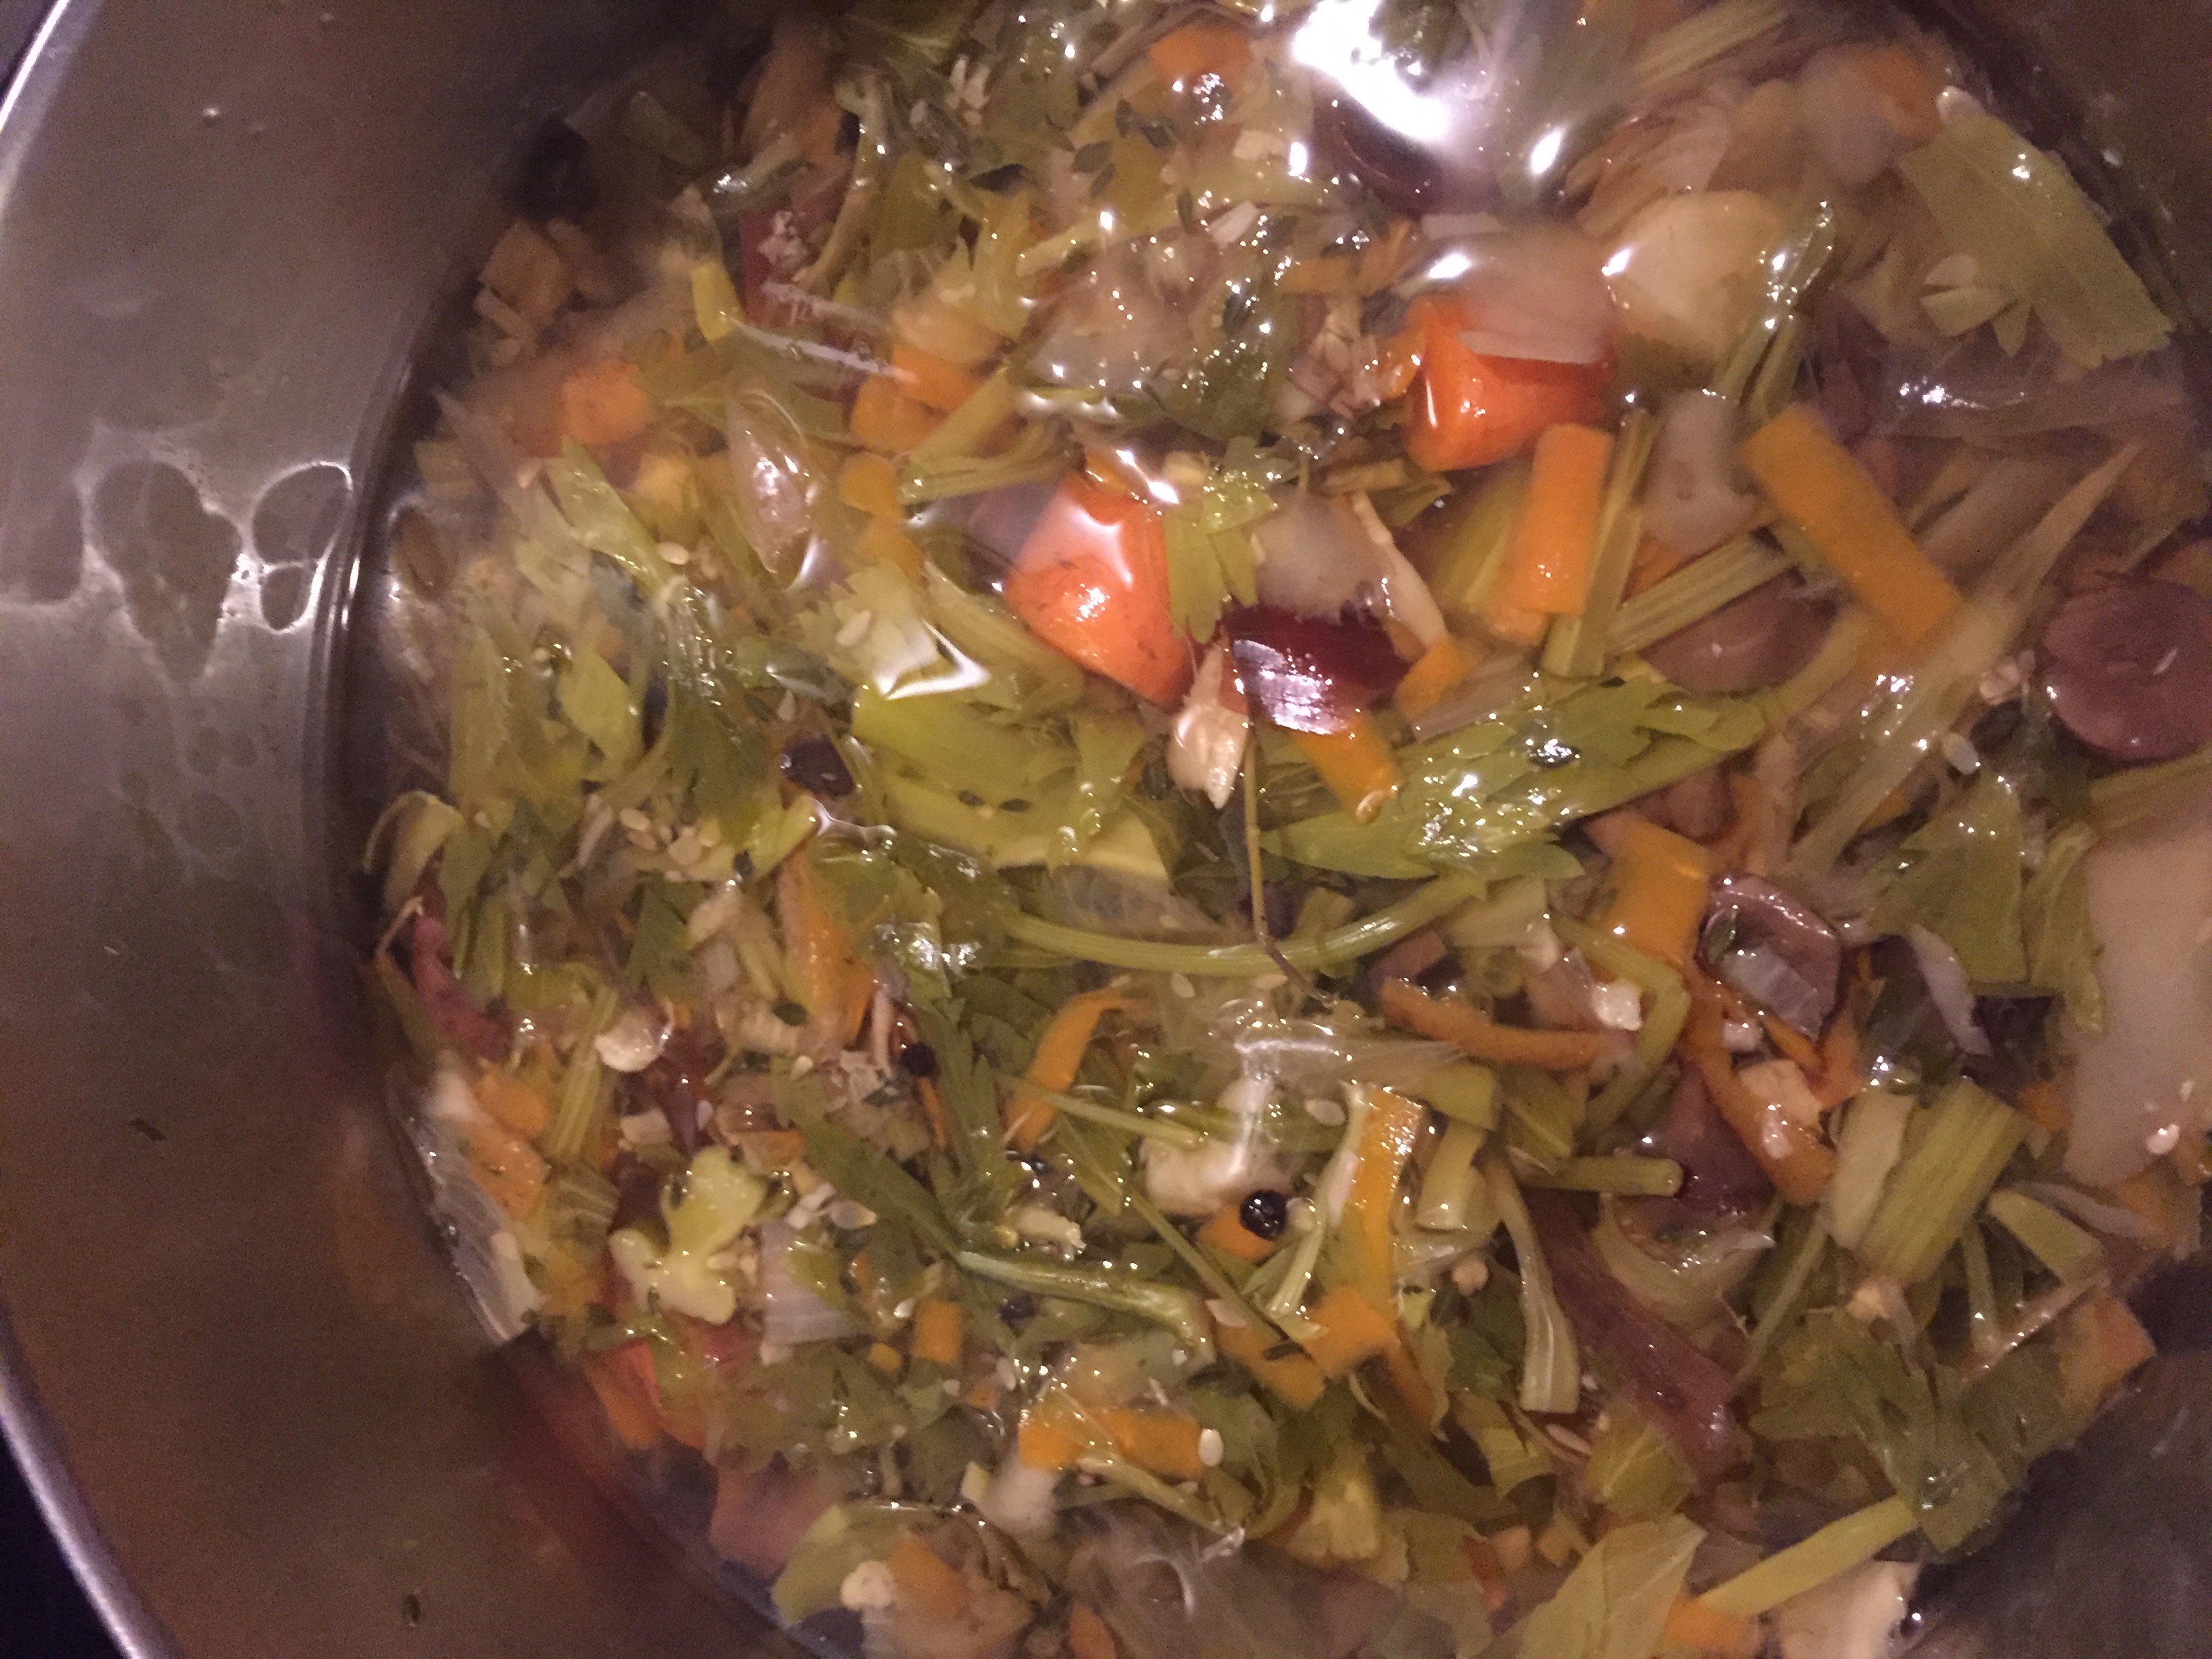
- Set on a hot stove and bring to a boil. Turn down to a simmer and cover. Continue to cook for an hour
- Turn the heat off and let it cool
- Put it through a coarse collander to remove all of the cooked and exhausted vegetables and then through a finer mesh collander
- The last step is to put it through a strainer lined with a coffee filter. This will remove almost all of the fine particulates and also by this stage no dirt from the original scraps collection will be in the broth.
You will end up with a fat free clear broth with a whole lot of flavour that can be used wherever vegetable broth is called for. I tend to freeze this broth in a muffin tin and then storing the resulting hockey pucks of veggie broth in ziploc bags in the freezer. These are good for 6 months to a year.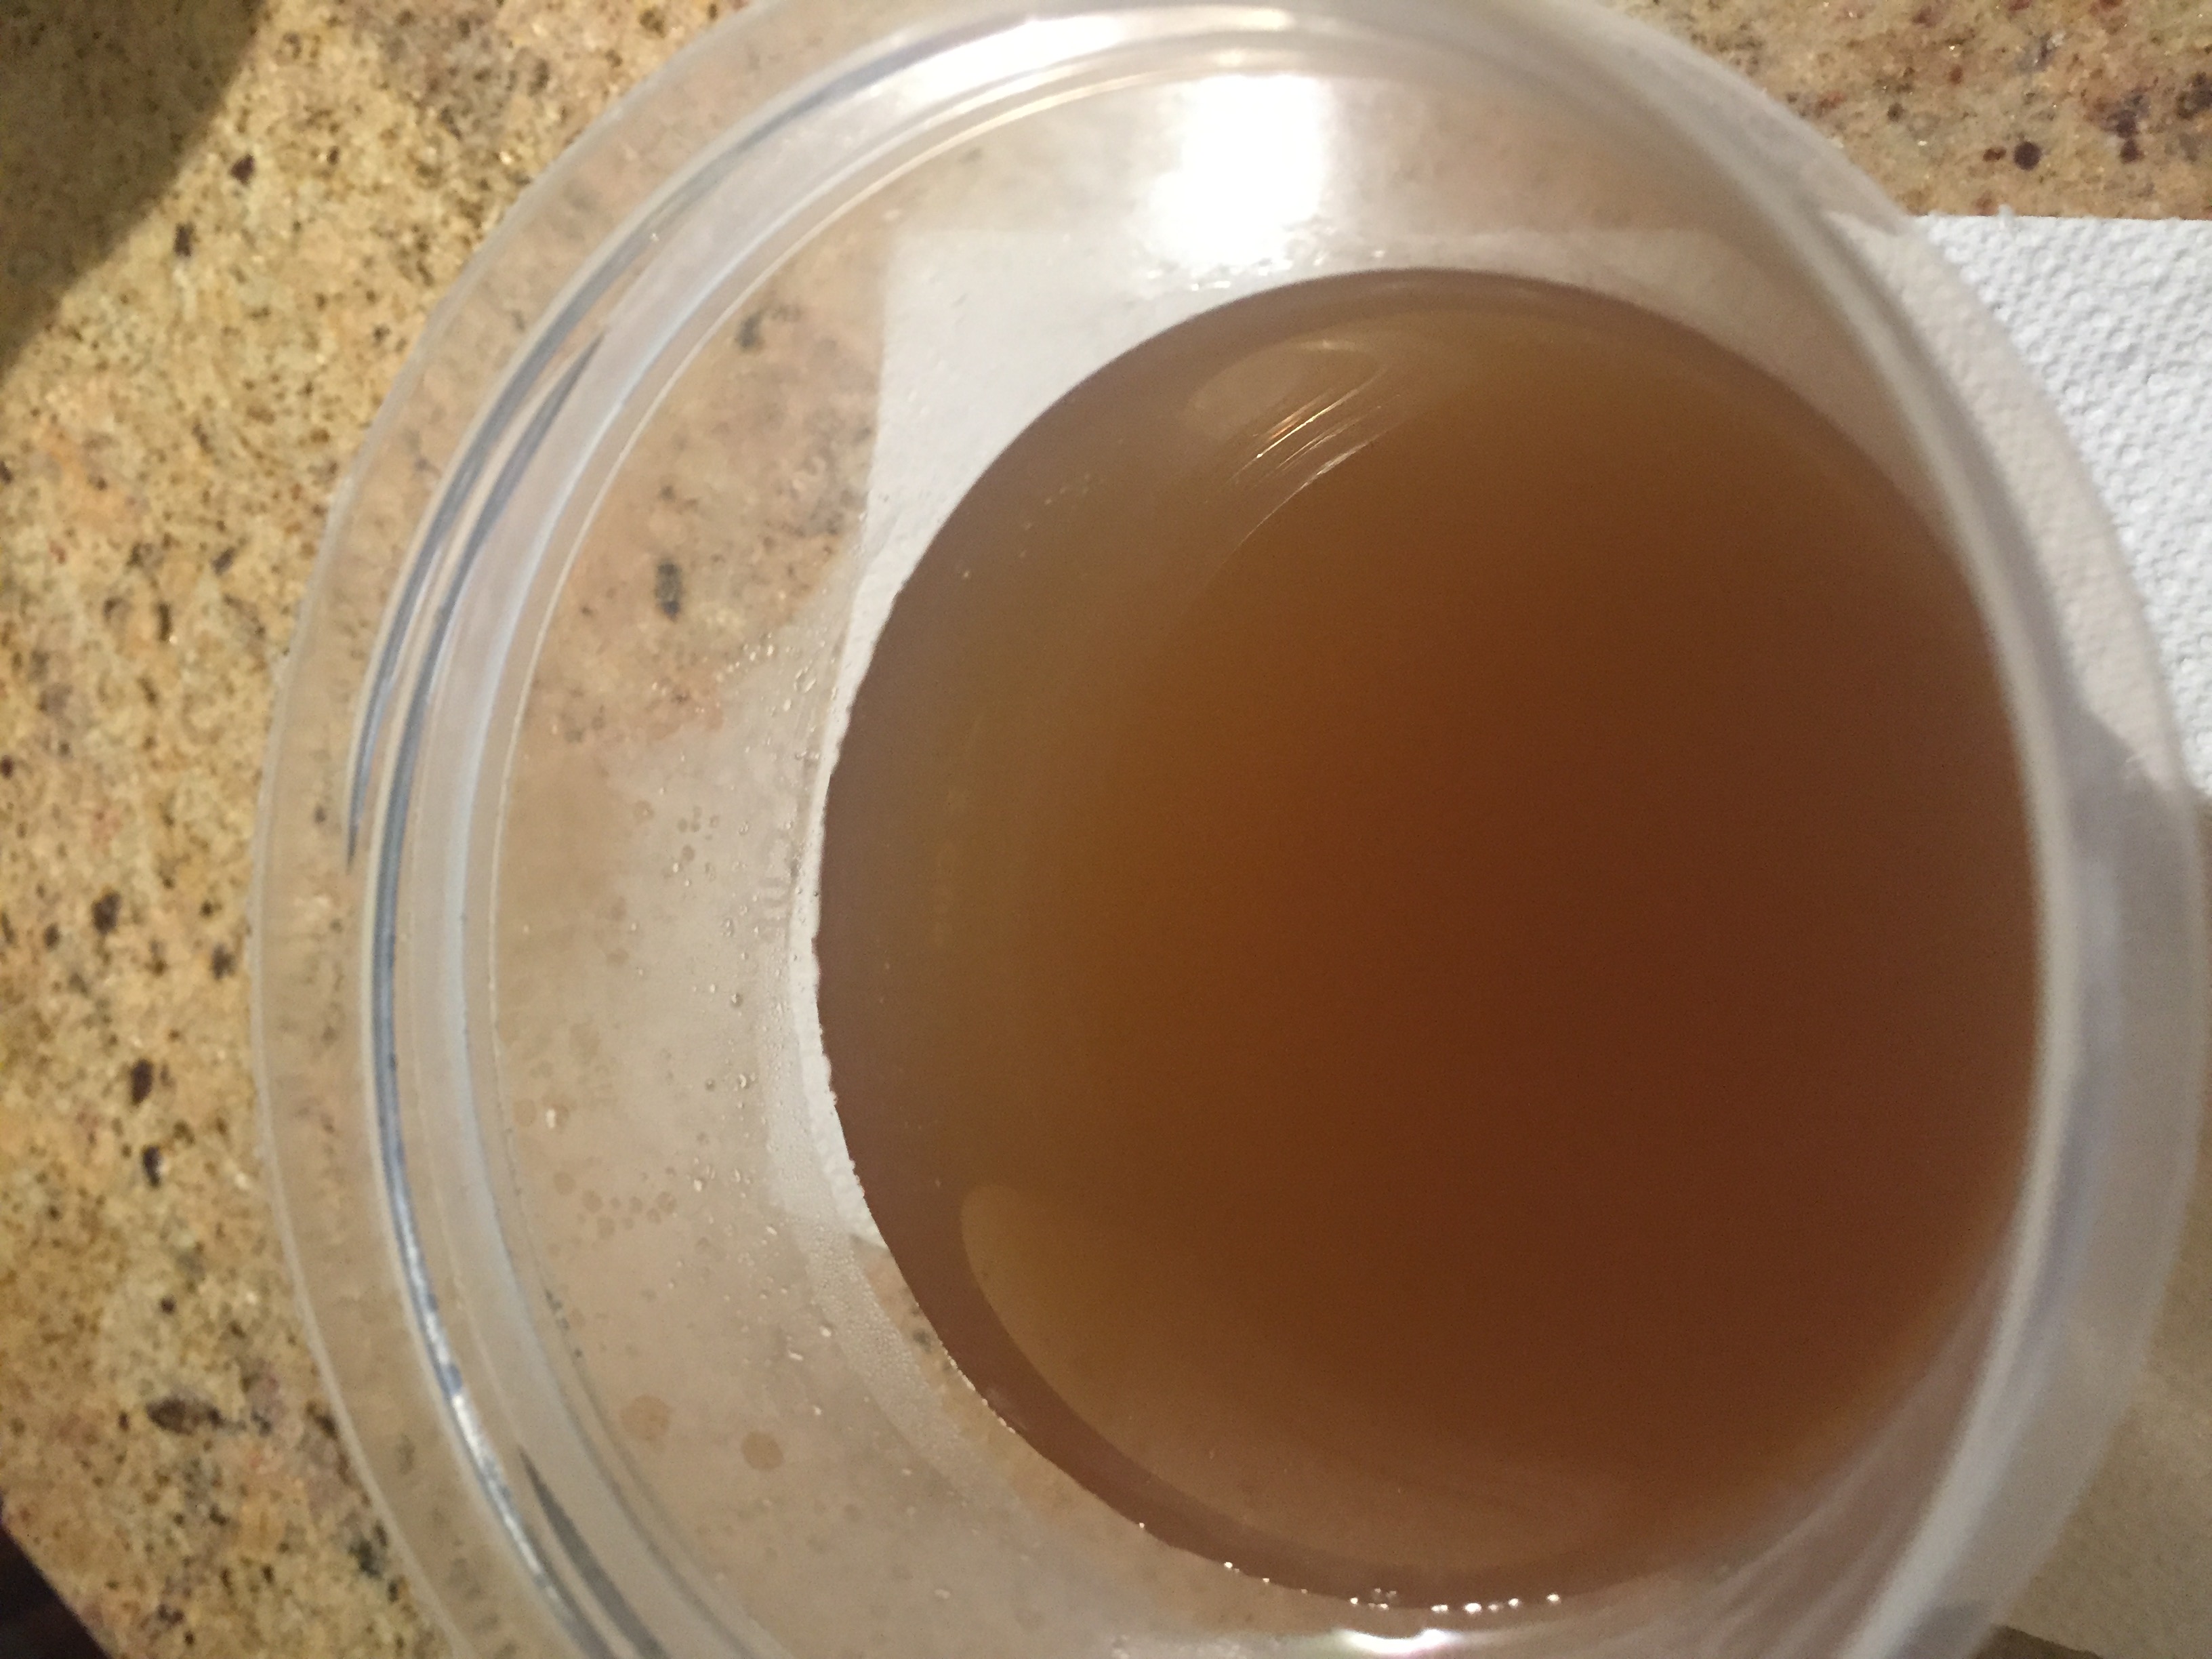
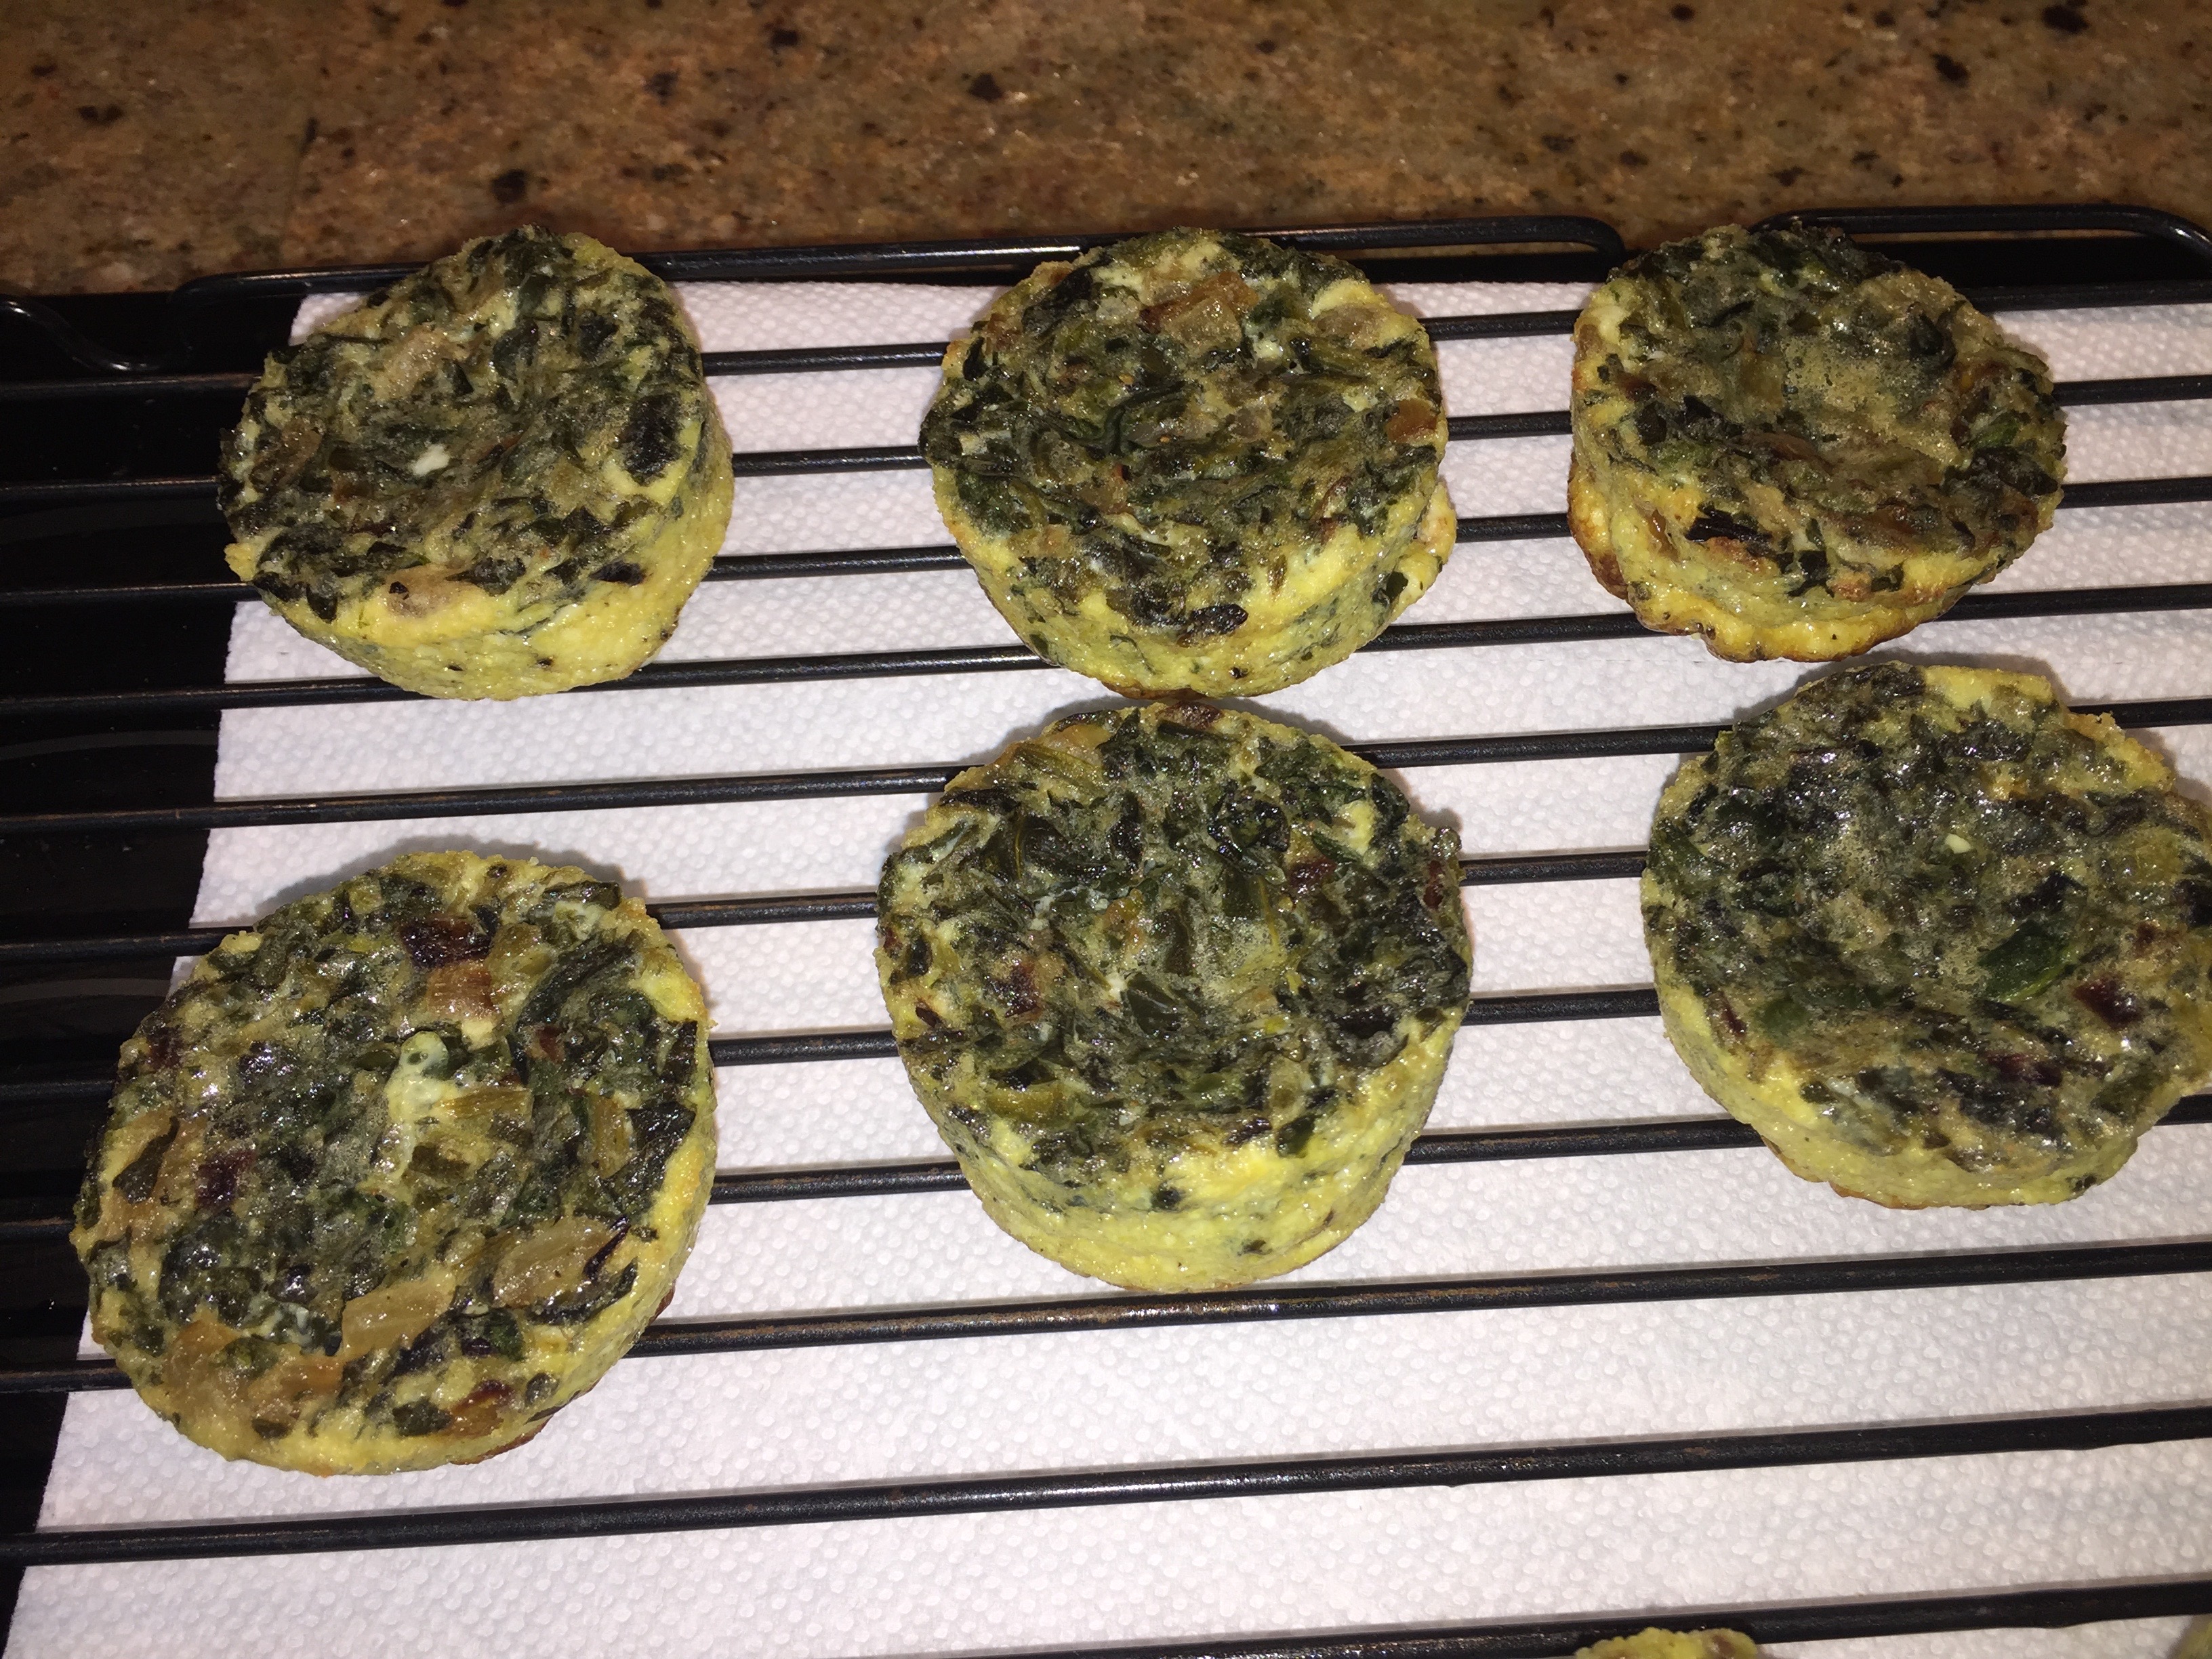
Eggs for Breakfast any one?
I am a Type 2 diabetic who has to worry about his blood glucose levels nearly all the time. This is especially hard on me since I LOVE good crusty bread. The other fact of life is that almost every standard breakfast item is a carb loaded things; cereal, toast, breakfast potatoes.
Eggs are fine but you end up having to cook them. The other thing about eggs is that unless you do something to them the standard egg preps tend to get bland. The biggest issue for me is that I don’t want to turn on the stove every morning to make something with eggs that would fulfill the low carb criterion.
I started doing this a week ago and this has worked out OK. Make little egg frittatas and store them in the fridge. They should be fine for a week (from the USDA). Add whatever bits needed to make them flavourful and your imagination is the limit on what you want to put in them. For this one I went with Spinach, Garlic and nutmeg.
Let me pontificate a bit here. The reason everybody reaches for the Cholula hot sauce or tabasco or Sriracha or whatever version of the sauce sitting on the table or even smother the version of egg you have in front of you with salt and pepper is the one glaring missing ingredient in the eggs that we as humans crave in almost all of our dishes, “ACID”. If we think about it almost all of our food is acidic in nature. So take care of that when making these eggs.
Ingredients:
- 4 large brown or 3 jumbo brown eggs (the fresher the better)
- 2 Tbsp half and half (milk is fine too, half and half is a little richer)
- Salt to taste
- Pepper. I love substituting regular black pepper with Aleppo pepper… Try it sometime, there is smoky sweetness to it that is just amazing. It is a bit like an Ancho without the harsh note associated with powdered Ancho chili.
- ½ packet of thawed frozen young spinach chopped up fairly fine
- ½ medium onion diced fine
- 2 cloves are Garlic smashed and chopped fine
- 1 Tbsp Red wine vinegar
Directions:
- Melt a pat of butter in a non stick skillet over medium heat with a dash of vegetable oil (the oil raises the smoke point of the mixture in the pan and will prevent the butter from burning)
- Saute the onions until they are translucent
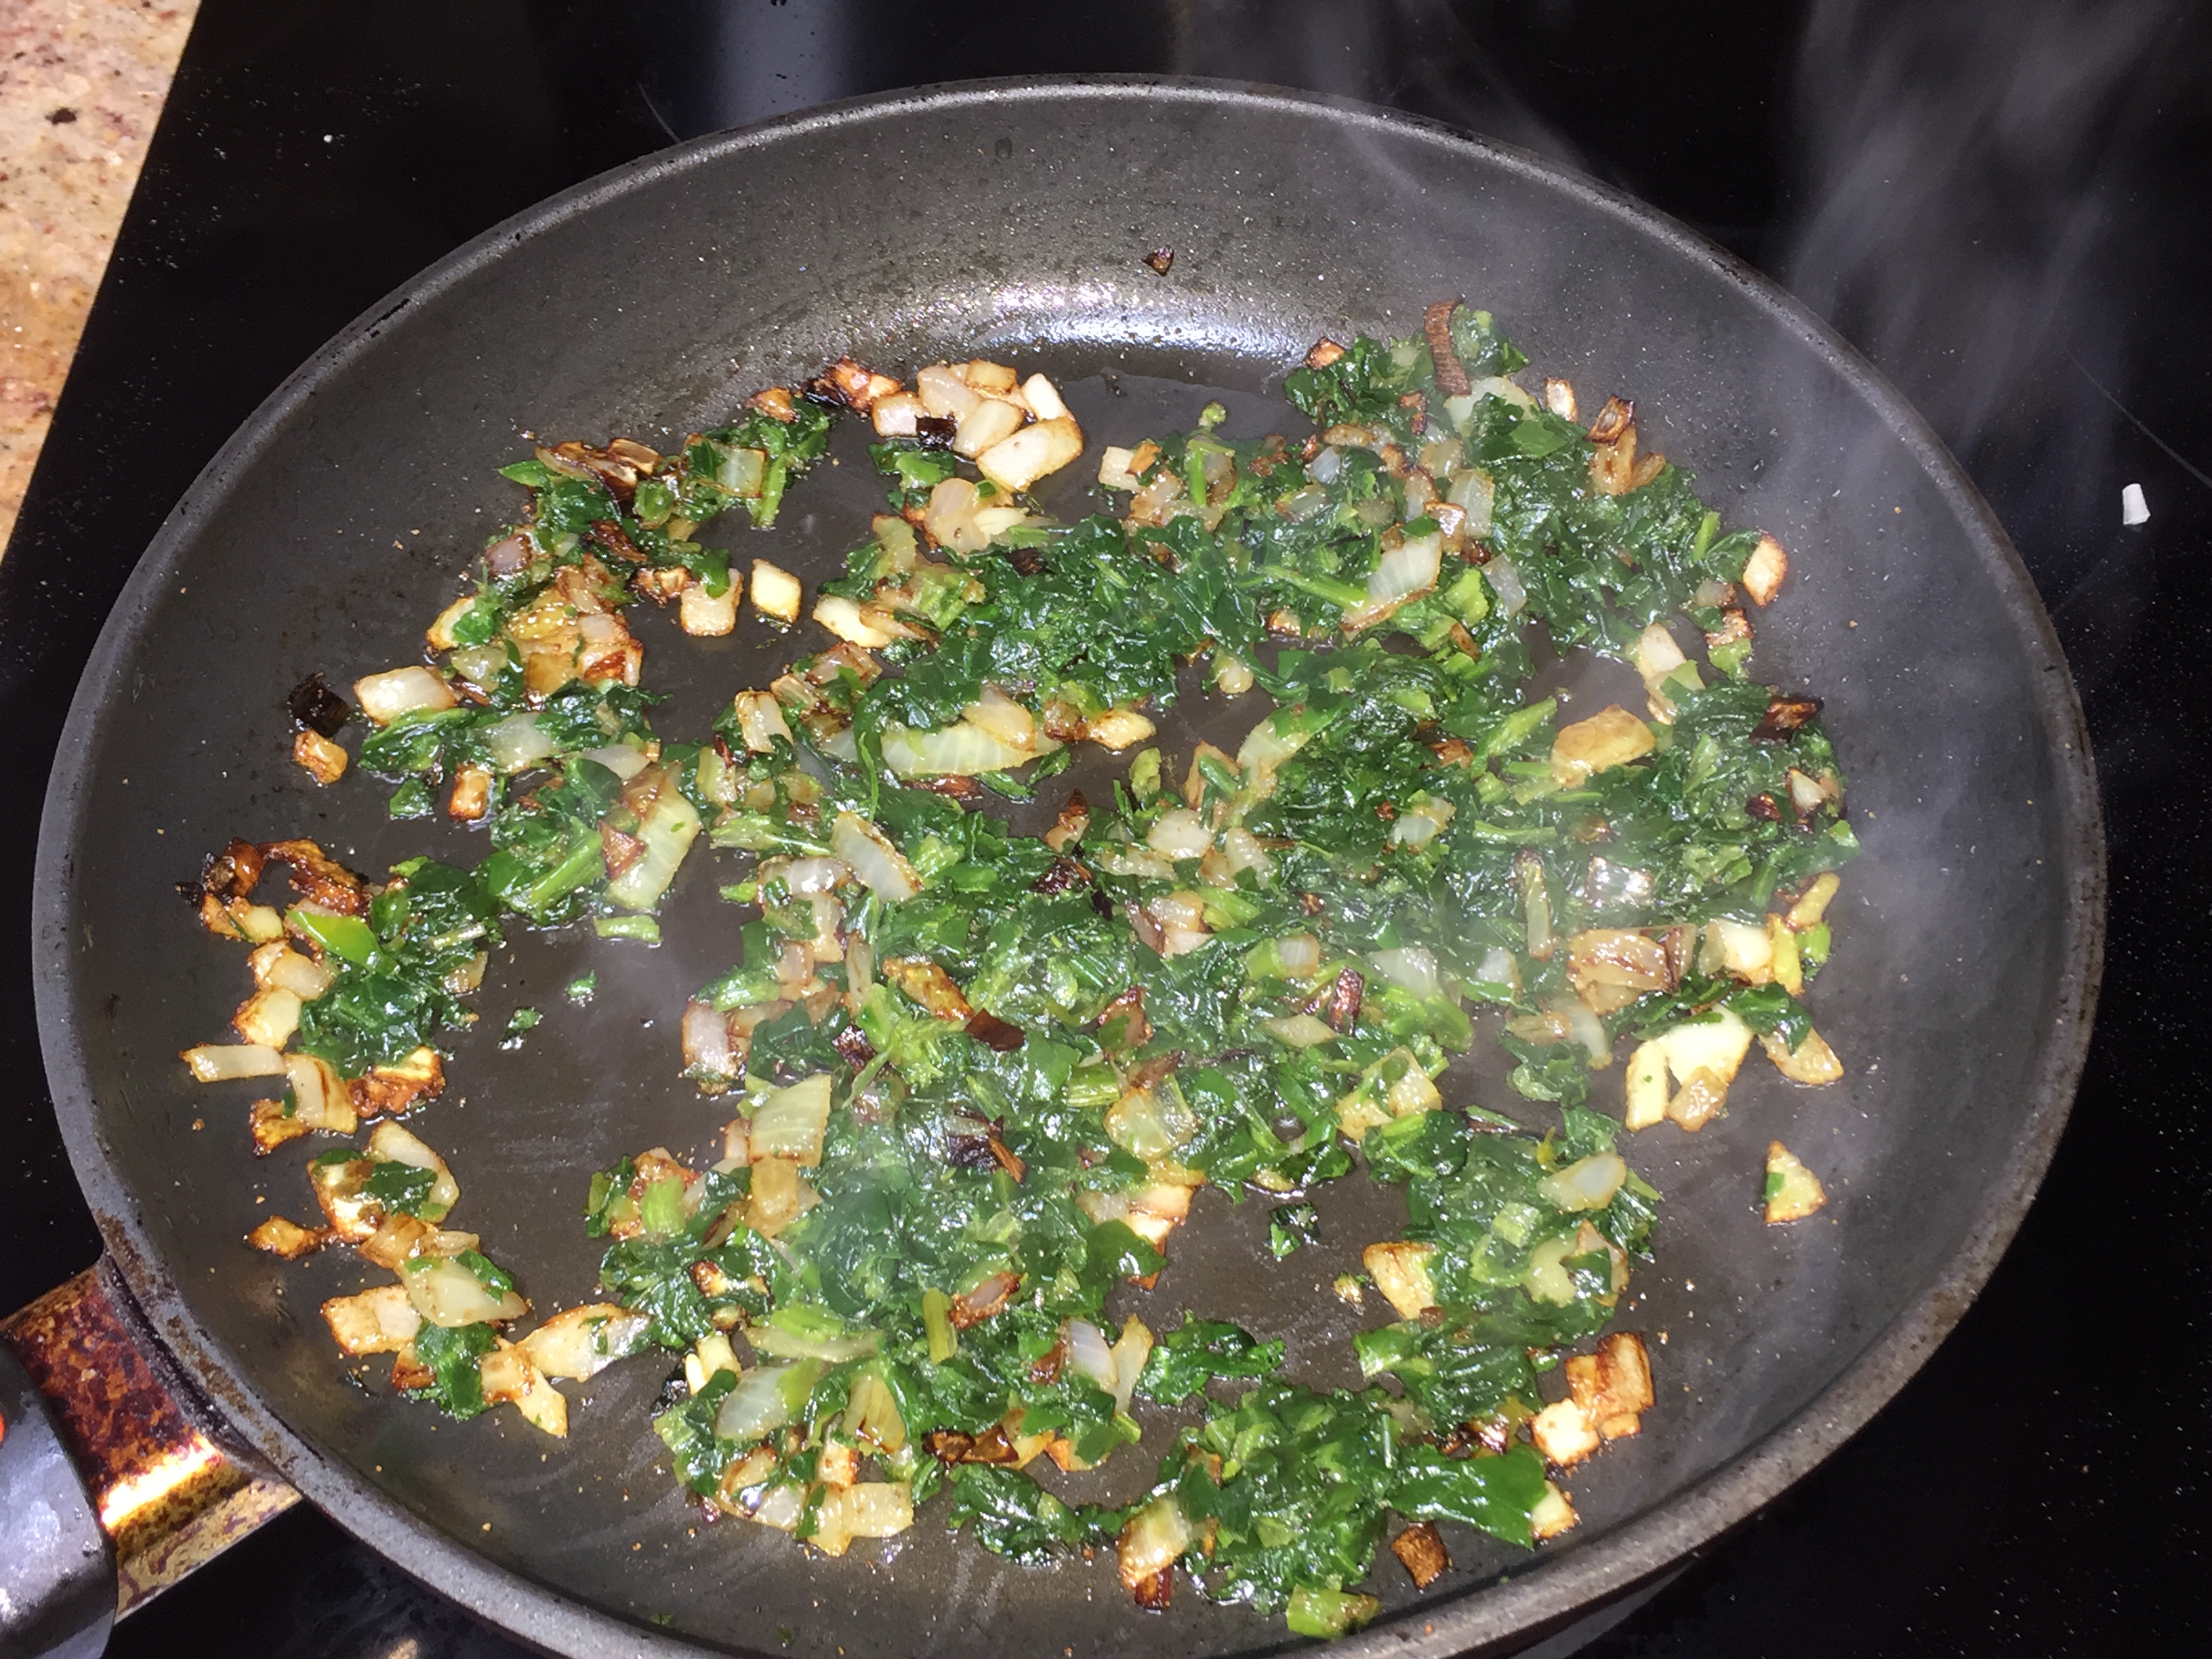
- Add the garlic and after 45 seconds or so add the spinach to the pan and continue sauteing. Take care not to burn the garlic; burnt garlic is bitter!!!
- Season with salt and pepper and optionally add a couple of grates of nutmeg. Spinach loves nutmeg!
- Once the spinach is cooked through, add the vinegar and mix it well and take it off the heat and let it cook.
- Break the eggs into a non reactive bowl and whisk them with the half and half really well. As you whisk you will see the colour homogenizing and actually starting to lighten. Time to stop whi
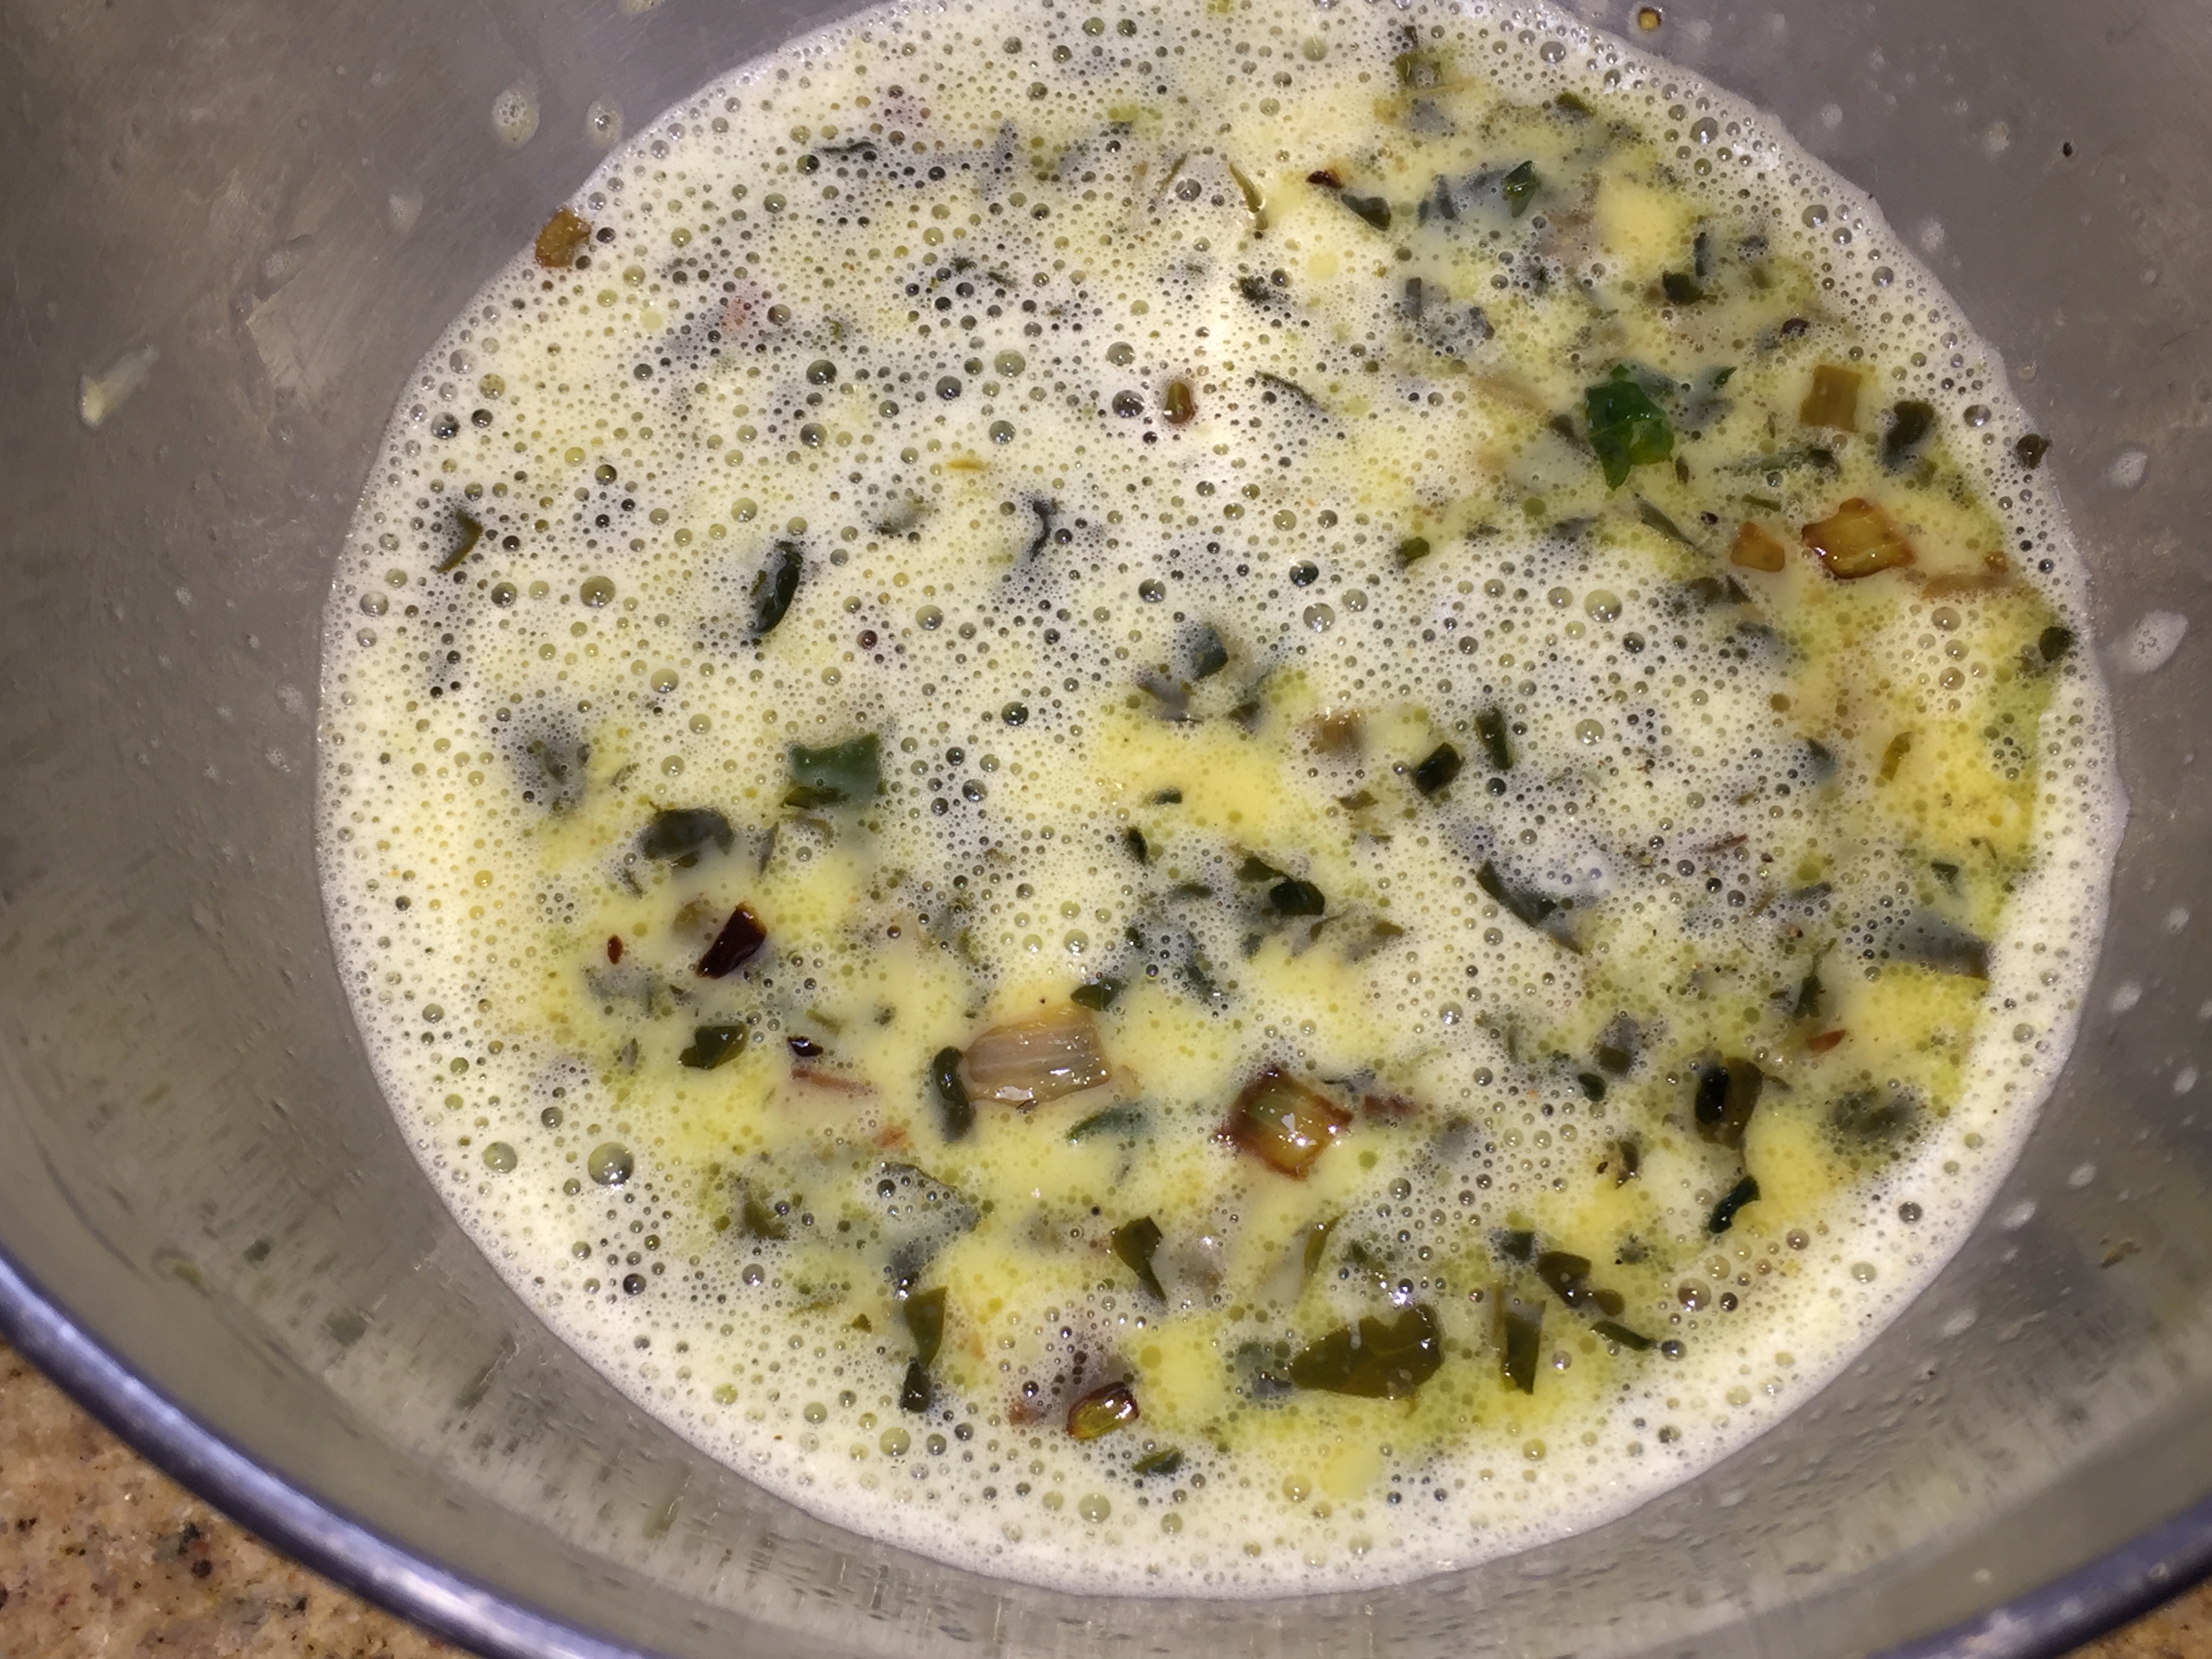 sking.
 - Season the eggs with salt and pepper (be generous with the pepper, it needs it) and scrape the cooked and cooled vegetables into the egg. Use a rubber spatula and get all of it including the liquid which has the acidity you are looking for. Mix well with the spatula.
- Pour the mixture into buttered or oiled (I use the vegetable spray) muffin p
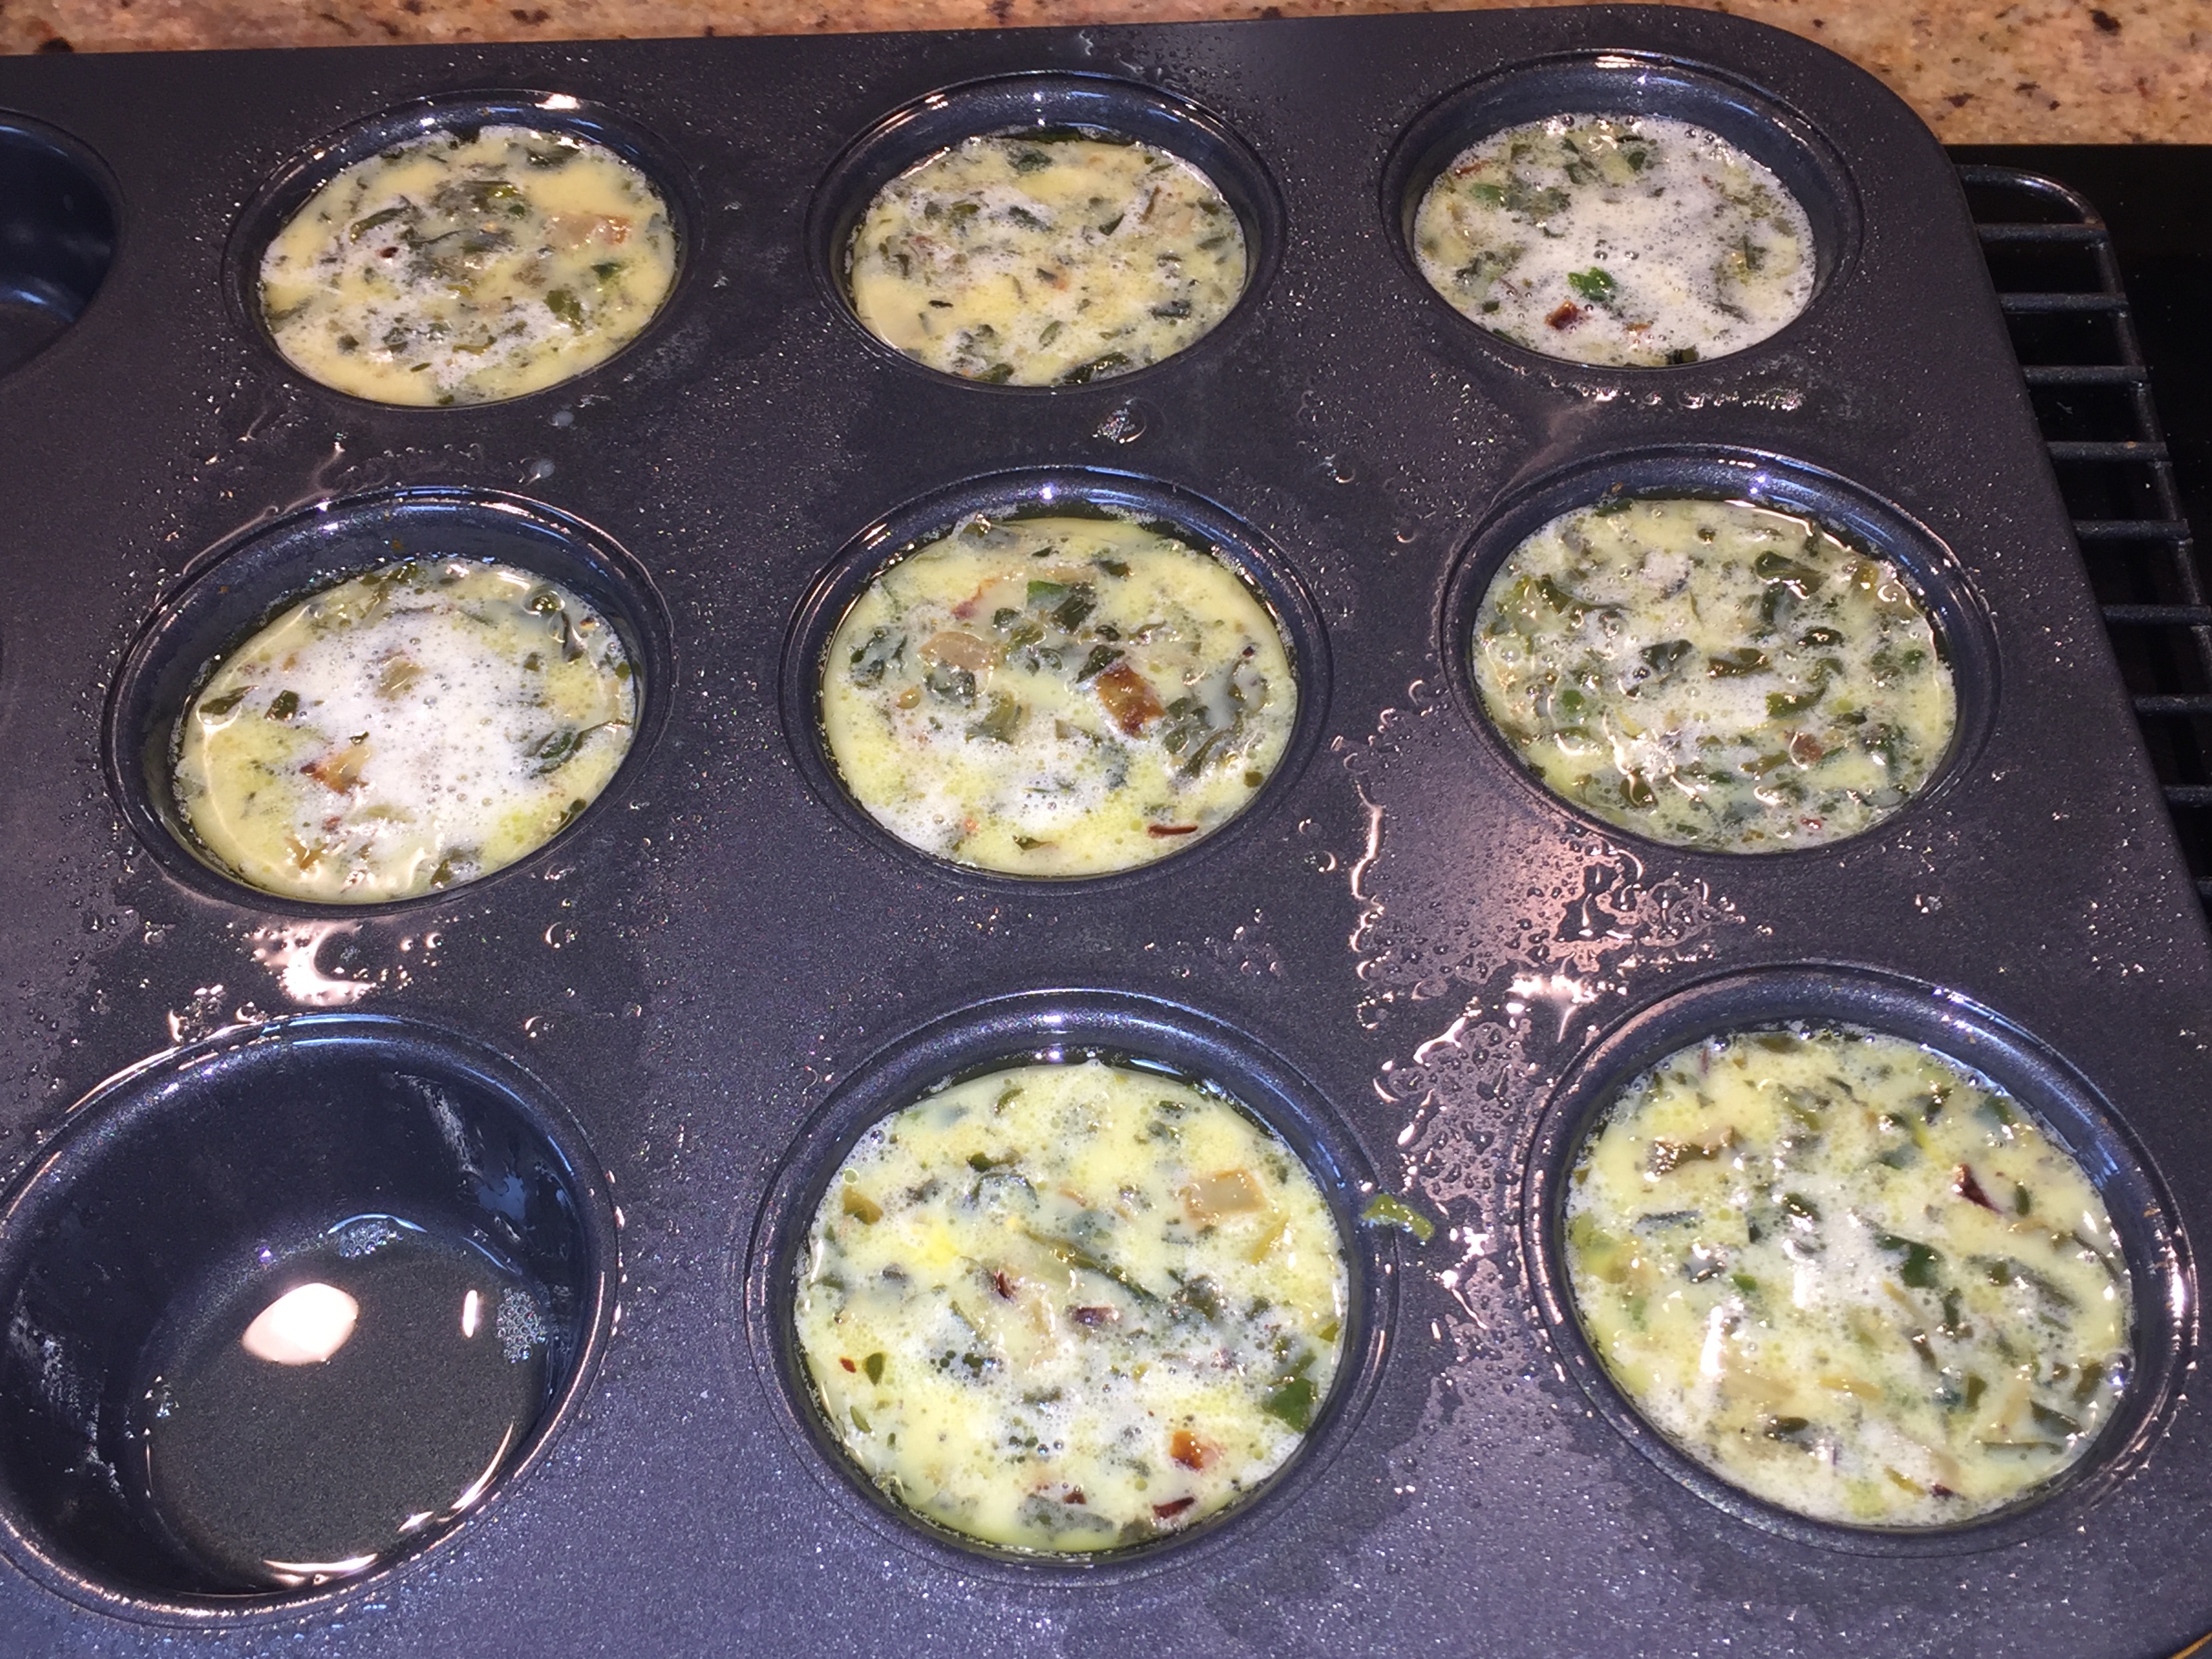 ans. Fill it about ¾ of the way
 - Bake about 10-15 minutes in a 350° F oven (just for fun, I believe it is Gas mark 4!!! 🤣 ) until a toothpick inserted comes out clean.
- Optionally top it with some cheese and continue for another 5 minutes to melt the cheese. If you do this fill it ⅔ of the way in the muffin pan rather than ¾.
- Cool, remove from the muffin pan and cool on cooling rack for another 15 minutes and store in the fridge.
- Microwave 30 seconds or so on high to eat when you pull it out of a fridge.
 Sky is the limit of what you want to add into the eggs. Peppers and Onions or whatever you choose to add to your omelettes or scrambled eggs can go in here. Be careful with tomatoes since they add a bunch of liquid and will thin out the eggs as well as leave pockets of moisture. I like partially dried tomatoes by sticking them in the oven to remove about 2/3 of their moisture or use sun dried tomatoes.
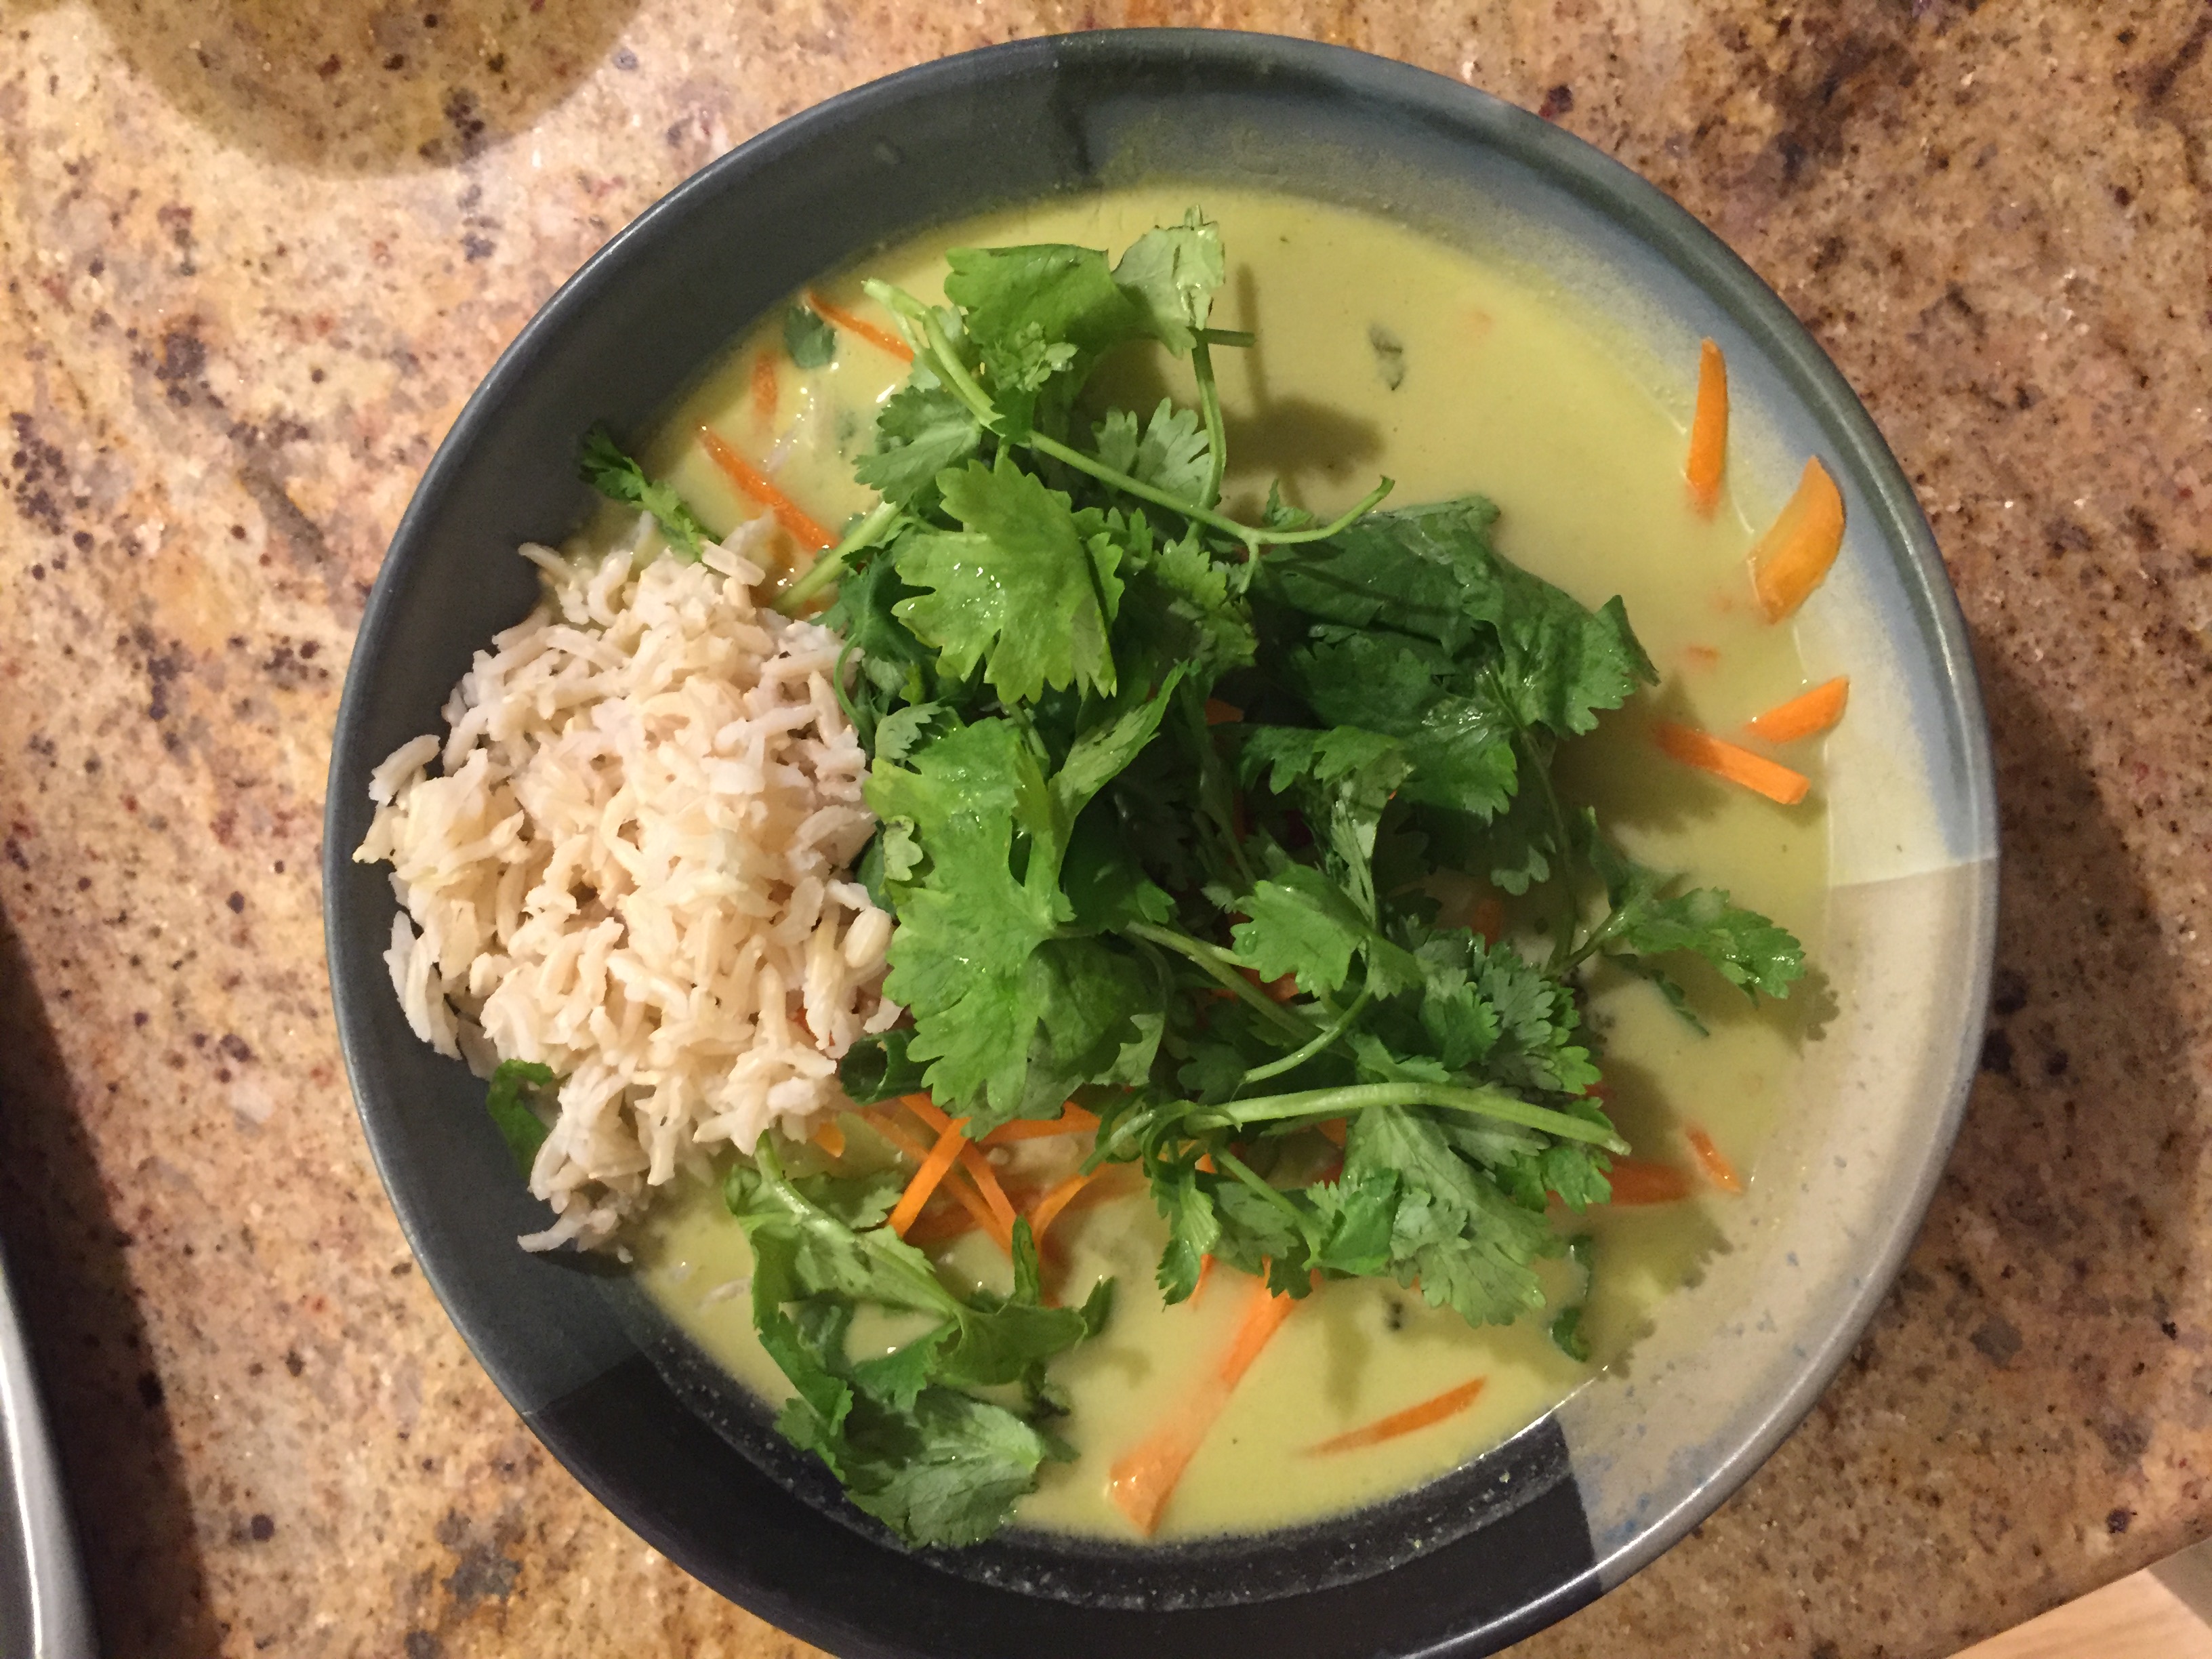
Pho and not Pho, may be a Tom Yum
Pho, a deep rich umami laden Vietnamese Soup that eats like a meal. It consists of a broth either beef or chicken, prepared from the usual starting point of almost all broths, roasted bones. But then the charred onions, with roasted spices like Cinnamon and Star Anise as well as the sweetness from some Rock candy” and a bunch of charred as well as dried Shiitake mushrooms takes it from a standard boring Beef Broth or Chicken broth into the realm of “Divinely rich”.
Start with the Beef broth, ladle it real hot over some rice noodles and a beef cut of your choice, garnish with a bunch of things at the table and you have a beef based meal. The condiments generally include Thai Basil, sliced Bird’s eye Chili (Chilé de Arbol is the closest in flavour), Wedges of Lime, Bean Sprouts and Cilantro. There is always some of the Chili sauce on the table to give it more of a kick if you prefer and the sweetish fermented bean paste. The common versions are “Pho tai” with thinly sliced tenderloin or rib eye (they stay rare since the only cooking they see is from the super hot broth poured over them), “Pho bo chin” with well done, Flank steak or Brisket, “Pho nam” with Flank steak and “Pho gau” with fatty brisket meat. For the more adventurous of you, you can always try “Pho sach” with tripe and “Pho gan” with tendon.
Start with chicken broth and you end up with “Pho ga”; let me just say this isn’t your boring chicken soup…
A couple of years ago, while visiting Gillian at UMass Amherst and eating at Berkshire (it may have been Hampshire) dining hall, I sampled their version of a vegetarian Pho. A vegetable broth with a very mild curry flavour (almost like the chef was afraid of the curry powder) with Tofu for protein. I decided I wanted to make a Pho but not Pho and go the Thai route, almost a Chicken Tom Yum.
Here is what I came up with and it actually worked.
Ingredients:
Broth:
- 4 Stalks of Lemon Grass
- 1 ½ cups of Basil with the thin stems included
- 1 cup of Cilantro
- 2 Tbsp of Lemon Juice
- ¼ cup Tamari
- 2 ½ – 3 Tbsp Grated Galanga (Substitute with 2 Tbsp grated Ginger)
- 1 can of Cocunut Milk
- 2 Thai bird chilis
Main Ingredients:
- 1 lb chicken tenders membranes removed and cut into bite sized chunks
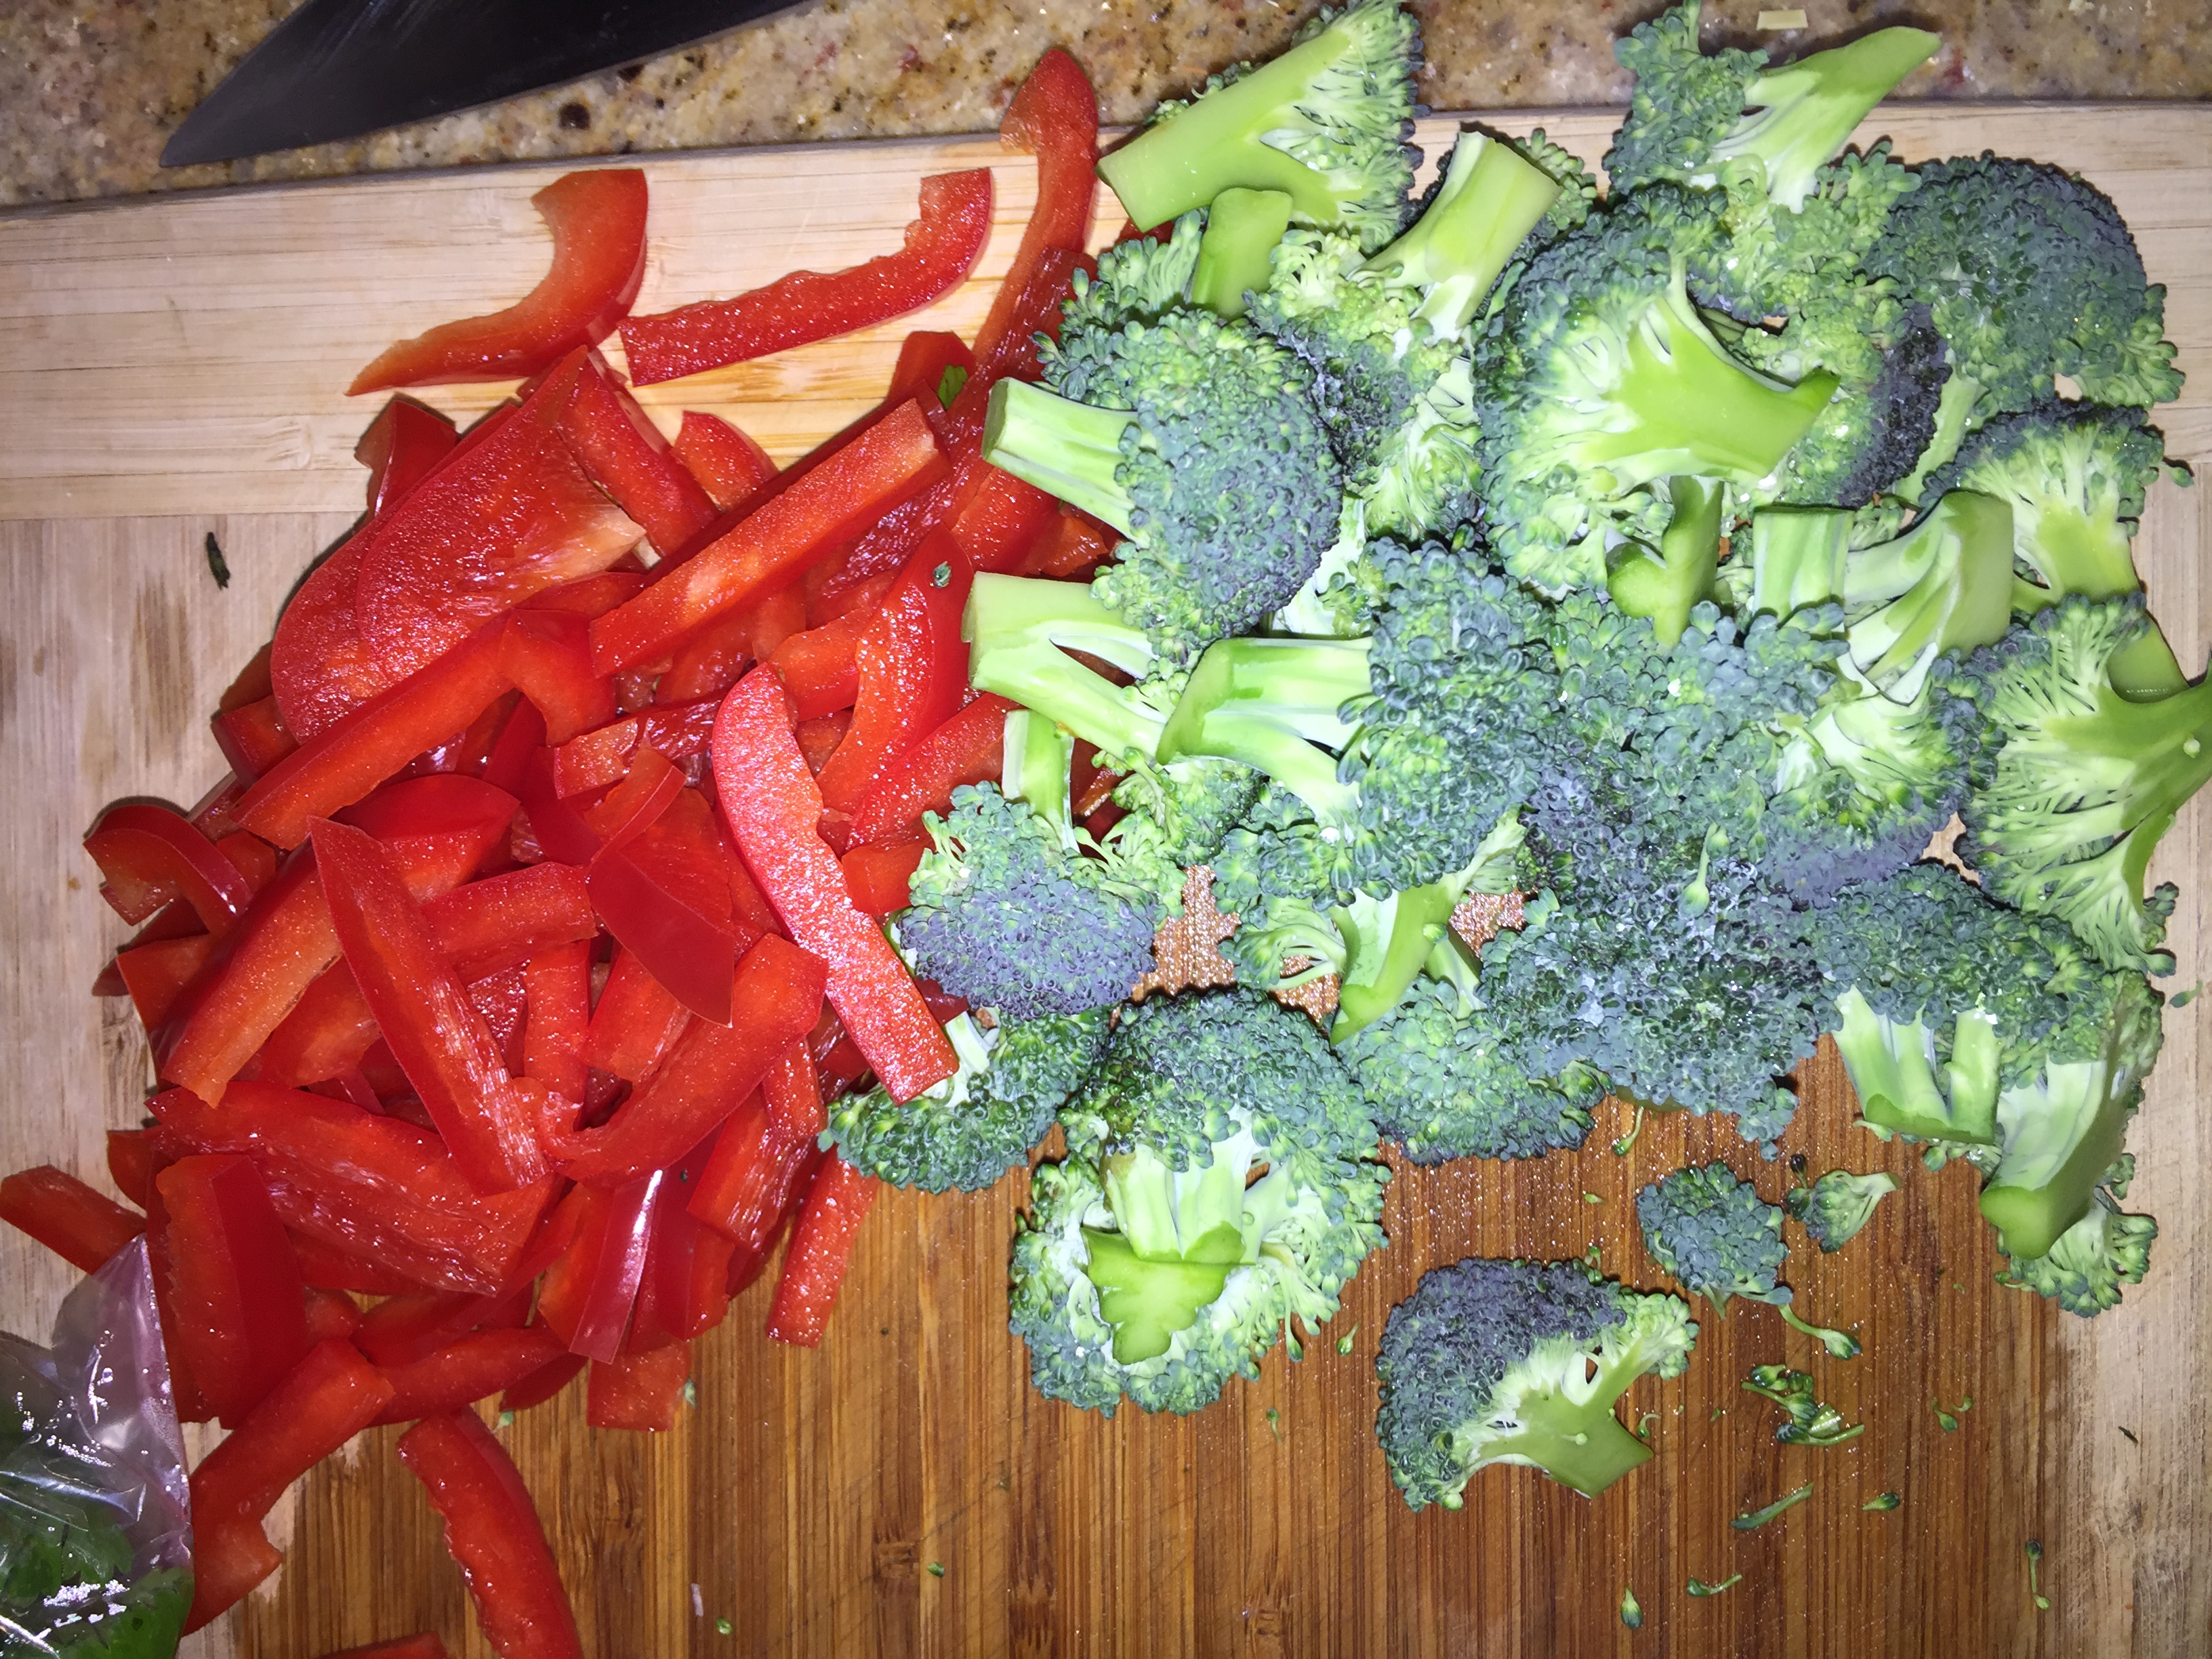
- ½ cup Broccoli Florets
- ½ cup cut green Beans
- ¼ cup sliced red onions
- ¼ cup sliced Red Bell Peppers
- 2 Kaffir lime leaves (Optional); Use 2 tsp of lime juice instead
- Cooked Brown Rice
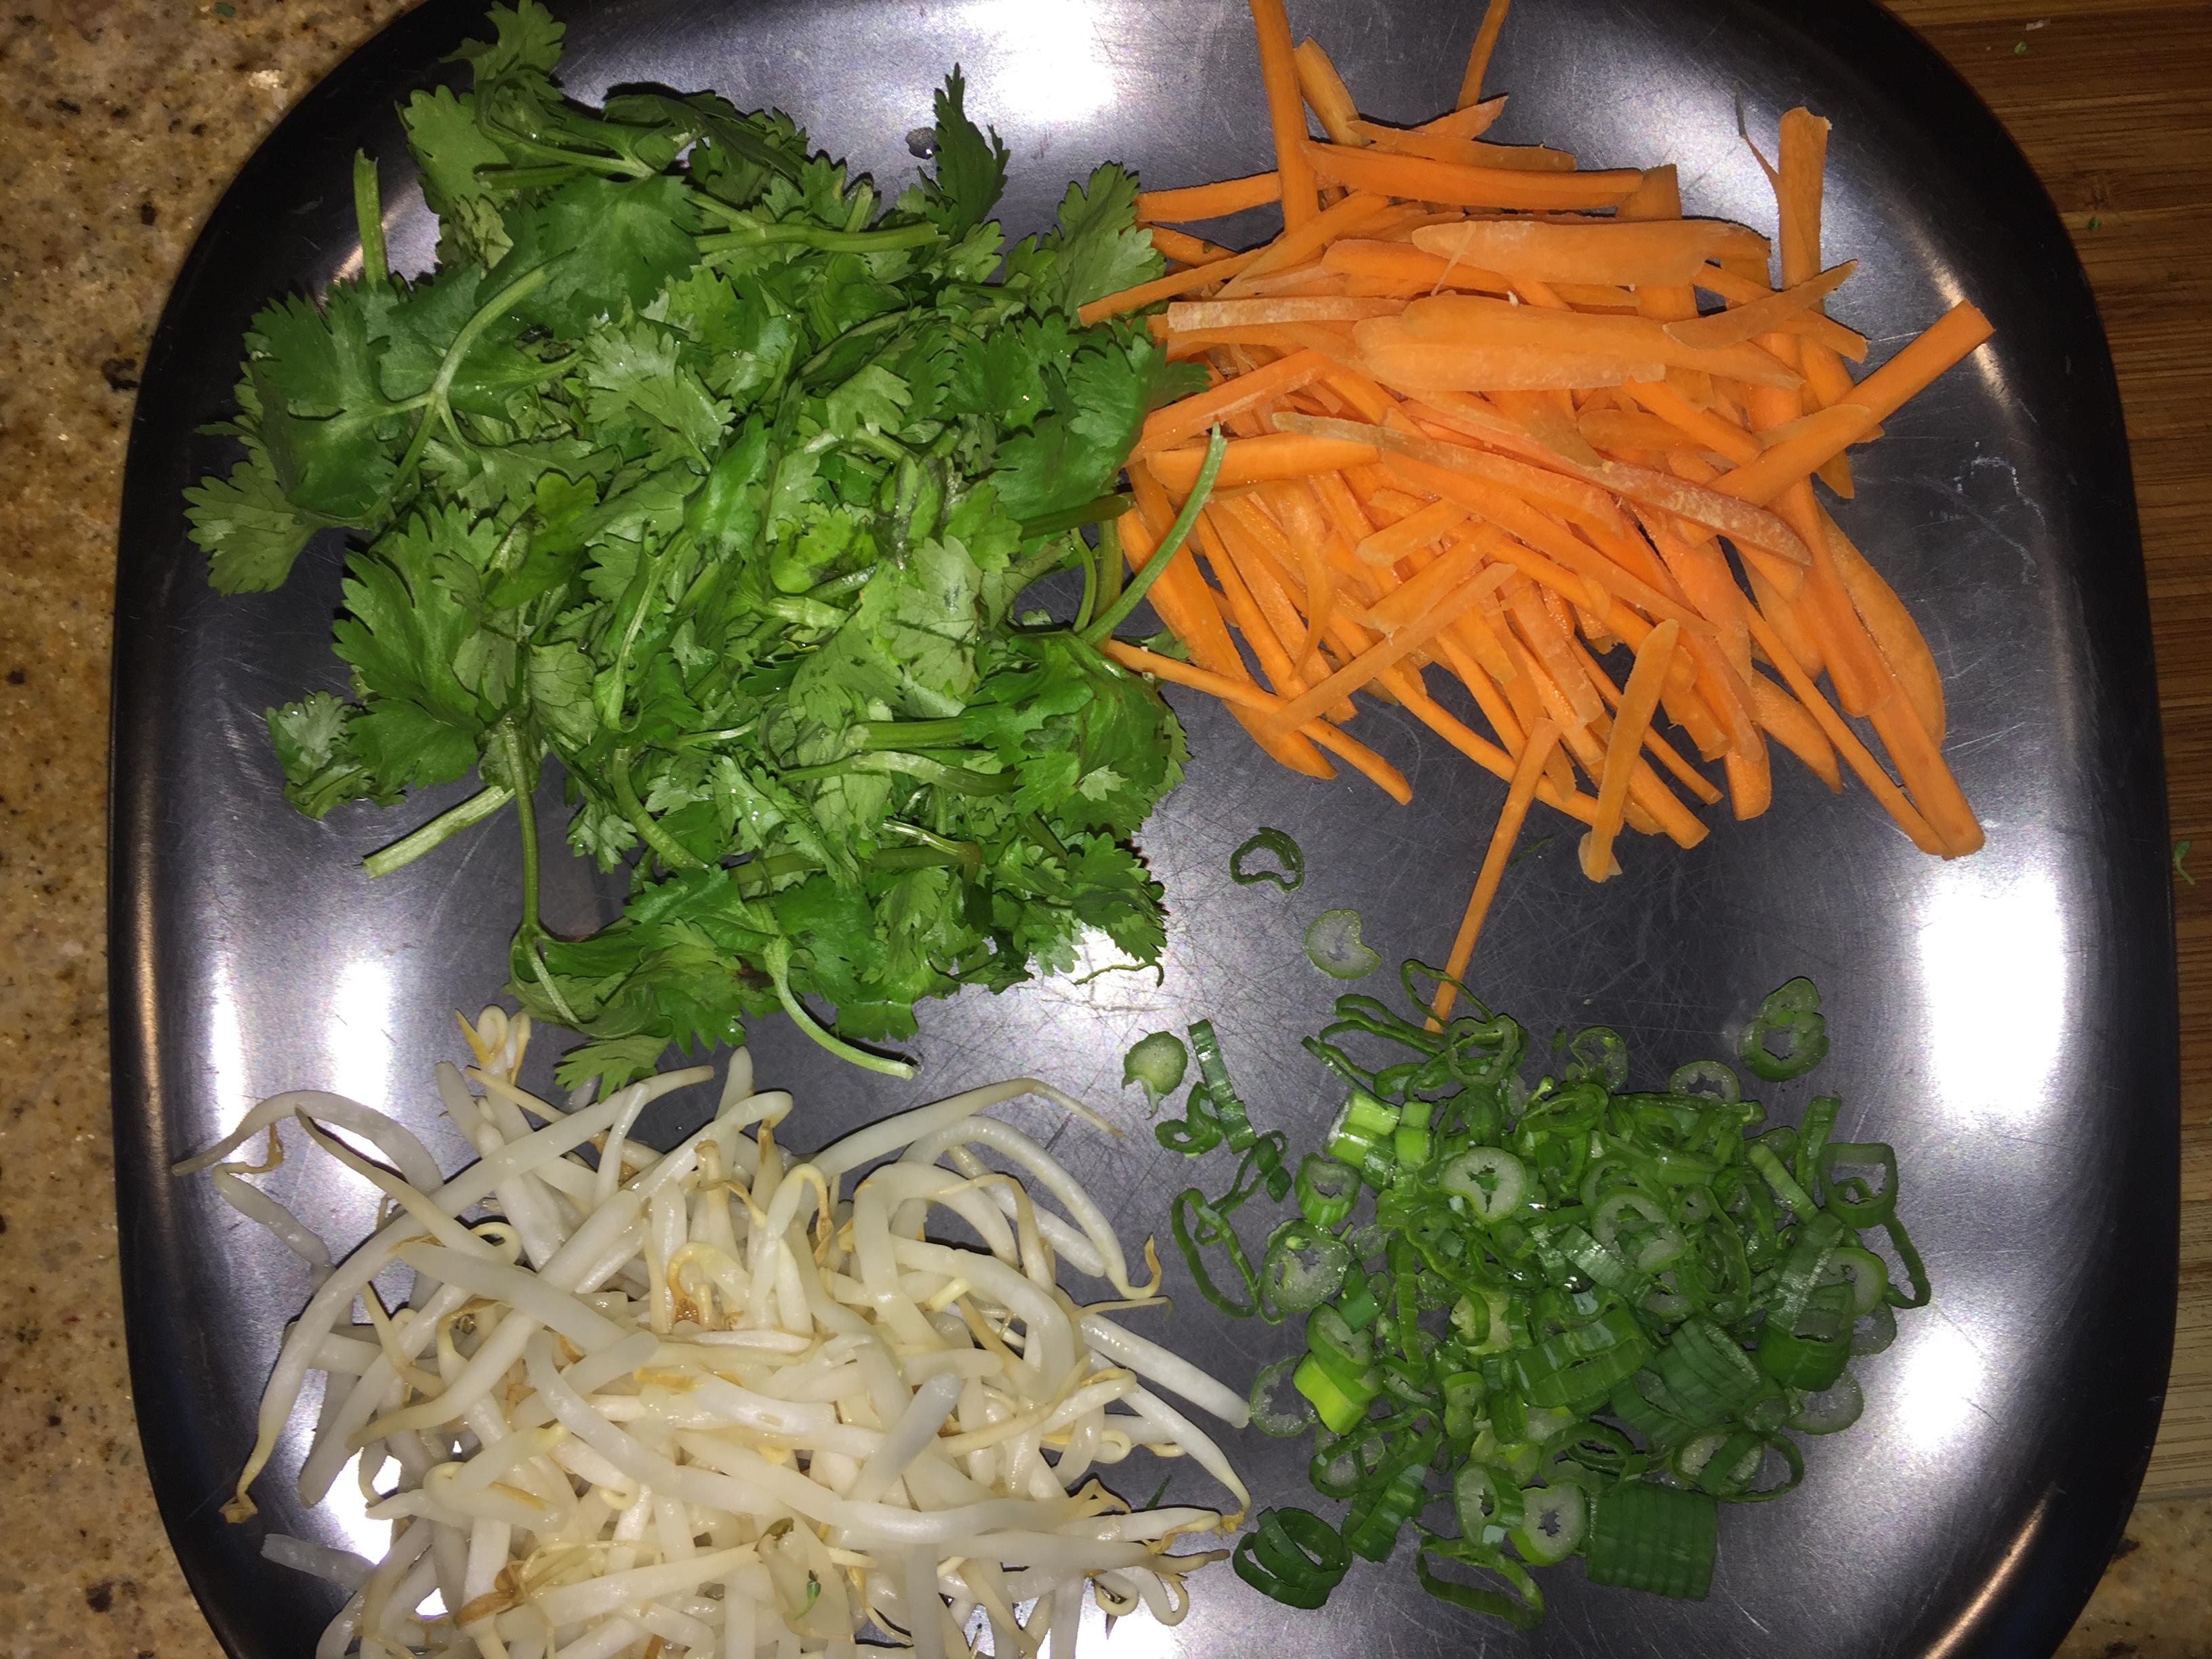
Garnish:
- matchstick sliced Carrots
- Bean Sprouts
- Cilantro
- Thinly sliced Scallions
- matchstick sliced Daikon radish
Directions: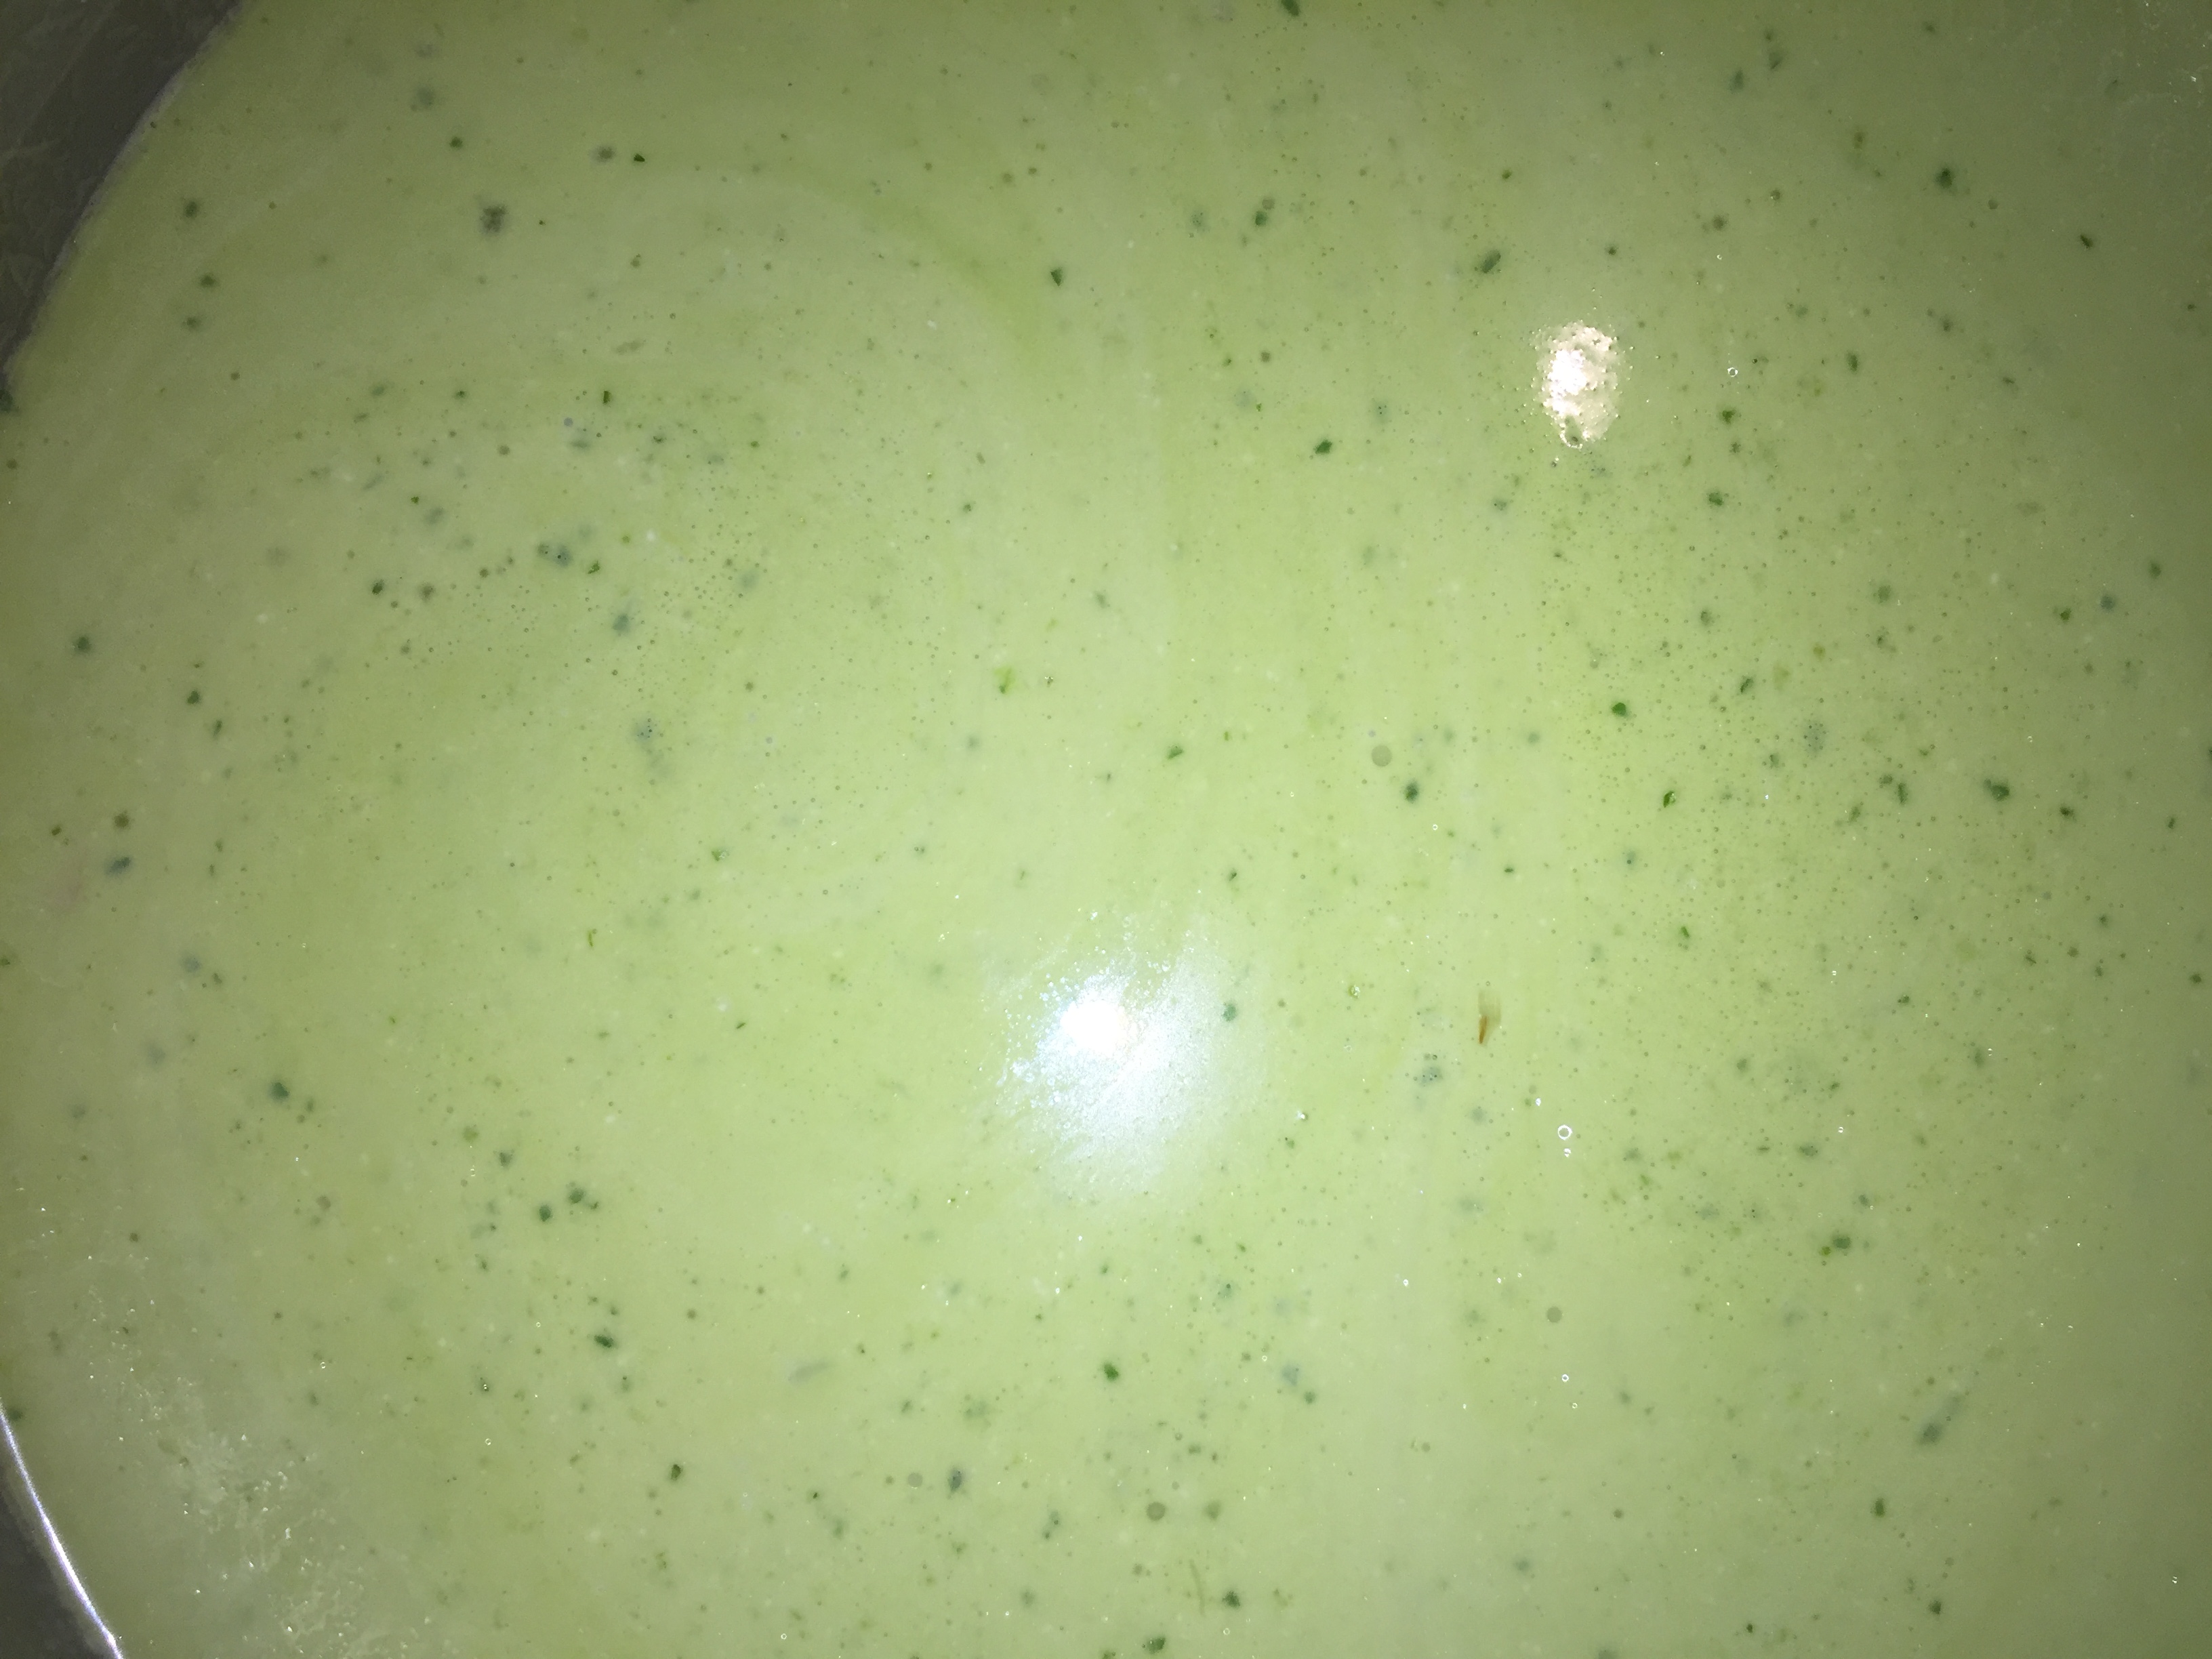
- Bang the Lemon grass stalks with the back of the heavy bladed knife to loosen it up and then chop it into rounds about ¼” or thinner
- Boil 3 cups of water and pour over the chopped lemon grass in a pot and steep 20 minutes.
- While it is steeping, Add all of the ingredients for the broth with the exception of the coconut milk into a blender.
- Add half of the steeped Lemon grass tea and about half the can of coconut mil in the blender. Remember t
 o strain the lemon grass tea through a wire strainer (you don’t need the woody stalks)
 - Blend well; you need it to be as smooth as possible. Add a little extra of the lemon grass teas as needed to make the blending easier.
- Strain the blended liquid through a wire-mesh strainer into a pot. Use the lemon grass tea to wash out the blender and strain through the strainer with the extra coconut milk.
- Add the chopped chick to the strained broth and season well. Bring to a boil over medium heat and simmer for about 10 minutes.
- Add the Broccoli, green beans, bell peppers and the onions to the pot together with either the lime leaves or the lime juice and continue simmering for another 8-10 minutes.
- Ladle hot into bowls and garnish with the Garnish Ingredients as well as a scoop of cooked Brown rice.
Don’t throw that out
 Most of us use vegetables in the kitchen. We have our habits of processing the vegetables, keeping some parts and tossing out others. This post is about two different things; one is that by throwing out some parts we may be losing out on the flavours contained there in, and the other is that it extends the use of the ingredient and actually contributes to frugality. It is the case of use as much of the ingredient as possible, along the lines of eat all parts of the butchered animal ethos. So I am also going to include these posts under the “Frugal Eating” Category.
One classic example is Broccoli. We cut the florets to steam and all of the stalks get tossed away as debris. At best, they are thrown on the compost heap. The same thing happens with Cauliflower stalks.
This practice is even more prevalent when we look at Herbs. Parsley is a classic example; we use the leaves and the entire pile of stems hits the garbage. The same happens to Cilantro and to Basil.
I will treat each of these ingredients and give them their due in separate posts.
Odd ball ingredients I use in Indian Cuisine
 There are a few odd balls ingredients I use with Indian cuisine, which would probably surprise the hell out of my tam-bram (ask me for an explanation of this term) relatives. No I am not talking about meat. These are non-meat ingredients.
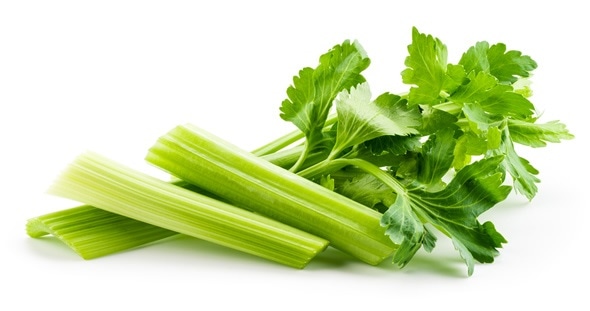
The first of them is celery, which does not grow in India, at least has not been grown and utilized there. However, it has enough fibre and is a vegetable that stands up to longer cooking that most Indian food demands courtesy of the fibre mesh skeleton of the celery stalk. I love cutting them up into 3/4 inch long and use them in Indian food. A great addition to the Biriyani dishes of the south. Even if you make Biriyani with meat in them, celery works well with them.
The second ingredient that I like throwing into curries surprisingly are Mushrooms. Most mushrooms work fine. I like to saute them first in a bit of oil which is real hot until the mushrooms give up a whole lot of liquid and then the liquid evaporates of the hot pan. I then keep them aside and add them to the pot for the last 10 minutes of th e simmering. They pick up the sauce into the mushrooms and end up being really juicy with the curry sauce soaking up in them. South Indian dishes are even most vegetarian Indian dishes do not have a whole lot of Umami in them. Well it takes red meat to produce the Glutamate cross links under heat that make up Umami and there isn’t much of it in Vegetables. While white mushrooms work fine, Shitakes give you a bit more leeway since they are stiffer and stronger and more meatier. The same is true of Portabella Mushrooms. Porcini’s add a richness that is amazing and they also soak up the sauce in them and are heavenly. Given the Morel mushrooms propensity for soaking up things like cream, I cant wait to try but Morels are hard to come by and are expensive; I have not had the occasion to throw them in a curry yet, but rest assured one of these days I will.
The Chinese h ave long used Tofu as protein in their food. They fry the extra firm tofu to take out even more of the m
 oisture and use it as protein in their food. The Indians have used the analog of Tofu, “Paneer”, in their cuisine. Tofu is from Soy and Paneer is from cows’ milk. However, Paneer tends to melt and vanish into the sauce if you add it for too long during the cooking process. For me, enter Halloumi cheese. Halloumi is a cheese originating from Cyprus. It is a very hard cheese, extremely compressed. It has a second attribute that is absolutely phenomenal. It is so high in its melting point that you can actually grill it or pan sear/fry it. I like to fry it as cubes in a pan and add it to the curries. Even if cooked for 10 minutes or so during the last phase of cooking the curry these Halloumi cubes will hold their shape and add this sauce flavoured salty nuggets to the curry.
Good Bye Paul Bocuse


Paul Bocuse passed away today the 20th Jan 2018. He was a Culinary Giant of France. He introduced the world to French “Nouvelle Cuisine”, which at the time was quite radical. It went from”Le Grande Cuisine Française” (The great french cuisine, which was RICH, butter cream truffles etc.) to using healthier and less fatty and rich alternatives without sacrificing the taste or the flavour.
His restaurant in Lyon, L’Auberge_du_Pont_de_Collonges, has held three Michelin stars for its quality, inventiveless and consistency since 1965…
In Gastronomic and Culinary circles, he was the chef of the 20th century and in more grandiose terms has been described by some writers as “The chef of epoch”
What ever he was he introduced a healthier form of French cooking and changed the conversation on Food. In some ways “Nouvelle Cuisine” as introduced by Paul Bocuse was the progenitor of the Farm to Table and the Fresh ingredient movement.
RIP…..
My attitudes to wine are changing
While I have always loved the good wines and have lashed out occasionally to buy 50-80-100-120 $ bottles of wine and really savoured them, my attitudes towards them are changing recently.
When I tasted a 100$ bottle of wine and it tasted great, my reactions and comments on the wine were just about the wine and not so much what I paid for it; it is easy because most 100$ wines taste darn good. It also resulted in me praising the wine maker for his great skills in producing the great wine.
Recently I am looking at things a little differently. The maker of the great wine is starting from a great place; he can afford and starts with the primo, crème de la crème juice from the best vineyards with the best climate for the year etc. So in effect, he starts on mile 14 of a marathon rather than mile zero.
The guy that produces a wonderful wine at 10-20$ a bottle is not starting from the primo juice and yet, he/she produces a great wine given their starting material. My respect for the makers of very good to great wines for 10-20$ is way more now than for the Mondavi winemaker who produces Opus 1 from the best juice of the year for the region and can sell his wine at about a 100$.
May be in my old age my palate has become not so refined anymore, but I don’t think so. It is just that I am looking at the skill levels of the wine makers with a different set of glasses on.
Our Everyday wine – Apothic Red

This has been our everyday wine in the house for the last three years or so. This is a luscious easy drinking wine. Fruit forward and does not need any work to quaff on a daily basis. Lots of Cheery Berry flavours in addition to soft but very noticeable vanilla from the oak.
In addition to its nice and easy drinking attributes, this wine lives on my counter top for two days without any deleterious effects; still very drinkable on day two. Only once in two years it has made the third day since we drink it. It has also been very consistent over three vintages…
All in all a great every day wine, especially given that it is a sub $10 wine…
This was our everyday wine for 3 years or so in 2015 when the original post appeared. It still isour evryday wine and it still is a sub $10 wine. It is awesome.